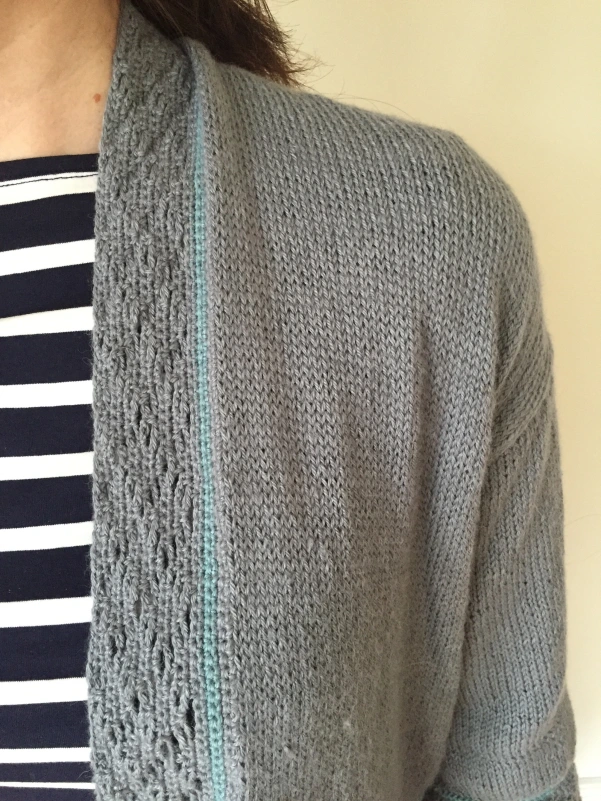
Do you have a yarn that you love so much that you will search months and months on end for a pattern just so that you can use this yarn? A yarn so soft and light, yet warm in the cold and cool in the heat? A yarn in the perfect shade of grey that will match almost everything in your wardrobe? I have. It’s Gardnstudio Drops BabyAlpaca Silk in 8465 Medium Grey.
I bought 12 balls back in August 2015 without knowing what I wanted to make with it. That’s unusual for me because I always find the pattern first and then look for the yarn. I thought I found the perfect crochet pattern in the Samira sweater, and I got halfway through the back when I realised this wasn’t working. The back loop only SC was creating a fabric with so little stretch, I would have had to modify the pattern so much and buy more yarn, that I just frogged it. You can see the frogged project in my Ravelry Projects here.
The fantastic Drops pattern database also didn’t have anything suitable for Babyalpaca Silk that I particularly liked.
What to do now?
I just made up my own pattern. And it’s mostly a knitted pattern.
I used Babyalpaca Silk for my Whispers cardigan which is crocheted, so this time I wanted to see and feel how the yarn looks knitted. I’m so happy I did it this way – this yarn looks better knitted than crocheted I think.
As for a pattern, well it needed to be super easy because I’m no good at shaping for knitting and especially not if I have to dream up the pattern myself! Straight sides were what I needed. That made me think of a kimono because isn’t that really just a bunch of squares and rectangles? Surely I could manage that.
Turns out a kimono is exactly that: squares and rectangles. I used the plus size DIY Kimono pattern of Nina Scott-Stoddard, as my guide for the pattern pieces.
But, me being me, I couldn’t just knit a cardigan. No I needed something crocheted for a bit of flair. That’s were the the “Zen lattice” pattern from Robyn Chachua’s book Crochet Stitches Visual Encyclopedia came in. It was the perfect type of lace stitch and also perfectly name – Zen. Zen crochet border for a knitted kimono cardigan. I mean really! Match made in Japan.
I also added two rows of SC in a contrasting colour before I started the knitted section. Just because I can.
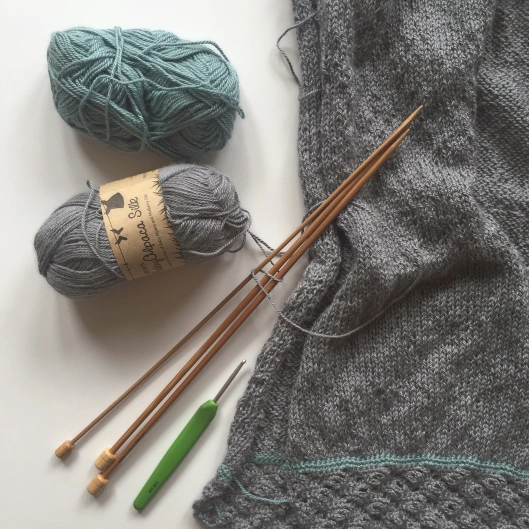
Below is the “pattern” for my Knitted and Crocheted Kimono Cardigan. I’m saying “pattern” because it’s really just a loose record of what I did. Not technical at all. I’m sure many knitters out there would be able to do a much better job of this than me, but I’m giving you the “pattern” so you can use it as a starting point.
I’m using US crochet terms.
Back
Working from the bottom up you start with the crochet border. Chain 114 (14 x 8 + 2) with 3 mm crochet hook.
Row 1: SC.
Now follow rows 1 – 12 of Zen lattice from Crochet Stitches Visual Encyclopedia. In the last row, make 3-chain in stead of 5-chain.
Row 14 and 15: change to new colour and make 2 rows SC 2. Cast off.
Start of knitted section:
Use 3 mm knitting needles to pick up stitches through front loop of crochet. (This was the only way I could work out to switch from crochet to knitting. I picked up the stitches with the same size knitting needle as my crochet, and then used a bigger size knitting needles to knit the first row.)
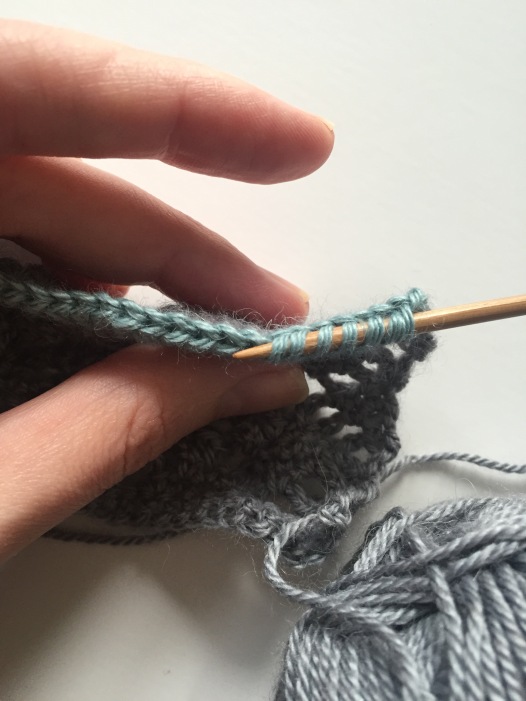
With 4.5 mm knitting needles, start the stockinette stich by knitting the first row, then purl the second row. Continue in in stockinette stitch until desired length.
Front panels
Follow the same instructions as for Back, but cast on 58 stitches (7 x 8 + 3).
Sleeves
Follow the same instructions as for Back, but chain 92 (11 x 8 + 3).
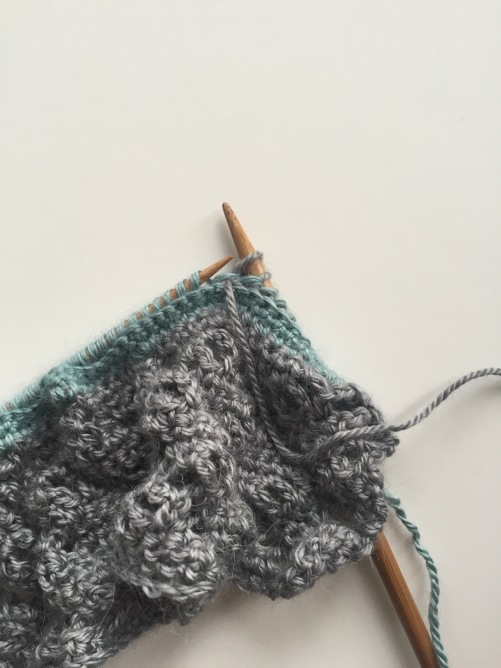
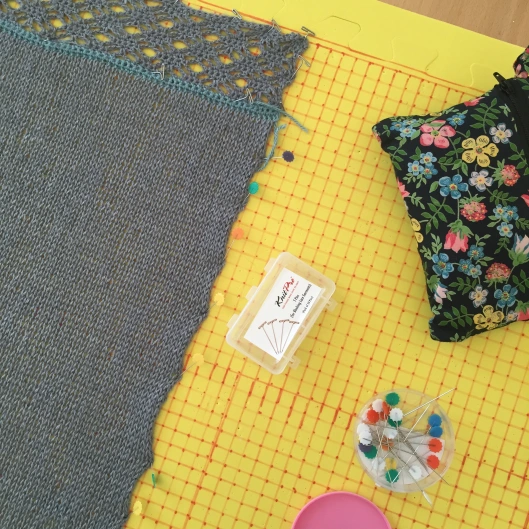
It’s crucial that you block the pieces before sewing them together. In the photo above you see how the Zen lattice looks before blocking. You can’t even make out that it’s crochet! Below you see the lattice stretched out to it’s full potential. The KnitPro t-pins were real life savers for the blocking.
I have to warn you though that when I started wearing the kimono cardigan those crochet borders lost their “openness”, so don’t rely on the crochet to add length to the cardigan – it will jump back to almost pre-blocking width. If I knew this, I would have made my knitting much longer.
As for sewing up the knitting, I can’t get over how amazing the mattress stitch is for this. It really creates an invisible seam. This video is what I used to see how to make the mattress stitch and how to sew in the knitted sleeves.
I love wearing my super soft kimono cardigan, but I do know I could have made a better job of it by 1) creating shaping for the neck and shoulders in the back and 2) by making the body longer. Because of the short boxy shape I also have to think a bit about what I wear it with because it can look very unflattering if you don’t have the right layers underneath.
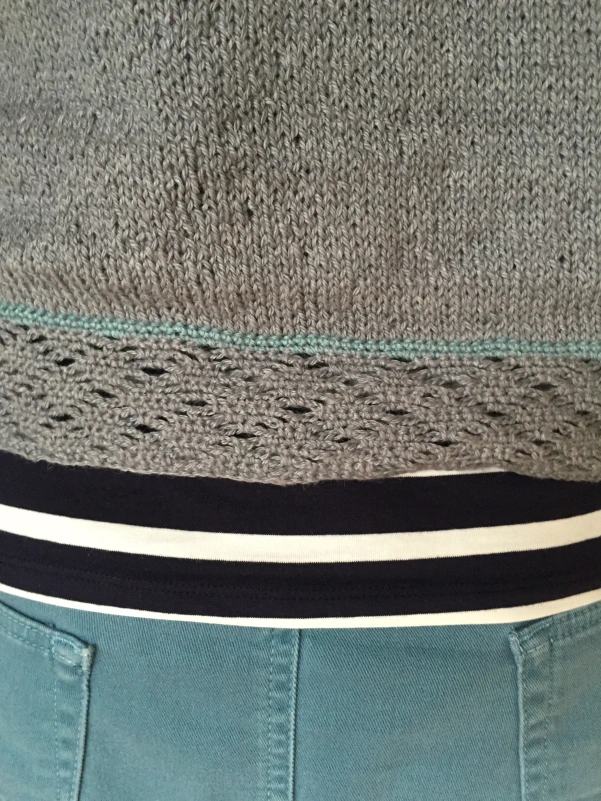
The yarn is this kimono cardigan’s saving grace – it’s so perfect that I don’t even mind having to think a bit harder about what I wear with the cardigan. I’ll even go clothes shopping to find the perfect thing to make this kimono cardigan look its best. I want to wear my kimono cardigan every day!



So vreeslik trots op jou. Het dit op FB gedeel. XX
Lovely yarn and pattern.
I particularly like the contrasting two rows.
Pingback: Buttercup knit and crochet cardigan | crochetime