• Home
  • About me
  • Contact me
  • Crochet How To Links
  • Photo Tutorials
  • Patterns I Designed
  • Crochet For Kidneys
    • Part 1
    • Part 2
    • Part 3
    • Part 4
    • Part 5

crochetime

~ So many patterns, so much yarn, so little time: story of my hooky life.

crochetime

Category Archives: Ta-daah!

Review of How To Crochet book by Mollie Makes

30 Saturday Jul 2016

Posted by Natasja in Book reviews, My crochet, My ramblings, Ta-daah!

≈ 21 Comments

Tags

crochet, crochet blanket, giveaway, granny square

The lovely people of Mollie Makes magazine sent me the book How To Crochet, published by Pavilion, to review here on my blog.

I have to apologise to the publishers that it has taken me this long to do the review, but I wanted to do the review justice by completing one of the 20 projects featured in the book.

I chose to make the Granny Square Blanket With Edging, designed by Anita Mundt. You guys know how I love granny squares! They are my all time favourite thing to crochet. For Crochet For Kidneys Part 4 I made two 2-colour 6-round squares in blue and in pink, and in 2013 I crocheted a traditional granny square blanket for a friend and even posted on my technique for choosing random colours.

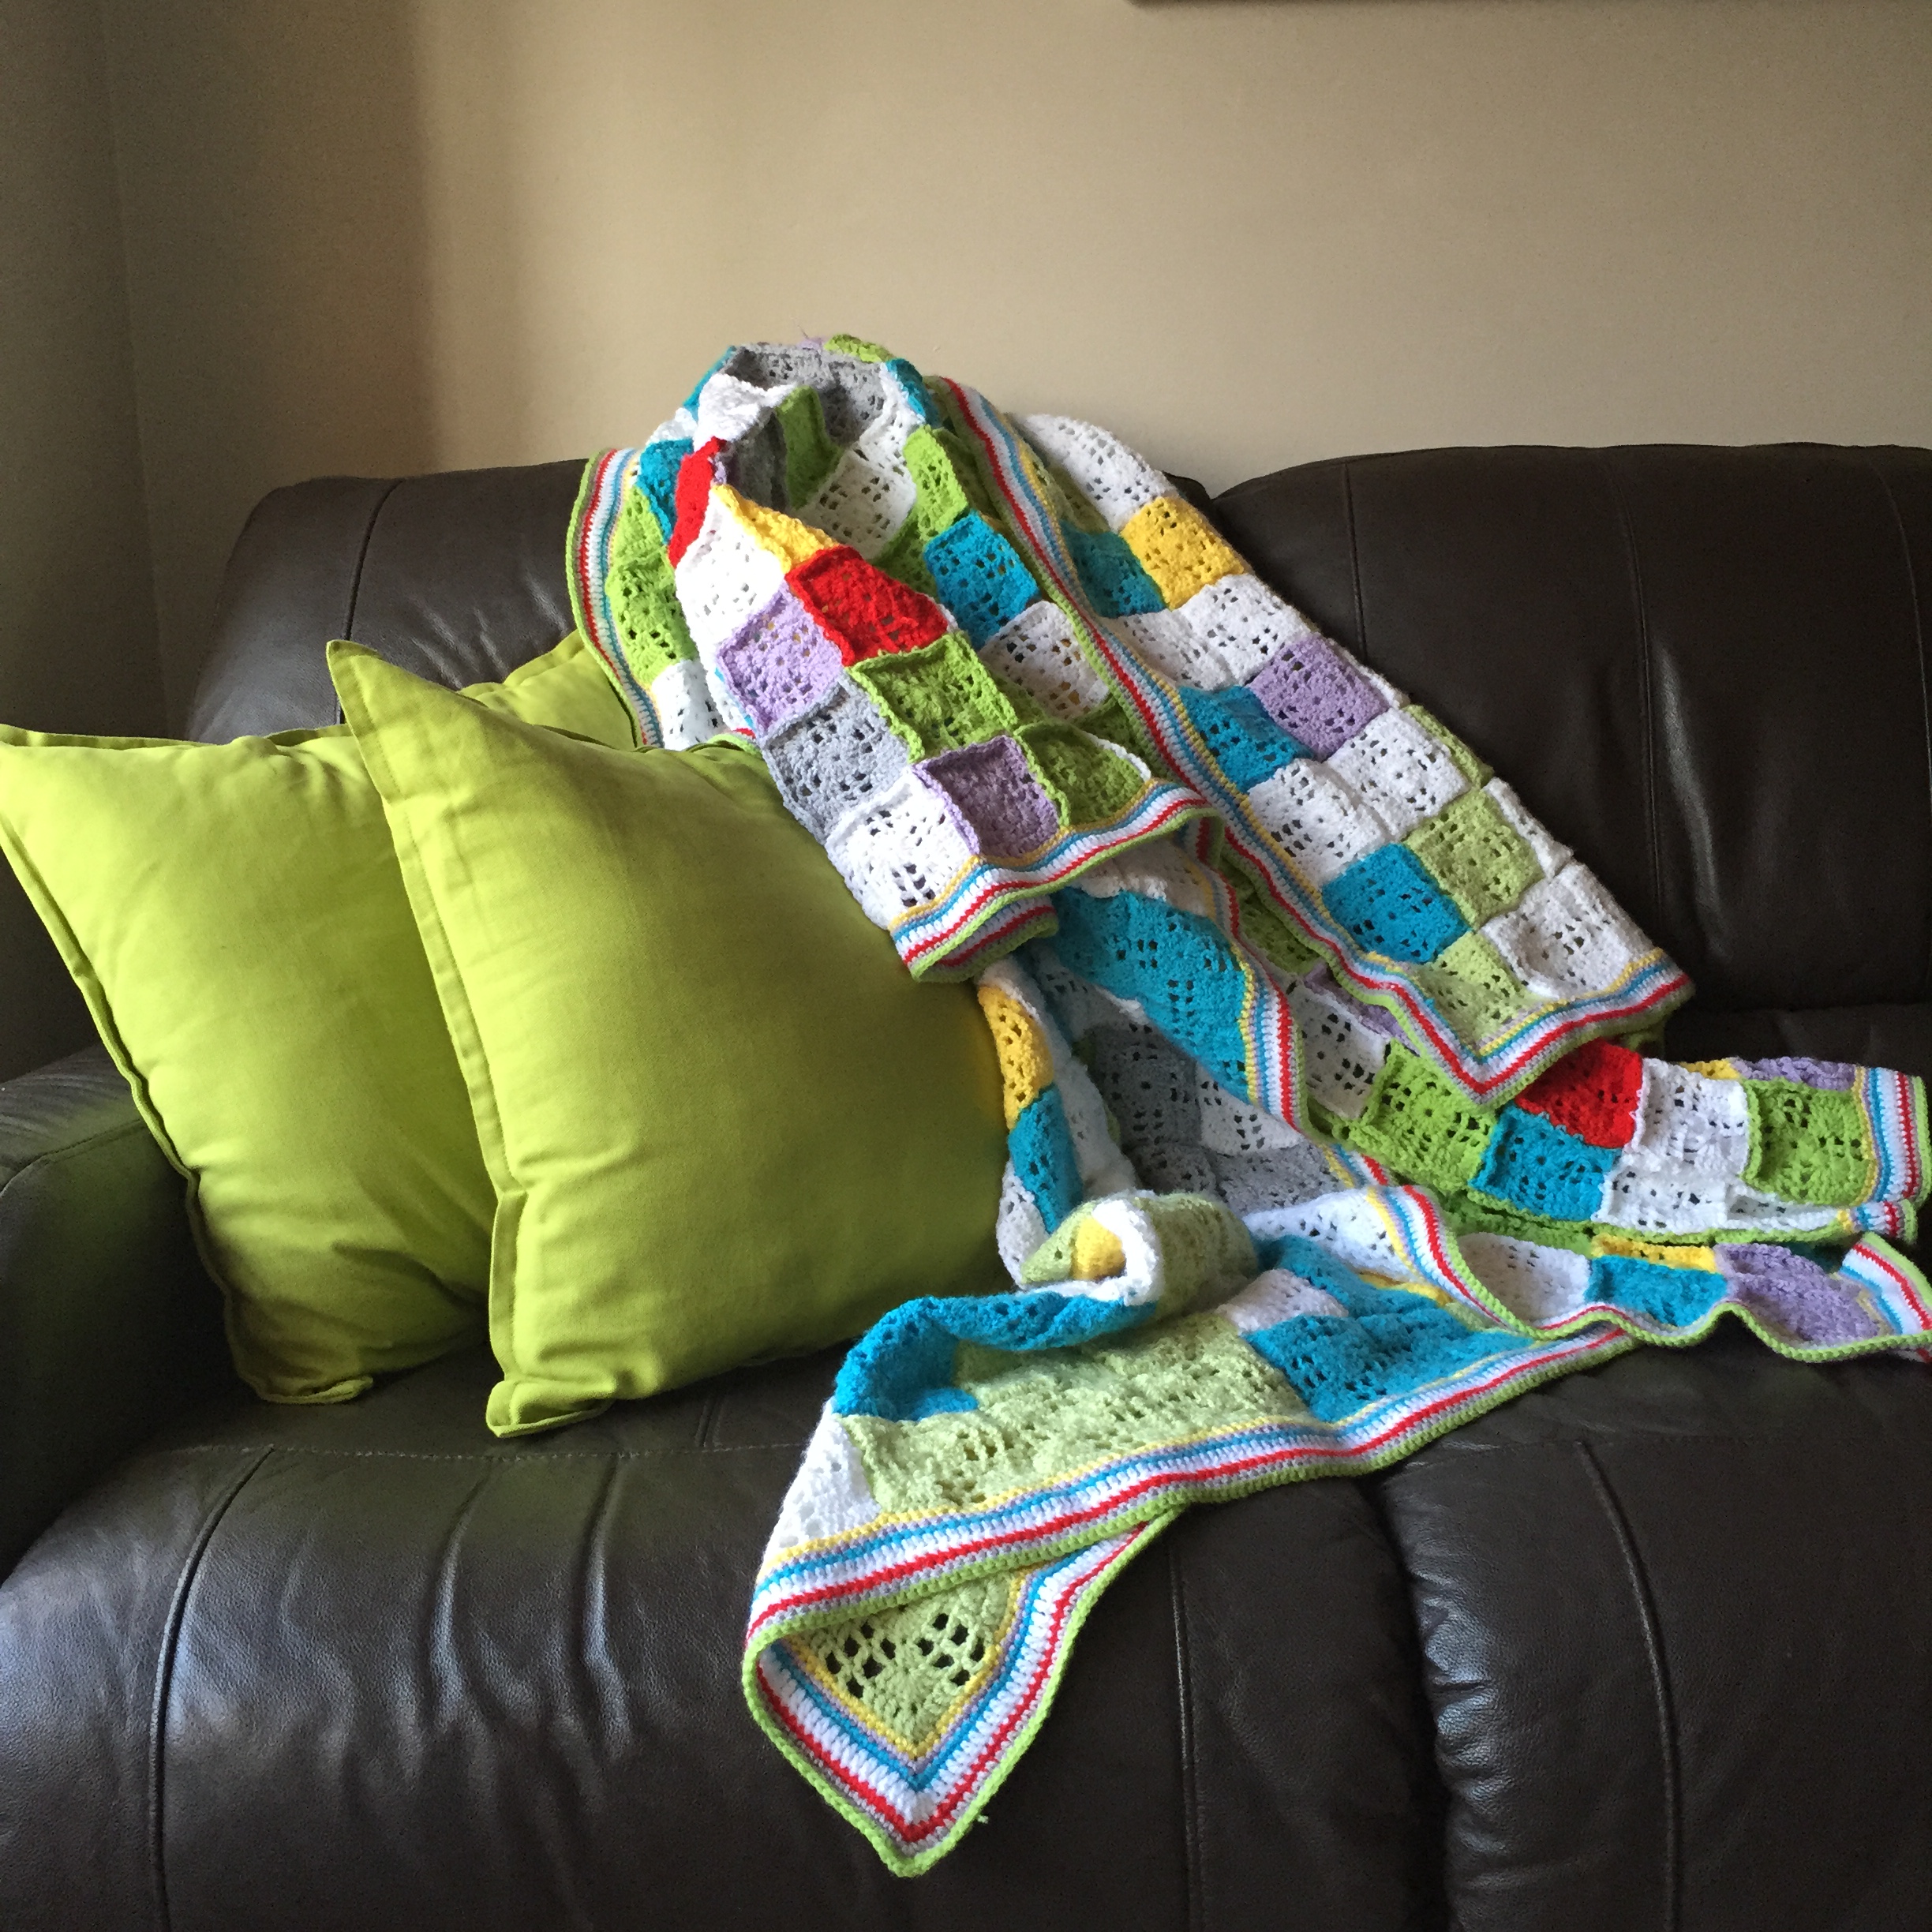
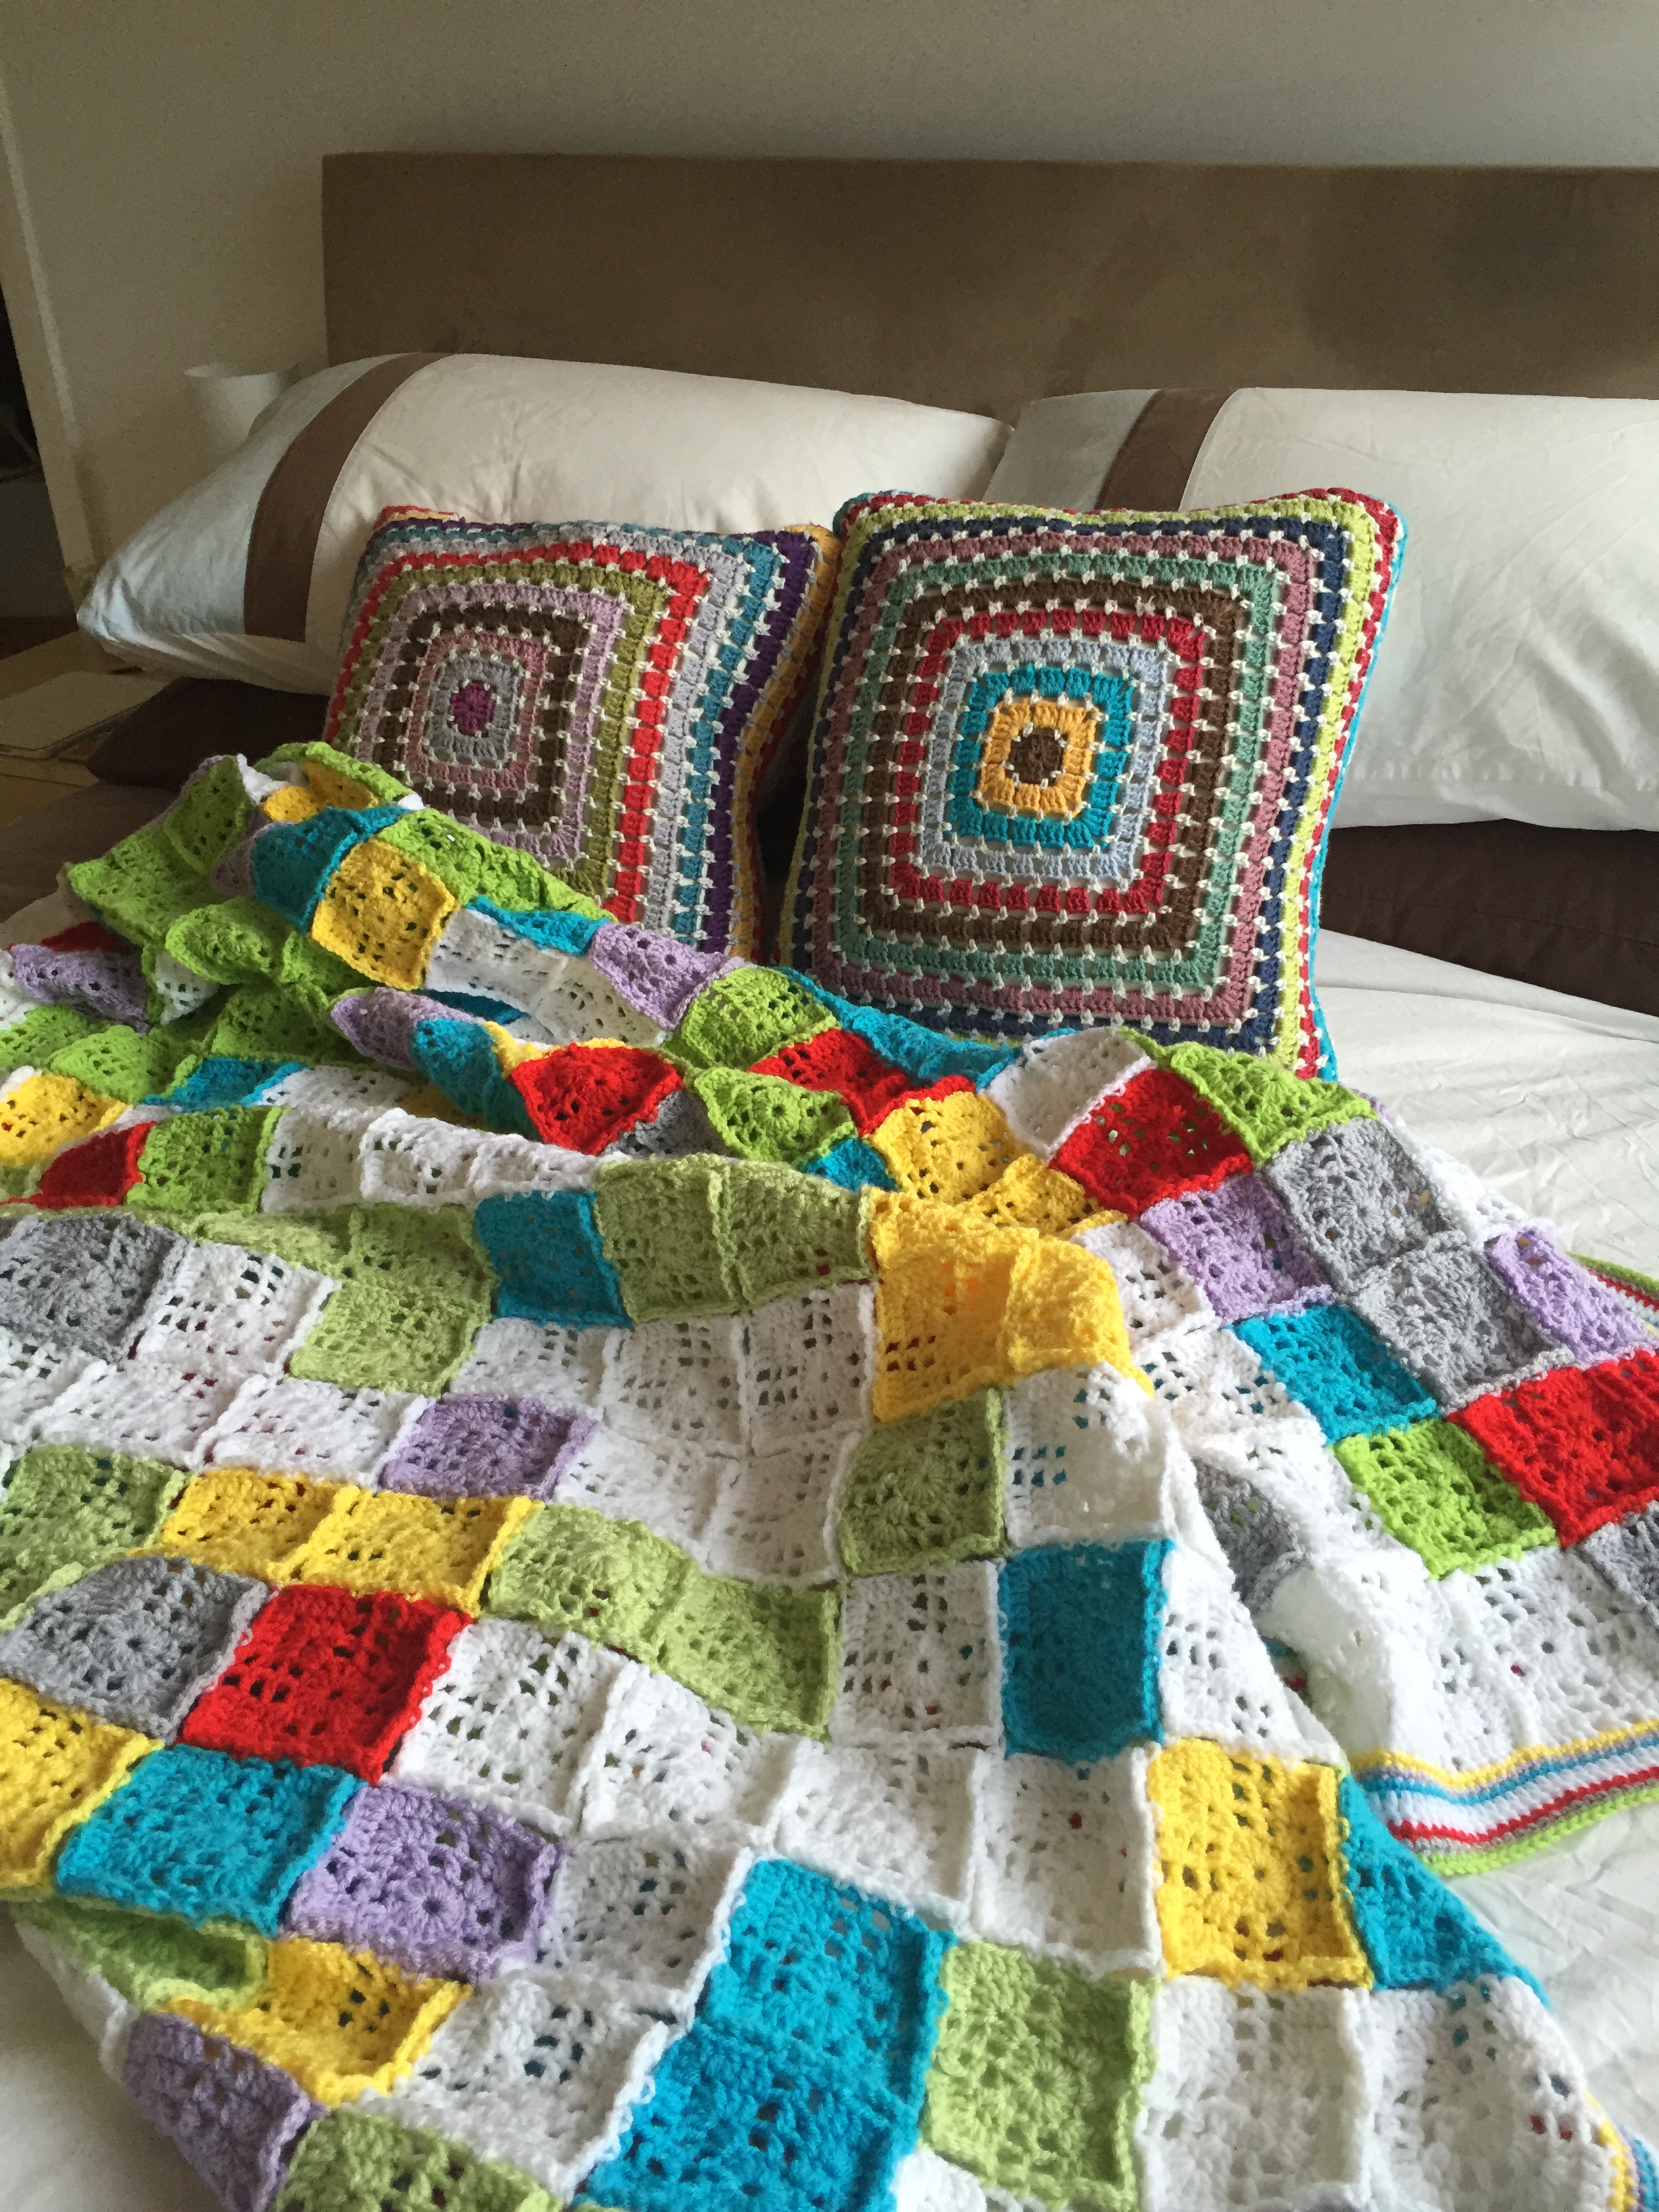
I started the blanket on the 30th of June and finished it today. Precisely one month! This granny square blanket will also be my contribution to the charity crochet campaign, Crochet For Kidneys Part 5. I had two weeks in that month where I was on sick leave so I had bit more time than usual for crocheting. (I had an operation to my foot on the 18th of June. The cast is coming off on 13 August and a month or so later, it will be the turn of my left foot to go under the knife and stay in a non-weight bearing cast for 8 weeks – expect a few more blanket ta-daaaah blog posts over the next 3 months!)

I really enjoyed following the colour scheme suggestion in Anita’s pattern. I know how to make a granny square so I didn’t need the pattern for that, but I found that following the designer’s colour scheme took away all the worry that I may get my colours wrong.

In this pattern the colour combinations are partly fixed and party random. Rounds 1, 2 and 6 are fixed colours, round 3 is random and 4 & 5 are also random but you use the same colour for both rounds.  Once I had decided on the colour for rounds 1 (green), 2 (white) and 6 (Parma Violet), there wasn’t much ‘randomising’ left to do. Choosing my colours for each square was really quick and I think I will stick to this partly fixed, partly random, colour scheme for all my future granny square blankets!

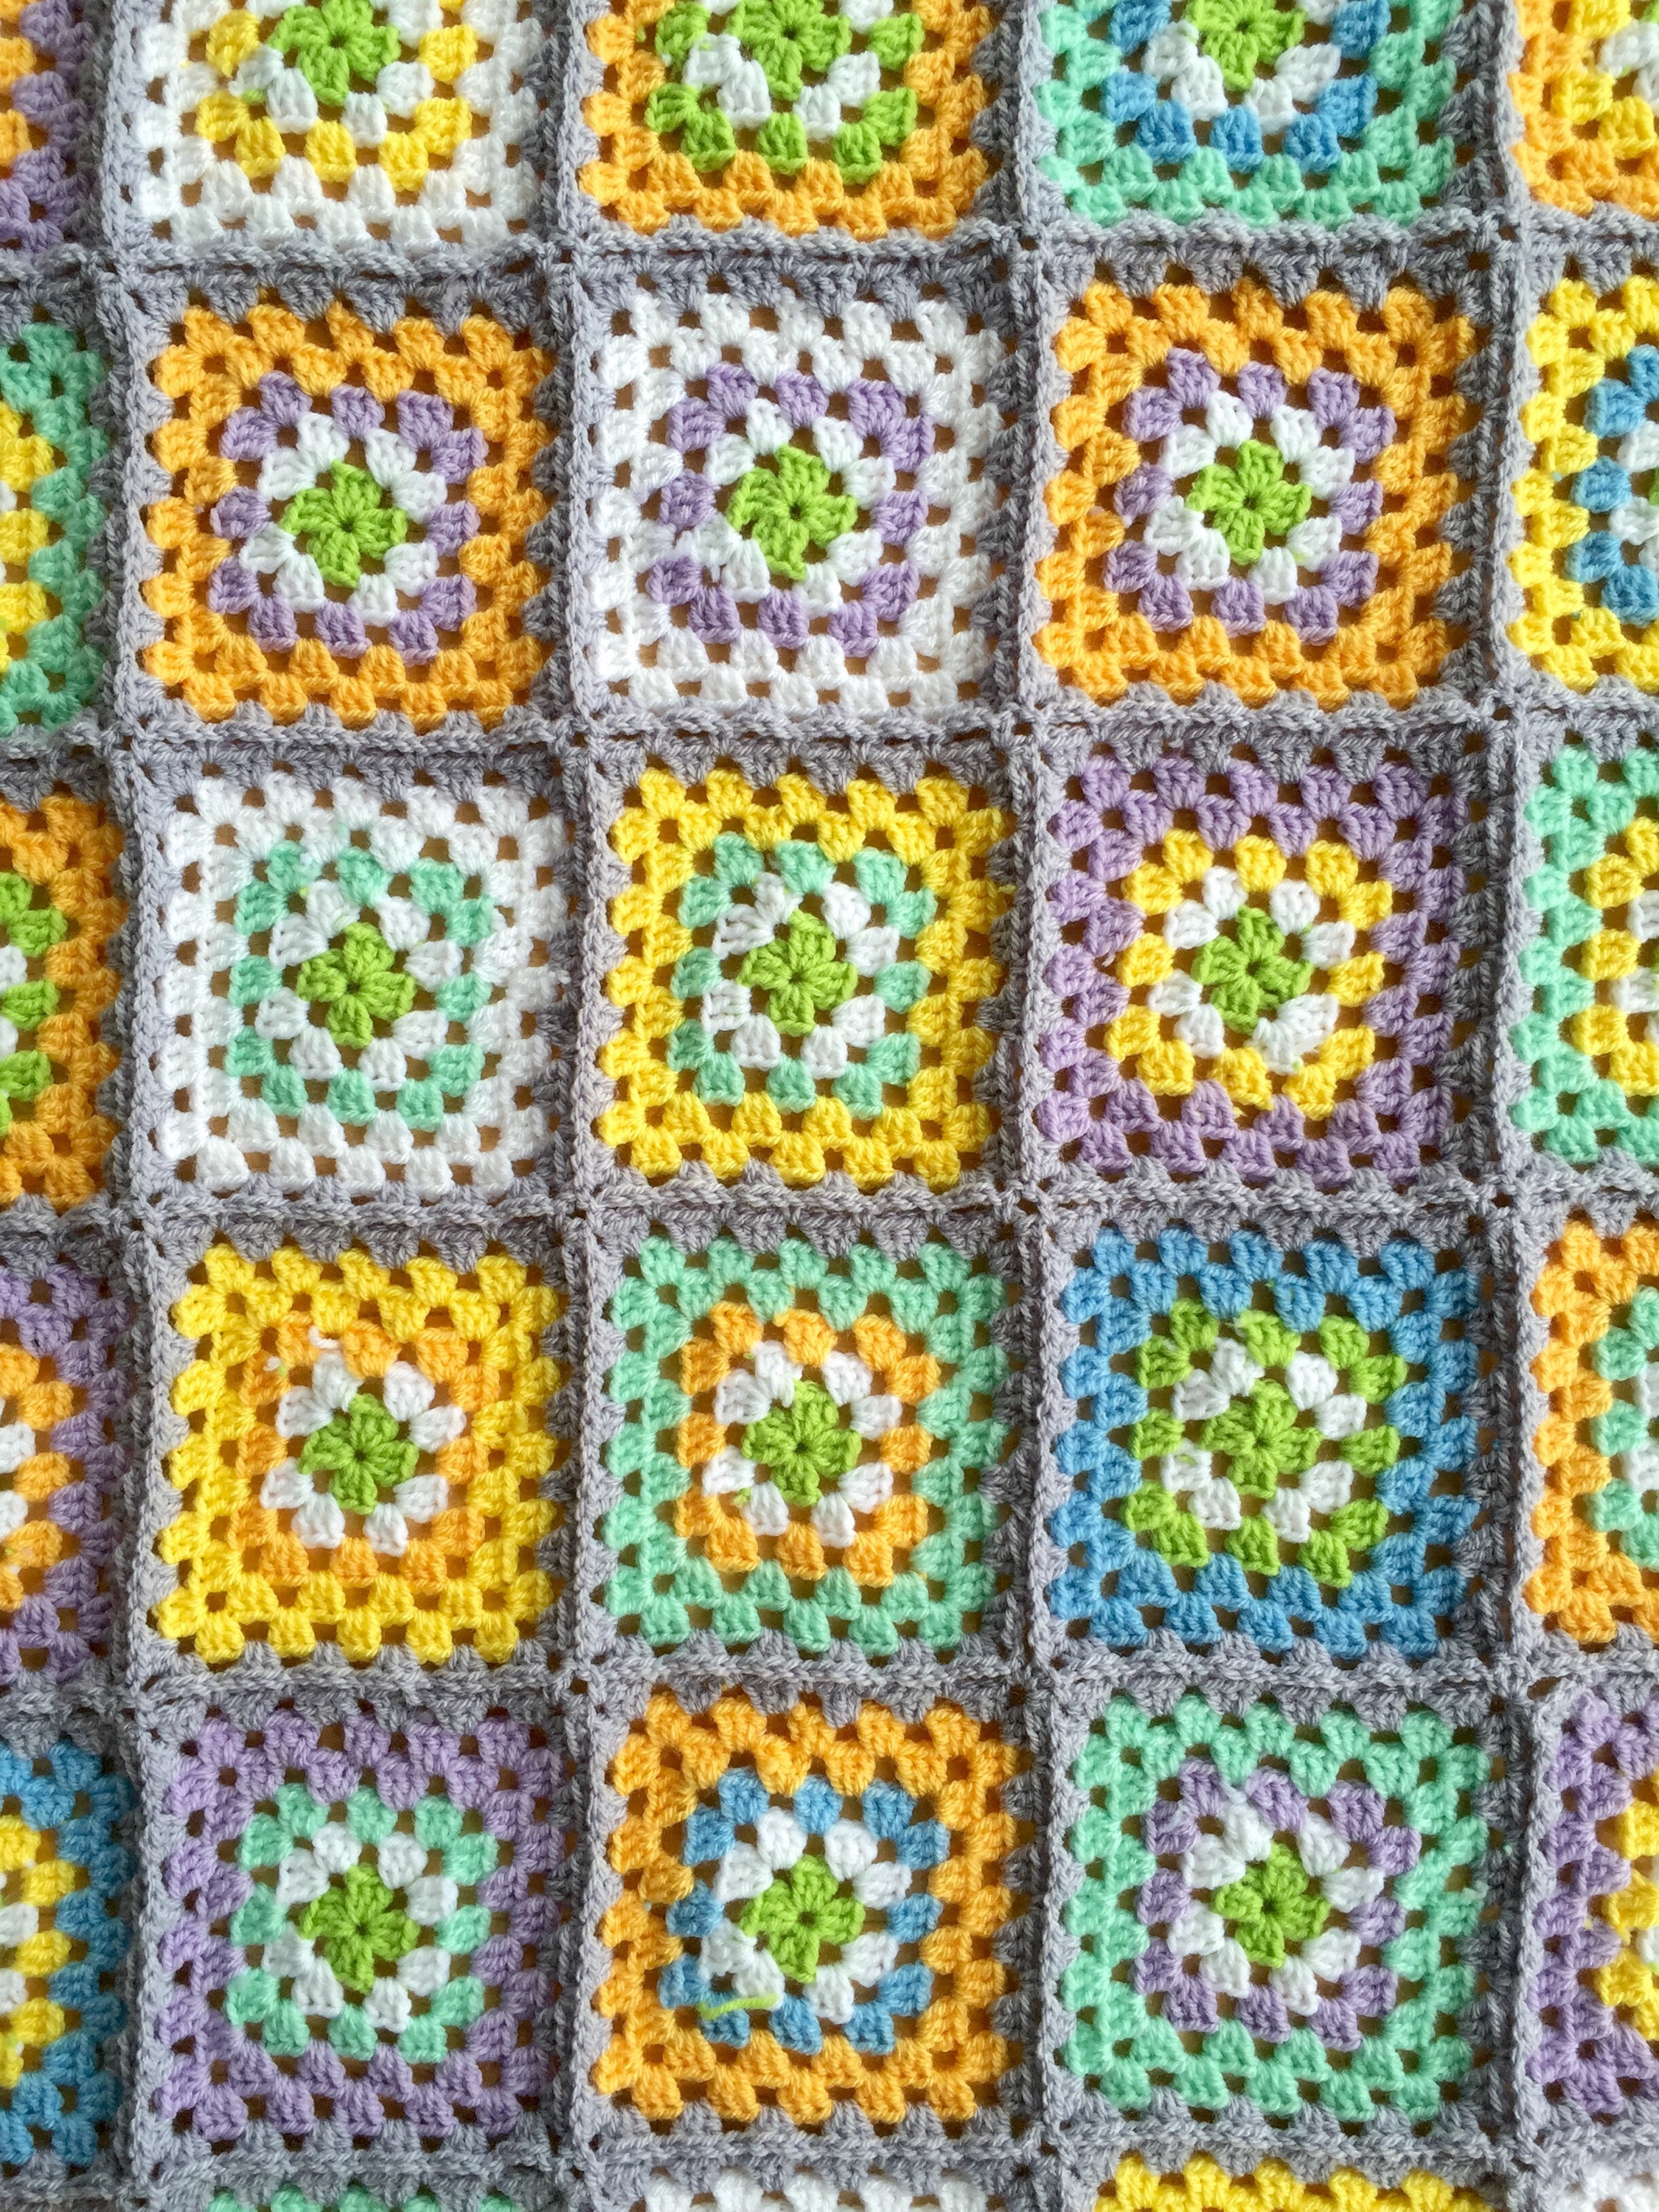
The colours I used were: Stylecraft Special DK in White, Saffron, Wisteria, Spring Green, Citron, Cloud Blue, Parma Violet (for the last round of each square) and the bright green was James C Brett Supreme Baby DK in SNG7.  I really love that Parma Violet shade. It’s not grey, it’s not purple, it’s just a beatiful  tie-it-all-together shade.

Please excuse the wonky photo but it’s difficult to get a blanket to lie flat and take a perfectly straight taken-from-above photo when you have only one leg to balance on!

For this blanket I also didn’t have to go looking for border like I do with my other granny square blankets – Anita’s border was just so perfect – I just had to follow her pattern.

The team from Mollie Makes (the UK’s most successful lifestyle and craft magazine) hand-picked the projects for this book.  All the patterns were designed exclusively for this book by the team’s favourite crochet designers: Ilaria Chiaratti, Emma Lamb, Beata Basik, Cara Medus, Pip Lincolne and Anita Mundt.  Apart form the Granny Square Blanket With Edging which I made, there are more fun and beautiful projects like the adorable set of Russian dolls from the cover photo, Bouquet of Flowers, pocket placemats and Monster Gadget Covers called Chomper, Nibbles and Tryclops. How To Crochet contains all the techniques you need to get started with crochet, with step-by-step instructions and clear, beautiful illustrations. Each of the 20 patterns have a Crochet Story which I really enjoyed reading – even if I weren’t going to make the project. How To Crochet is available on Amazon for £9.99.

If however you don’t want to purchase one, why not enter my giveaway!

I’m giving away two copies of How To Crochet by Mollie Makes. All you have to do is leave a comment on this blogpost telling me what your favourite time of day and/or week is to crochet. There’s no special reason why I ask this question, I’m just interested to know when my readers sit down with their yarn and hooky stick. The winners will be drawn randomly and announced on my Instagram feed (natasjaking) and crochetime Facebook page on 7 August.  Good luck!

Buttercup knit and crochet cardigan

03 Sunday Apr 2016

Posted by Natasja in My crochet, My knitting, Ta-daah!

≈ 3 Comments

John, my brother and I just got back from an European road trip of two weeks. We had the most amazing time driving through Belgium, Netherlands, Germany, Luxembourg and back to Belgium.

12524432_10153329861926249_6616873504238449632_n

You can see more photos on my Instagram feed.

While in Germany we drove over the border to Austria to visit Innsbruck for the day (amazing that you can do that!) On our way there we stopped at the side of the road where John took these photos to show you my Buttercup cardigan.

Buttercup cardigan 01

The navy cardigan over white t-shirt looks just like the snow covered mountains, don’t you think?

Buttercup cardigan 02

I was knitting like a lunatic the three days before we left on holiday – I just had to finish before the road trip!

Buttercup cardigan 03

The pattern for this beautiful cardigan is  Buttercup pattern from Marie Wallin’s book Filigree. This is my second project from Filigree, the first being the crochet top Rose which I absolutely adore.

Buttercup cardigan 04

The nitty gritty of my Buttercup cardigan:

Pattern: Buttercup from Filigree: Collection Three by Marie Wallin. The pattern for Right Front is missing from the book but you can download it from the errata page on Marie’s website here.
Yarn:  7 balls of Rowan Summerlite in Navy Ink shade 492
Size: Medium
Knitting needle size:  3 mm
Modification: I lengthen the cardigan by adding a 6th crochet square motif. That meant I also had to lengthen the back to 37 cm in stead of 29 cm, before doing the arm shaping.

Buttercup cardigan front detail

I’m really in love with the crochet and knit combination. I combined the two in my Kimono Cardigan, but  I definitely think Buttercup combines crochet and knitting better.

Buttercup cardigan side detail

I think I have a pattern crush on Marie Wallin. As soon as put down the knitting needles on Buttercup, I picked up the crochet hook to make my second Belle top from  Rowan Holiday Crochet. The second top with the same pattern! That’s how good her designs are!  I’ve been wearing my Belle since May 2015 about once every two weeks. No wonder I need a second one.

If Belle is anything to go by, I’m going to need a second Buttercup cardigan again in a few years.

Thank you Marie Wallin for designing the most amazing knitting and crochet patterns.

Kimono Cardigan

09 Saturday Jan 2016

Posted by Natasja in My crochet, My knitting, Pattern, Ta-daah!

≈ 3 Comments

Do you have a yarn that you love so much that you will search months and months on end for a pattern just so that you can use this yarn? A yarn so soft and light, yet warm in the cold and cool in the heat? A yarn in the perfect shade of grey that will match almost everything in your wardrobe? I have.  It’s Gardnstudio Drops BabyAlpaca Silk in 8465 Medium Grey.

I bought 12 balls back in August 2015 without knowing what I wanted to make with it. That’s unusual for me because I always find the pattern first and then look for the yarn. I thought I found the perfect crochet pattern in the Samira sweater, and I got halfway through the back when I realised this wasn’t working. The back loop only SC was creating a fabric with so little stretch, I would have had to modify the pattern so much and buy more yarn, that I just frogged it. You can see the frogged project in my Ravelry Projects here.

The fantastic Drops pattern database also didn’t have anything suitable for Babyalpaca Silk that I particularly liked.

What to do now?

I just made up my own pattern. And it’s mostly a knitted pattern.

I used Babyalpaca Silk for my Whispers cardigan which is crocheted, so this time I wanted to see and feel how the yarn looks knitted. I’m so happy I did it this way – this yarn looks better knitted than crocheted I think.

As for a pattern, well it needed to be super easy because I’m no good at shaping for knitting and especially not if I have to dream up the pattern myself!  Straight sides were what I needed. That made me think of a kimono because isn’t that really just a bunch of squares and rectangles? Surely I could manage that.

Turns out a kimono is exactly that: squares and rectangles. I used the plus size DIY Kimono pattern of Nina Scott-Stoddard, as my guide for the pattern pieces.

But, me being me, I couldn’t just knit a cardigan. No I needed something crocheted for a bit of flair. That’s were the the “Zen lattice” pattern from Robyn Chachua’s book Crochet Stitches Visual Encyclopedia came in. It was the perfect type of lace stitch and also perfectly name – Zen. Zen crochet border for a knitted kimono cardigan. I mean really! Match made in Japan.

I also added two rows of SC in a contrasting colour before I started the knitted section. Just because I can.

Below is the “pattern” for my Knitted and Crocheted Kimono Cardigan. I’m saying “pattern” because it’s really just a loose record of what I did. Not technical at all. I’m sure many knitters out there would be able to do a much better job of this than me, but I’m giving you the “pattern” so you can use it as a starting point.

I’m using US crochet terms.

Back

Working from the bottom up you start with the crochet border. Chain 114  (14 x 8 + 2)  with 3 mm crochet hook.

Row 1: SC.

Now follow rows 1 – 12 of Zen lattice from Crochet Stitches Visual Encyclopedia. In the last row, make 3-chain in stead of 5-chain.

Row 14 and 15: change to new colour and make 2 rows SC 2. Cast off.

Start of knitted section:

Use 3 mm knitting needles to pick up stitches through front loop of crochet. (This was the only way I could work out to switch from crochet to knitting. I picked up the stitches with the same size knitting needle as my crochet, and then used a bigger size knitting needles to knit the first row.)

With 4.5 mm knitting needles, start the stockinette stich by knitting the first row, then purl the second row. Continue in in stockinette stitch until desired length.

Front panels

Follow the same instructions as for Back, but cast on 58 stitches (7 x 8 + 3).

Sleeves

Follow the same instructions as for Back, but chain 92 (11 x 8 + 3).

It’s crucial that you block the pieces before sewing them together. In the photo above you see how the Zen lattice looks before blocking. You can’t even make out that it’s crochet! Below you see the lattice stretched out to it’s full potential. The KnitPro t-pins were real life savers for the blocking.

I have to warn you though that when I started wearing the kimono cardigan those crochet borders lost their “openness”, so don’t rely on the crochet to add length to the cardigan – it will jump back to almost pre-blocking width. If I knew this, I would have made my knitting much longer.

As for sewing up the knitting, I can’t get over how amazing the mattress stitch is for this. It really creates an invisible seam. This video is what I used to see how to make the mattress stitch and how to sew in the knitted sleeves.

I love wearing my super soft kimono cardigan, but I do know I could have made a better job of it by 1) creating shaping for the neck and shoulders in the back and 2) by making the body longer. Because of the short boxy shape I also have to think a bit about what I wear it with because it can look very unflattering if you don’t have the right layers underneath.

The yarn is this kimono cardigan’s saving grace – it’s so perfect that I don’t even mind having to think a bit harder about what I wear with the cardigan. I’ll even go clothes shopping to find the perfect thing to make this kimono cardigan look its best. I want to wear my kimono cardigan every day!

Kimono cardigan 02
Kimono cardigan 05
Kimono cardigan 01


Super Stripy Snood ta-daah

28 Saturday Nov 2015

Posted by Natasja in Knitting, My knitting, Ta-daah!

≈ 2 Comments

Tags

knitting, scarf

Well what have we here? A ta-daah post for a completed yarny item? Yes indeed!  I knitted a Super Stripy Snood to match my grey winter coat, and I love it!

Close up of knitted scarf

It all began on the 9th of August when John and I took iVan (which is for sale by the way in case you are interested in purchasing a super awesome campervan) to Brighton for the day. Before we left the house, I Googled “yarn shops in Brighton” (as you do) and came across Yak a lovely little yarn shop in Gloucestershire road. We wore our flip-flops thin to find Yak so when we got there John was adamant I should at least buy something to make it worth the effort. And yes, I did make a mental note of husband’s fortuitous statement and will in future always select the yarn shop furthest from where we parked the car.

Seeing as I was now forced to buy something at this great little shop – joy oh joy – I went for 8 balls of MillaMia Naturally Soft Merino in shades to match my grey coat – blues and soft greyish shades. They are:

Shade 121 – Putty

Shade 102 – Storm

Shade 120 – Forget me not

Shade 161 – Seaside (I mean really. How perfect?)

I don’t usually go for these muted tones but that’s what was needed to match my grey coat. Yak had many other gorgeous bright shades of MillaMia which were so tempting, but I had to stick to my plan of finding something to match the coat. Of course blue matches grey and it would remind me of our day in Brighton so adding the Seaside shade was a no-brainer.

I didn’t start knitting until October, but when I did boy it was gooood! I chose the very simple and soothing knit stitch for 90% of the snood. The other 10% was stockinette stitch for when I was using Adriafil Knitcol shade 55. Like I said, I don’t usually go for muted shades and felt the need for something in a darker blue to break up all the muted-ness. I had long ago fallen in love with the crazy beautiful things people were knitting with Knitcol so here was my chance – their “Renoir” shade matched my MillaMia shades perfectly!

MillaMia yarn knitting

Throughout October and November I knitted and knitted. The sweet receptiveness of knit stitch, mindlessly changing colour whenever I felt like it, mixing solid bands of colours, 2-colour stripe combinations and sections of the self striping Knitcol to make a super stripy snood.

I love stripes knitted scarf

I finished the snood just in time for the cold English Winter and wore it for the first time last Monday.

You probably want to see more of the stripes of this Super Striped Snood. Here it is. (John took the photos on our way to work. Can you spot the heron in the background?)

IMG_3792

First Half

I repeated three of the sections of colour twice, but apart from those repeating bands there isn’t really a pattern. It’s just randomly knitting stripes.

Second Half

With so many stripes and different colour combinations the snood can look different every time I twist it around my neck.  I love it!

Knitted stripe snood

I can highly recommend knitting a Super Striped Snood or Scarf. It’s the ultimate easy project for playing with colour and it looks great! It’s also a great stash busting project. Or you can do what I did and go on day trip and park the car as far as possible from the best yarn shop in town.


Rose ta-daaah!

09 Sunday Aug 2015

Posted by Natasja in My crochet, My ramblings, Ta-daah!

≈ 12 Comments

Tags

crochet, Marie Wallin, motif crochet, wearable crochet

The Rose top is finished!

I love it! Despite a rocky start where I got a bit bored but then eventually turned the corner into sheer joy, this top is destined to become a firm favourite.

The King Cole Bamboo 4 ply was the perfect choice. It drapes beautifully, it’s soft, it’s cheap and I only needed 3 balls of yarn. I will definitely use this yarn again.

All credit should go to Marie Wallin for designing such a beautiful piece of wearable crochet. The neckline really sets it apart from other motif-based crochet tops.

I just couldn’t resist making the bottom rows of the body and the sleeves in a second colour. I’m really glad I did – I love the contrast and extra bit of detail. The greenish grey Glazier shade is so pretty!

The nitty gritty of my Rose Top:

  • Pattern: Rose from Filigree: Collection Three by Marie Wallin
  • Yarn: King Cole Bamboo 4 ply in Denim and Glazier
  • Amount of yarn used: 2.5 balls of Denim and 0.5 of Glazier
  • Size made: M for the body, L for the sleeves
  • Crochet hook: 2.5 mm
  • Modification: It isn’t really a modification, but I did mix two sizes for this top. The body is size Medium, but the armholes for size Medium were to tight for me. In size Medium the sleeves, and therefor the armholes as well, are 4 motifs. I increased this to 5 motifs as for size Large. This worked out beautifully because now I have a roomy sleeve, but a fitted body.

I can highly recommend Rose and also the King Cole Bamboo 4 ply.

Now that Rose is finished I’m on to my next crochet top. At the moment I’m still busy with the gauge swatch. Unlike other gauge swatches, the stitch count isn’t as important as the row count with this one, because you crochet the pieces from from side seam to side seam. The crochet rows therefore lie vertically in stead of horizontally. I’m hoping it’s going to be a very slimming top.

Wanna see what I’m making? Have a look at the Ravelry page here. I know you’re just going to love it!!!

Serina crochet top ta-daaah

07 Saturday Feb 2015

Posted by Natasja in My crochet, Ta-daah!

≈ 12 Comments

Tags

Bamboo yarn, crochet, Garnstudio, Vinnis, wearable crochet

Long time no bloggy! Sorry I’ve been so quiet dear readers, but I was on holiday with my family in Cape Town. I met up with dear friends, met Instagram friends in person (that’s you @redheadmom23 and @Liezelvs) and made amazingly creative and lovely new friends (that’s you Ella and Ananda). Huge shout-out to the girls of the Hekel Innie Kaap Facebook group. (“Hekel Innie Kaap” means “Crochet In Cape Town”). Have a peek at their January meet-up photo album to see what I experienced – 50 crocheting Afrikaans-speaking ladies all in one restaurant! Cape Town is filled with extremely creative crocheters who love sharing their inspiration and knowledge, and enjoying coming together to crochet. People after my own heart. (I say “come together to crochet” but I only managed to crochet one row of DC in the four hours I was at the meet-up. Talking about crochet is just as good as crocheting right?)

While I was in Cape Town I of course did a bit of crochet. I worked on the Convergence top (it’s half way done!) and finished one sleeve of this crochet top. I ran out of Vinnis Serina Bamboo yarn just before I left for Cape Town. I left the front piece, back piece and one sleeve in the UK, bought the extra yarn and finished the second sleeve while I was there. Yesterday I sewed all the pieces together and today I wore my top. I was positively glowing with pride. I just love it!

Drops Design crochet top

I am over the moon with this pattern and the Vinnis Serina yarn!

Drops Design crochet top

As I mentioned in this blog post, Drops Design Collection 136 contains the most beautiful collection of crochet pieces for me. I already made Whispers and Country Dreams, and now pattern 136-23 “Blues” Jumper is my third and I have to say, it’s my favourite. The pattern was easy to follow and it works up really quickly. The square motifs are done quickly “join as you go” and they make up almost half of the top. For me it went even quicker because I didn’t have any colour changes. Not that I needed colour changes to make my top interesting – look at the subtle marbling from the hand dyed yarn. Isn’t it amazing?!

Drops Design crochet top

As for the Vinnis Serina bamboo yarn – oh my word. So super soft! I am aware though that the yarn has a tendency to sag a bit after a few hours of wear. There is no cotton in this yarn that will help it keep its shape; it’s just 100% bamboo. That makes for a super lustre and lovely drape, but it can become “floppy”. To compensate for this, I made my top in Size M, even though my measurements are for a size L. It worked like a charm. The top fits beautifully and even if it does stretch a bit during the day, I’m not going to look like a bag lady by the end of the day.

Drops Design crochet top

Drops Design crochet top

The nitty gritty of my Serina Top:

  • Pattern: Drops Design pattern 136-23 “Blues” Jumper
  • Yarn: Vinnis Serina 4-ply bamboo in shade 631 Turquoise Green
  • Amount of yarn used: 12 x 50g balls
  • Size made: M
  • Crochet hook: 3.5 mm for the sleeves & squares and 3 mm for the body
  • Modifications: An extra row of SC around the neck before doing the edging. Also using a larger size crochet hook for the sleeves as I know from previous experience that Drops Design sleeves tend to be a bit tight for me.

Drops Design crochet top

I have a few crochet wearables that I don’t really want to wear outside the house, but this one is definitely not one of those. If you’ve never tried crocheting a wearable piece, give this pattern a try. It’s a winner!

Crochet Mood Blanket 2014 ta-daaah!

31 Wednesday Dec 2014

Posted by Natasja in My crochet, My ramblings, Ta-daah!

≈ 12 Comments

Tags

#crochetmoodblanket2014, crochet, crochet blanket, Mood Blanket

Behold my Crochet Mood Blanket 2014!!! All 357 squares of it in its colourful glory! I started it on 1 January 2014 and completed it 31 December 2014 – precisely one year in the making.

crochet mood blanket 2014

The Crochet Mood Blanket is the brainchild of Stacey Wentworth-Hall (@frofunky on Instagram). You basically just crochet or knit a block or stripe everyday (or once a week if that suits you better)  using a colour that you feel reflects your mood.

If you would like to get on board for 2015, have a look and join the Facebook Group here.

Our blanket will be moving between the living room and the bedroom. I just love how colourful it is! It cheers up any space!

Crochet mood blanket 2014IMG_1251

The Mood Blanket has taught me a lot about myself and how my moods change. John said the blanket is a testament of his patience 🙂  I love that for years and years to come I will always be able to look back at my blanket, and therefore on my emotions during 2014. It’s been a good year and for that I am very, very grateful.

lacy cross crochet squares
IMG_1246

The border I chose for my Mood Blanket is a variation on Border #39 that I used for my Dad’s Atlantic Waves Ripple blanket. The border is made up of  three rows of single crochet, a row of double crochet (which in the original Border #39 is a treble) and a final three rows of single crochet. I used all seven of my colours for the border.

IMG_1240

Seeing as the Crochet Mood Blanket is based on the days of the year, I wanted to be able to remember where it all started. In other words which square represents  1 January 2014? I did this by switching around the colours of the first two rows of the borders. See?

mood blanket corner border

Around the square for 1 January, I used purple as the first row, whereas for the rest of the blanket I used yellow for the first row of the border.  I don’t think anyone else would even notice this small switcharoo, but it’s the perfect reminder of my very first mood of 2014 – in this case a happy lime green.

The nitty gritty of the Crochet Mood Blanket 2014:

  • Pattern: Lacy Cross from 200 Crochet Blocks by Jan Eaton
  • Yarn: Hayfield Bonus and Hayfield Baby Bonus
  • Crochet hook: 3.5 mm
  • Joining method: Join as you go
  • Border: No. 39 from Around The Corner Crochet Borders by Edie Eckman.
  • Size: 21 rows of 17 squares, which makes 357 squares. Completed size with border is 165cm x 135cm.
  • Colours: The colours of the Mood Blanket were chosen to represent my seven moods. This is how may of each colour I used for the blanket:

Crochet Mood Blanket 2014

I did some number crunching and at the end of 2014 I can reveal that I had 6% sad, 7 % irritable, 7% ditsy, 4 % stressed, 30% not great but not bad either, 29% happy and 17% grateful days.  I know this because of a crochet blanket! How crazy and amazing is that?!

Making the Mood Blanket was a great eye opener. I had to be honest with myself about my moods. If that meant that there were three days of being depressed, then so be it. Three grey squares it shall be. I also had to reflect on my day at the end of every day. Some days may have started as green (happy) days, but then something would happen at work which upset me and the day turned into a stressed day. At the end of the day I had to look back and decide what was the prevailing mood for the day: the happiness of the morning, or the stress? Did I allow the stress to get to me or did I look on the bright side and manage to keep my day happy. If I allowed the stress to get to me, then it had to be honest with myself and make the day a red day.

At one point during 2014 I also realised that although I had lots of green (happy) days, I didn’t have that many grateful (turquoise) days. That’s not good and that’s something I had to, and still have to, work on.

If you are ready to be honest with yourself and stick with it, you can use a crochet project to analyse your moods, attitude and emotions for a whole year. As a bonus you’ll have a blanket at the end of the year. I highly recommend it.

Free pattern for a Christmas Tree Ring

14 Friday Nov 2014

Posted by Natasja in My crochet, Pattern, Ta-daah!

≈ 14 Comments

Tags

Christmas, christmas crochet, crochet jewellery, free crochet pattern

It’s almost Christmas (shock, horror) so I decided to design a free Christmas crochet pattern for all my lovely readers, Facebook followers and Instagram followers.

Christmas tree crochet ring

Christmas tree crochet ring

The christmas tree ring is a cute accessory to wear on Christmas day, it’s a great stocking filler, or wear it throughout December to spread the Christmas cheer every day.

crochet thread crochet christmas tree

I use crochet thread for this ring. Please don’t be afraid of using crochet thread and the required 1.5 mm crochet hook. I used crochet thread for two of the projects in Crochet Pretty. Out of all the patterns in Crochet Pretty, the Oh What A Cute Oval Brooch is my favourite and that’s all down to the use of crochet thread for tiny flowers and picots. I’m falling in love with crochet thread more every day.

We are spoilt with choice when it comes to yarn weights and most of the time we go for the double knits or 4 plies, but crochet thread is made for us! Literally! Making something with thin yarn and a tiny crochet hook is just like regular crochet, you just need to look a bit closer when you’re crocheting. That’s all there is to it.

crochet thread crochet christmas tree with seed beads

Hopefully this tiny crochet christmas tree will give you the confidence to also use crochet thread more and see the 1.5 mm crochet hook as your friend.

crochet thread seed beads ring blank

You will need

1.5 mm crochet hook

Anchor Freccia ticket no. 6 in green

Ring blanks like this one sold at Hobbycraft

Clear super glue or use a mini glue gun

5 x size 8 red seed beads. I bought this pack of mixed colours at Hobbycraft and just picked out the red beads.

Notes and abbreviations

This pattern is written in US crochet terms. The sc (single crochet) in this pattern is the equivalent of a dc (double crochet) in UK crochet terms.

Bsc is a Beaded Single Crochet. You make a beaded crochet stitch by moving the bead up against your crochet before doing the last “yarn over” of the stitch. Watch this video to see how to make a beaded treble – the technique is the same no matter what crochet stitch you use.

Beads have to be threaded onto the yarn before you begin crocheting. Watch this video to see how to thread the beads onto yarn.

Turn your work after every row.

ch = chain

sc = single crochet

bsc = beaded single crochet

st = stitch

Pattern

Thread 6 seed beads onto yarn.

Foundation row: Work 2 chains.

Row 1: 1 sc into second ch.

Row 2: 1 ch, (1 sc, 1bsc, 1 sc) into next st. (3 st.)

Row 3: 1 ch, sc in each st to end. (3 st.)

Row 4: 1 ch, (1 sc, 1 bsc) into next st, 1 sc, 2 sc in next st. (5 st.)

Row 5: 1 ch, 1 sc in each st to end. (5 st.)

Row 6: 1 ch, 2 sc in first st, 1 sc, 1 bsc, 1 sc, 2 sc in last st. (7 st.)

Row 7: 1 ch, 1 sc in each st to end. (7 st)

Row 8: 1 ch, (1 sc, 1 bsc) into next st, 4 sc, 1 bsc, 2 sc in last st. (9 st)

Row 9: 1 ch, 1 sc in each st to end. (9 st)

Row 10: 1 ch, 4 sc, 1 bsc, 4 sc (9 st)

Row 11: 1 ch, 3 sl st, 1 ch, 3 sc (last 3 st remain unworked). (3 sc)

Row 12: 1 ch, 3 sc. (3 sc)

Fasten off and weave away the ends.

Glue the christmas tree to the ring blank.

xxxxxx

Christmas tree crochet ring

A white baby blanket

17 Thursday Jul 2014

Posted by Natasja in My crochet, Ta-daah!

≈ 4 Comments

Tags

baby blanket, crochet, Simply Crochet magazine

Sirdar baby blanket
I’ve been crocheting a baby blanket for a lady at work and now it’s time to share it with you. Lynette suffered from a major illness last year (I don’t know the details, I just know she was at death’s door) but miraculously recovered, only to find out a couple of months later she was expecting again. She already has two teenage children and wasn’t planning on getting pregnant. I think Baby No. 3 is a second chance, don’t you agree? I mean really. She was near death, recovers and then falls pregnant. There must be more to it than just “a unexpected pregnancy”. Knowing how special this baby is I put a lot of love into her blanket. You would too, wouldn’t you?

First step was to find a pattern. There are thousands of baby blanket patterns out there. Luckily, just before Lynette asked me to crochet her a blanket, I had my yearly magazine clear-out. For some reason I decided to keep the Simply Crochet Summer 2012 issue. It was one of their early issues, before they had their make-over. There isn’t really anything I would want to make for myself in that issue, but I kept it anyway. Strange how that works…. or not so strange because that issue contained a beautiful baby blanket pattern by Sirdar! I showed it to Lynette and she loved it.

Sirdar baby blanket pattern

That pattern is for a newborn baby (61 x 76cm), but Lynette wanted something bigger that could be used for longer, so we decided on dimensions of roughly 76 x 89 cm. I used the same yarn as suggested by the pattern, so it was just a case of making a longer foundation chain and adding a few extra pattern repeats.  I ended up with a 72 x 92cm blanket. I realised I could (should?) have added two more pattern repeats in the row which would have brought it closer to the 76cm width, but I think the length will make up for the slightly smaller width.

white baby blanket

The wavy “cosy cuddles” pattern is easy to do and you get into the rhythm of it quite quickly, but it looks much more complicated. The pattern doesn’t call for a border but I like adding borders to blankets. It just feels unfinished without. It also helps to bring a blanket to the desired size… I chose border no. 99 from Around The Corner Crochet.

border 99

white baby blanket The nitty gritty of the white baby blanket:

Pattern: Sirdar Wave pattern blanket (Cosy Cuddle)

Publication: Simply Crochet Summer 2012

Yarn: Sirdar Snuggly 4 ply

Hook: 3.5 mm

Border: Around The Corner Crochet border #99

Size with border:   72 x 92cm. 23 Pattern rows, with 13 pattern repeats per row.

The blanket is now wrapped and tagged with Ravelry tags, ready to give to Lynette on Monday. (I love my Ravelry tags. It’s printed on thick card and on the bag are care instruction symbols that you can circle with space to write the fibre content of the yarn. It’s only $5 for a pack of 6. If you make a lot of crochet for others as gifts, this is really handy.)

Ravelry tag

I hope Mom and Baby likes the blanket. I enjoyed making it and put a lot of love into it. I can see why people enjoy making baby blankets – it’s quick, satisfying and you are making something warm and snug for a tiny person. I like that.

V-neck knitted sweater ta-daaaah

09 Monday Jun 2014

Posted by Natasja in Knitting, My knitting, Ta-daah!

≈ 5 Comments

Tags

knitting, V-neck sweater

On 6 April 2014 I picked up a pair of knitting needles and took up knitting again after 10 years. Almost exactly two months later, my first knitted sweater is done!

Stylecraft ladies sweater 8948

The last thing I had knitted, was a cream, pink and grey scarf back in 2004. I was bored out of my mind and didn’t do any crafting after that. That was until August 2009 of course when the crochet bug bit me. I guess the confidence I have after years of crochet, seeing pretty knitting on Ravelry, starting the craft group at work where I am surrounded by knitters and reading every now and then on a crochet blog that a crocheter has taken up knitting, wore me down. I wanted to knit something. Not a scarf mind you! I wanted something to wear but the pattern had to be easy, not too fussy yet with a something special, v-neck and something I would want to wear. I found the perfect pattern on Loveknitting.com – Stylecraft Stars 8948.

When I bought the pattern pamphlet I also bought 4.5 mm Pony aluminium needles. I didn’t need any yarn, as the Vinnis Nikkim that I wanted to use, is the exact gauge and yardage as Stylecraft Stars. What a great stroke of luck! When I saw that, I knew this was going to be a goooood pattern for my first knitted sweater attempt!

When my needles and pattern arrived, I decanted myself onto my spot on the couch, ready to do some knitting. Only problem was I didn’t know how to do the very first instruction of the pattern: Cast on with the thumb method. The what?! Thank goodness for my laptop and Youtube. I found the perfect  instructional video on the Deramores website. The thumb method turned out to be very easy. Hurdle 1 overcome.

As I was knitting the ribbing I soon realised that I made a mistake. Not with the knitting, but with the knitting needles. My cotton yarn was slipping all over the place and I was gripping my knitting needles so tightly to try and keep the stitches from dropping, that I developed knitters-cramp very quickly. Back to the Loveknitting.com website for bamboo needles, (and stitch holder and row counters – in for a penny in for pound).

Those bamboo needles were a godsend! Everything was so much easier once I switched to bamboo.

Everything went swimmingly from there. Bearing in mind that the fancy bit of my sweater happened right after the ribbing, I kinda had thrown myself into the deep end right from the beginning, but I loved it. I got a thrill when I did a stitch count and was spot on!

I have to say that the finishing of the sweater was my biggest fear. To me there’s nothing worse than a handmade piece of clothing that looks…well, handmade. No matter how hard you worked on knitting, crocheting or sewing your pieces, it can all so easily look “cheap” if the finishing isn’t spot on. Thank goodness for another Deramores video where I learned to do the mattress stitch. I couldn’t believe how neat the join (or lack thereof) looked! I also found the Vogue Knitting website helpful when it came to inserting the sleeves into the body.

I did have a little flurry of upset when the sleeve opening on the front of the sweater seemed to be much larger than the sleeve. Thankfully, after a bit of Google-ing, I realised that that’s normal. I just had to ease the sleeve into the opening. Easier said than done. Then I had a brainwave: if the knitting was designed this way, it means they probably did it because a lady’s bust will fill out the front so I had to replicate this “filling out” when I sewed my sleeve into the opening. That means I shouldn’t try to sew it together with the pieces lying on a flat surface, I need something curved. My knee!! And it worked!

Sewing the sleeve into body of knitting

This is how the two sleeves of my sweater was inserted using a mattress stitch. I didn’t even notice the extra fabric at the body when I did it this way. For a first attempt, I am very happy with the way my sleeve sits in the opening. (Please excuse my penguin pajamas…)

After sewing everything together I just had the ends to weave away. For this I found this blog post on The Purl Bee very helpful. I used the diagonal on the wrong side method.

The very last thing to do was to block my sweater. This is the only part that I would do differently next time. The pattern says to block the sweater right at the very end, whereas I think I would have had an easier time sewing all the pieces together, had I blocked the pieces beforehand. What do you knitters think? Do you block your knitting when it’s all sewn up, or do you block the pieces before sewing?

The nitty-gritty of my first knitted sweater:

Pattern: Ladies Sweater in Stylecraft Stars 8948

Yarn: 8 balls of Vinnis Nikkim DK cotton in Avocado

Needles: Pony bamboo 4.5mm and Pony aluminium 3.5mm for the rib

All in all, I’m very happy with my first sweater and kinda proud of myself. I mastered a fancy pattern, managed to do a v-neck (which included a very intimidating s1 knit2tog psso combo) and learned to do mattress stitch to join all the pieces together. Credit should go to Stylecraft Yarns for writing a pattern this pretty, yet easy enough that a newbie knitter can master it.


Close-up of the pattern
Close-up of the neckline
Shoulder
Shoulder
V-neck
V-neck

Being so happy with the outcome of my first foray into wearable knitting, I already bought the pattern for sweater number 2!

I may have to think about changing my blog name to crochetandabitofknittingTime…. it doesn’t have the same ring to it, but it’s accurate 🙂


← Older posts

Enter your email address to follow this blog and receive notifications of new posts by email.

Join 2,706 other subscribers
Follow crochetime on WordPress.com

Follow on Bloglovin’

Social

  • View NatasjaKing’s profile on Instagram
  • View Natasja King’s profile on Pinterest

The eBook I wrote

Recent Posts

  • Edward’s Crochet Imaginarium and two pink monsters
  • Review of How To Crochet book by Mollie Makes
  • Buttercup knit and crochet cardigan
  • Kimono Cardigan
  • The Sky is the limit

Categories

As seen on TV Book reviews CAL Camping Crochet For Kidneys Etsy Etsy seller interviews Folksy GIF In the press Knitting Markets My book My crochet My knitting My ramblings Other people's crochet Part 1 Part 2 Part 3 Part 4 Pattern Photo Tutorial Positive Thinking Ta-daah! Terrific Tuesdays Video Watch me crochet Wednesdays Yarnbombing

Instagram

No Instagram images were found.

My designer profile

Create a free website or blog at WordPress.com.

  • Follow Following
    • crochetime
    • Join 718 other followers
    • Already have a WordPress.com account? Log in now.
    • crochetime
    • Customize
    • Follow Following
    • Sign up
    • Log in
    • Report this content
    • View site in Reader
    • Manage subscriptions
    • Collapse this bar
 

Loading Comments...
 

    Privacy & Cookies: This site uses cookies. By continuing to use this website, you agree to their use.
    To find out more, including how to control cookies, see here: Our Cookie Policy