• Home
  • About me
  • Contact me
  • Crochet How To Links
  • Photo Tutorials
  • Patterns I Designed
  • Crochet For Kidneys
    • Part 1
    • Part 2
    • Part 3
    • Part 4
    • Part 5

crochetime

~ So many patterns, so much yarn, so little time: story of my hooky life.

crochetime

Category Archives: Ta-daah!

Ta-daaaah my tapestry crochet laptop sleeve

22 Tuesday Apr 2014

Posted by Natasja in My crochet, Ta-daah!

≈ 3 Comments

Tags

Apple, crochet, laptop sleeve, tapestrycrochet

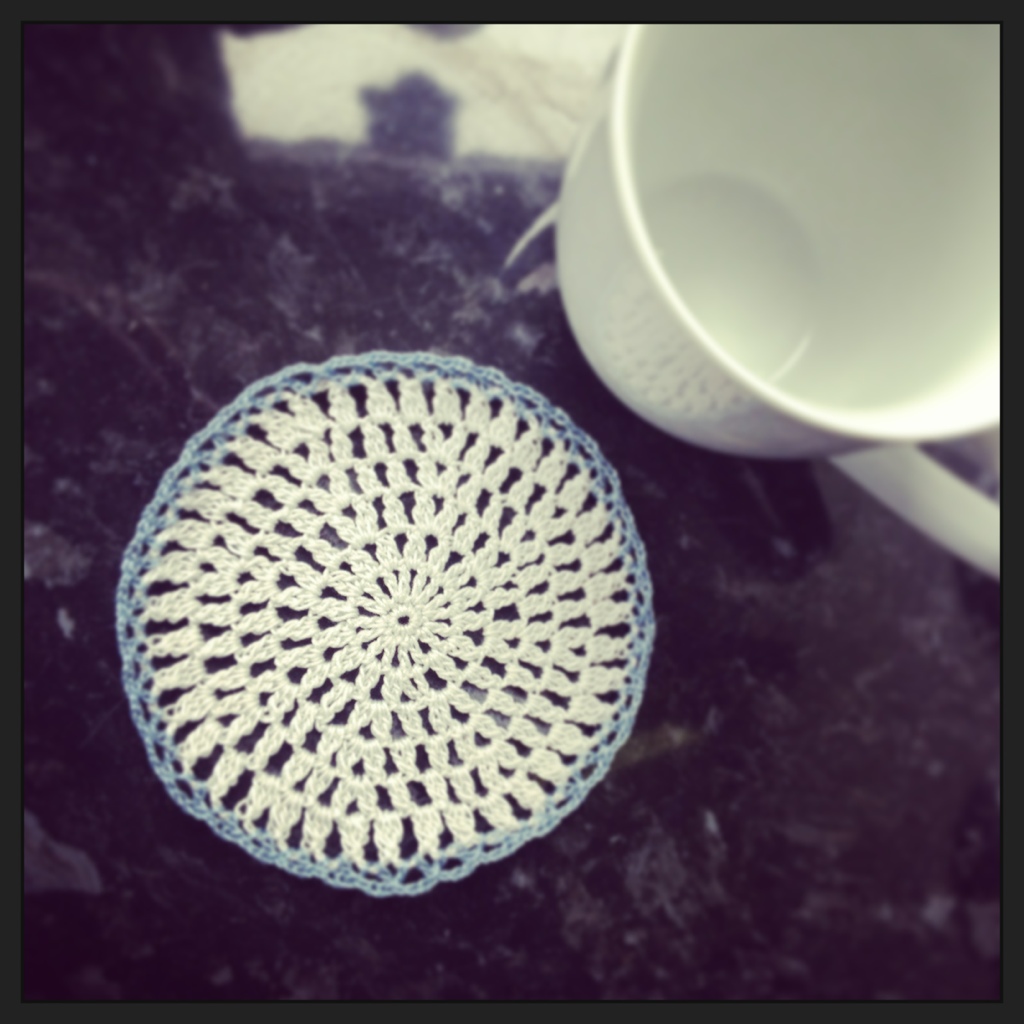
Have you ever tried tapestry crochet? I read about it for the first time in issue six of Simply Crochet magazine. Tapestry crochet is similar to regular crochet, except that one or more yarns are carried while another is crocheted. The finished pieces look woven instead of crocheted. I immediately fell in love with the graphic patterns you can create with only the use of only double crochet stitches and lots of colour. As much as I like lacy, feminine crochet patterns (see my lacy coasters) I’m even more drawn to strong, sharp, repetitive designs like stripes, chevrons, diamonds and simple polka dots. Tapestry crochet lends itself to exactly that type of design.

There are some amazing things made with tapestry crochet. I love the shoulder bag, but I was blown away by the tapestry crochet vase by the tapestry crochet artist Caroline Routh!

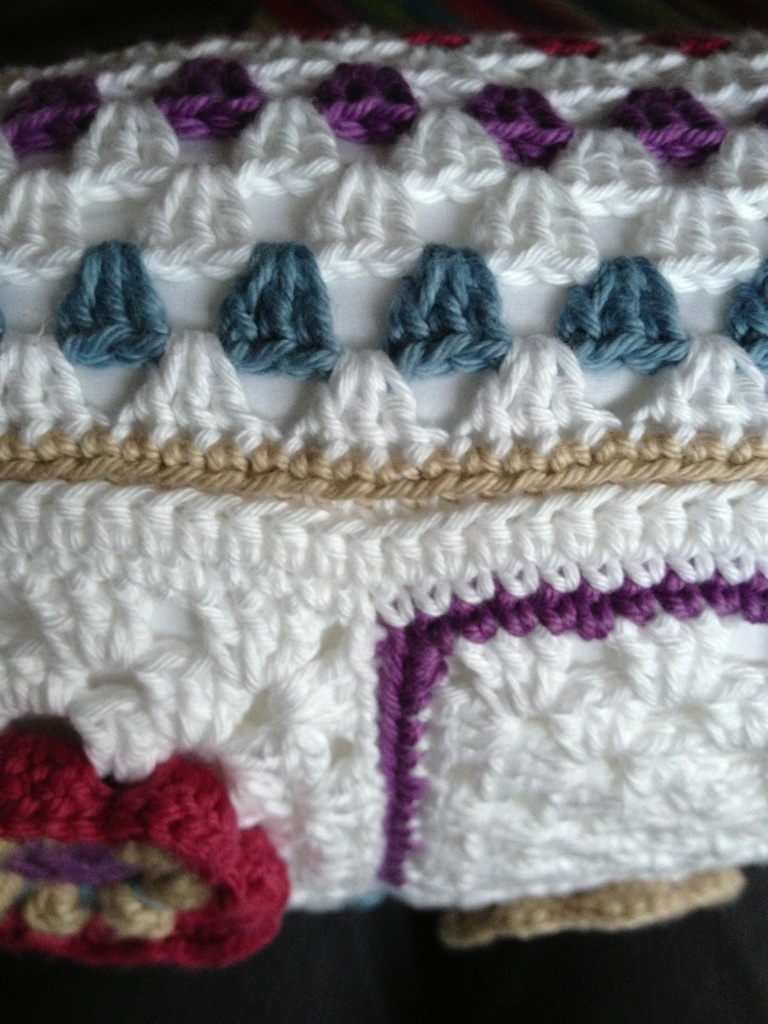
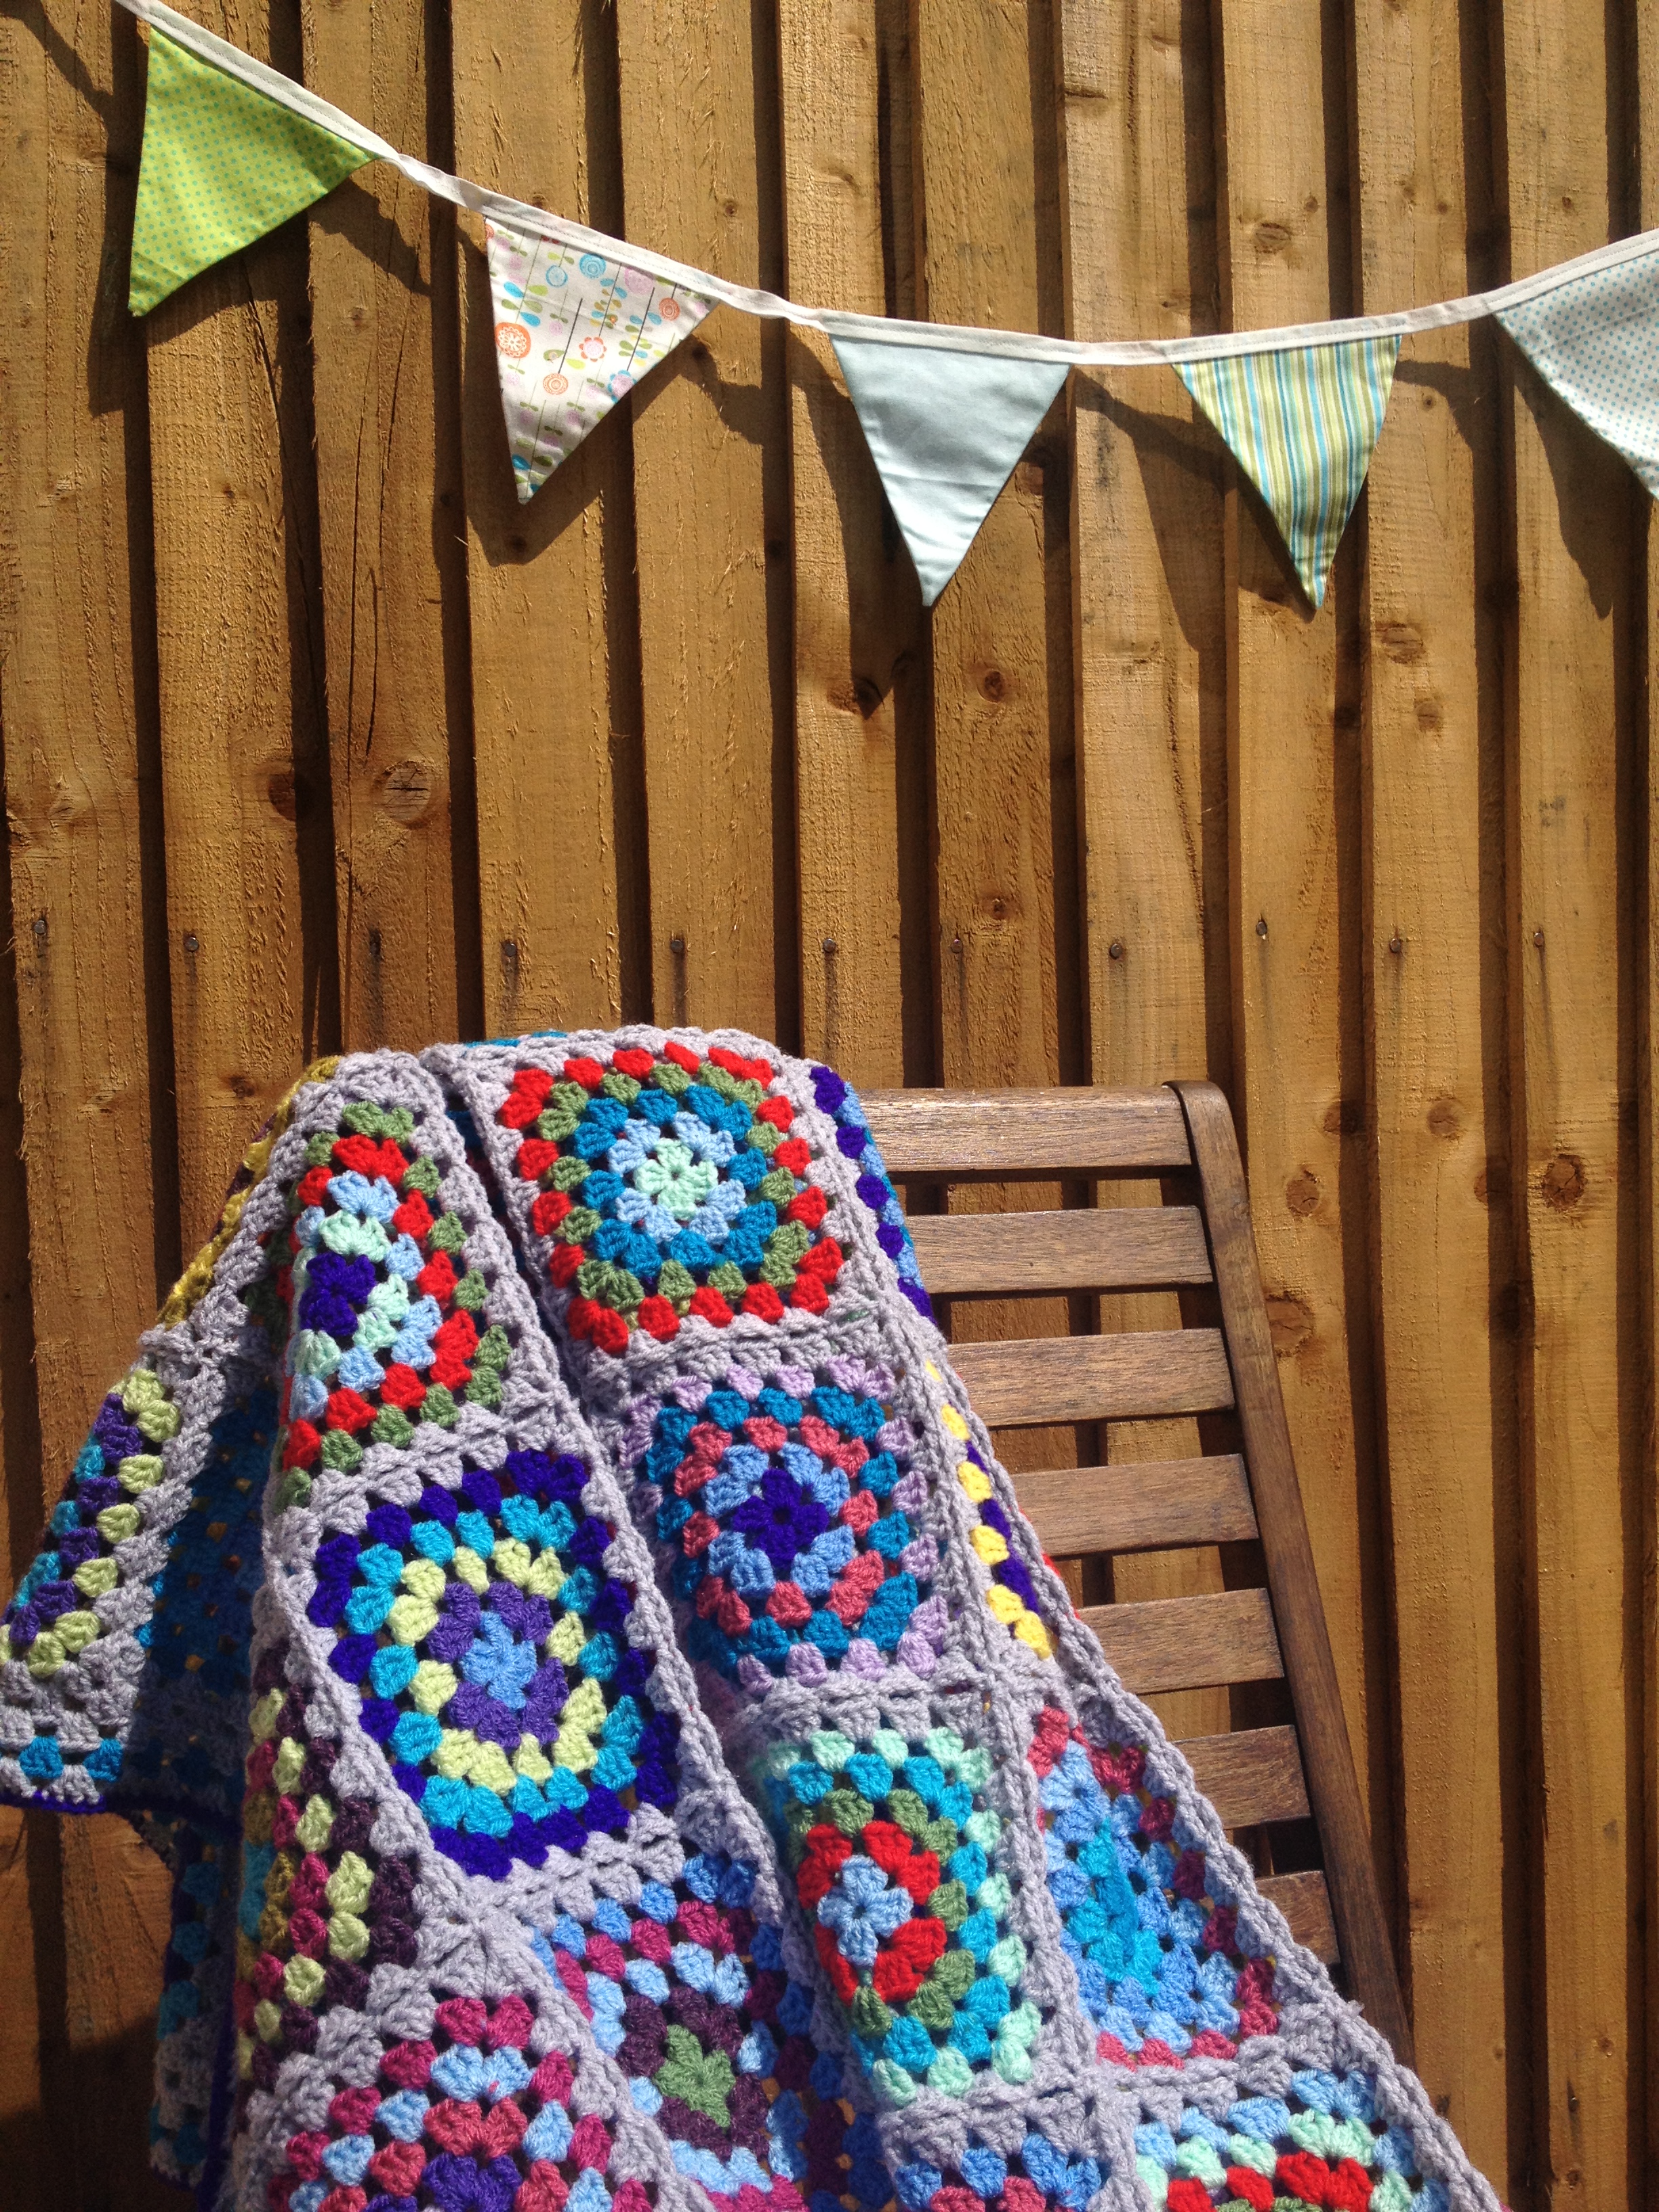
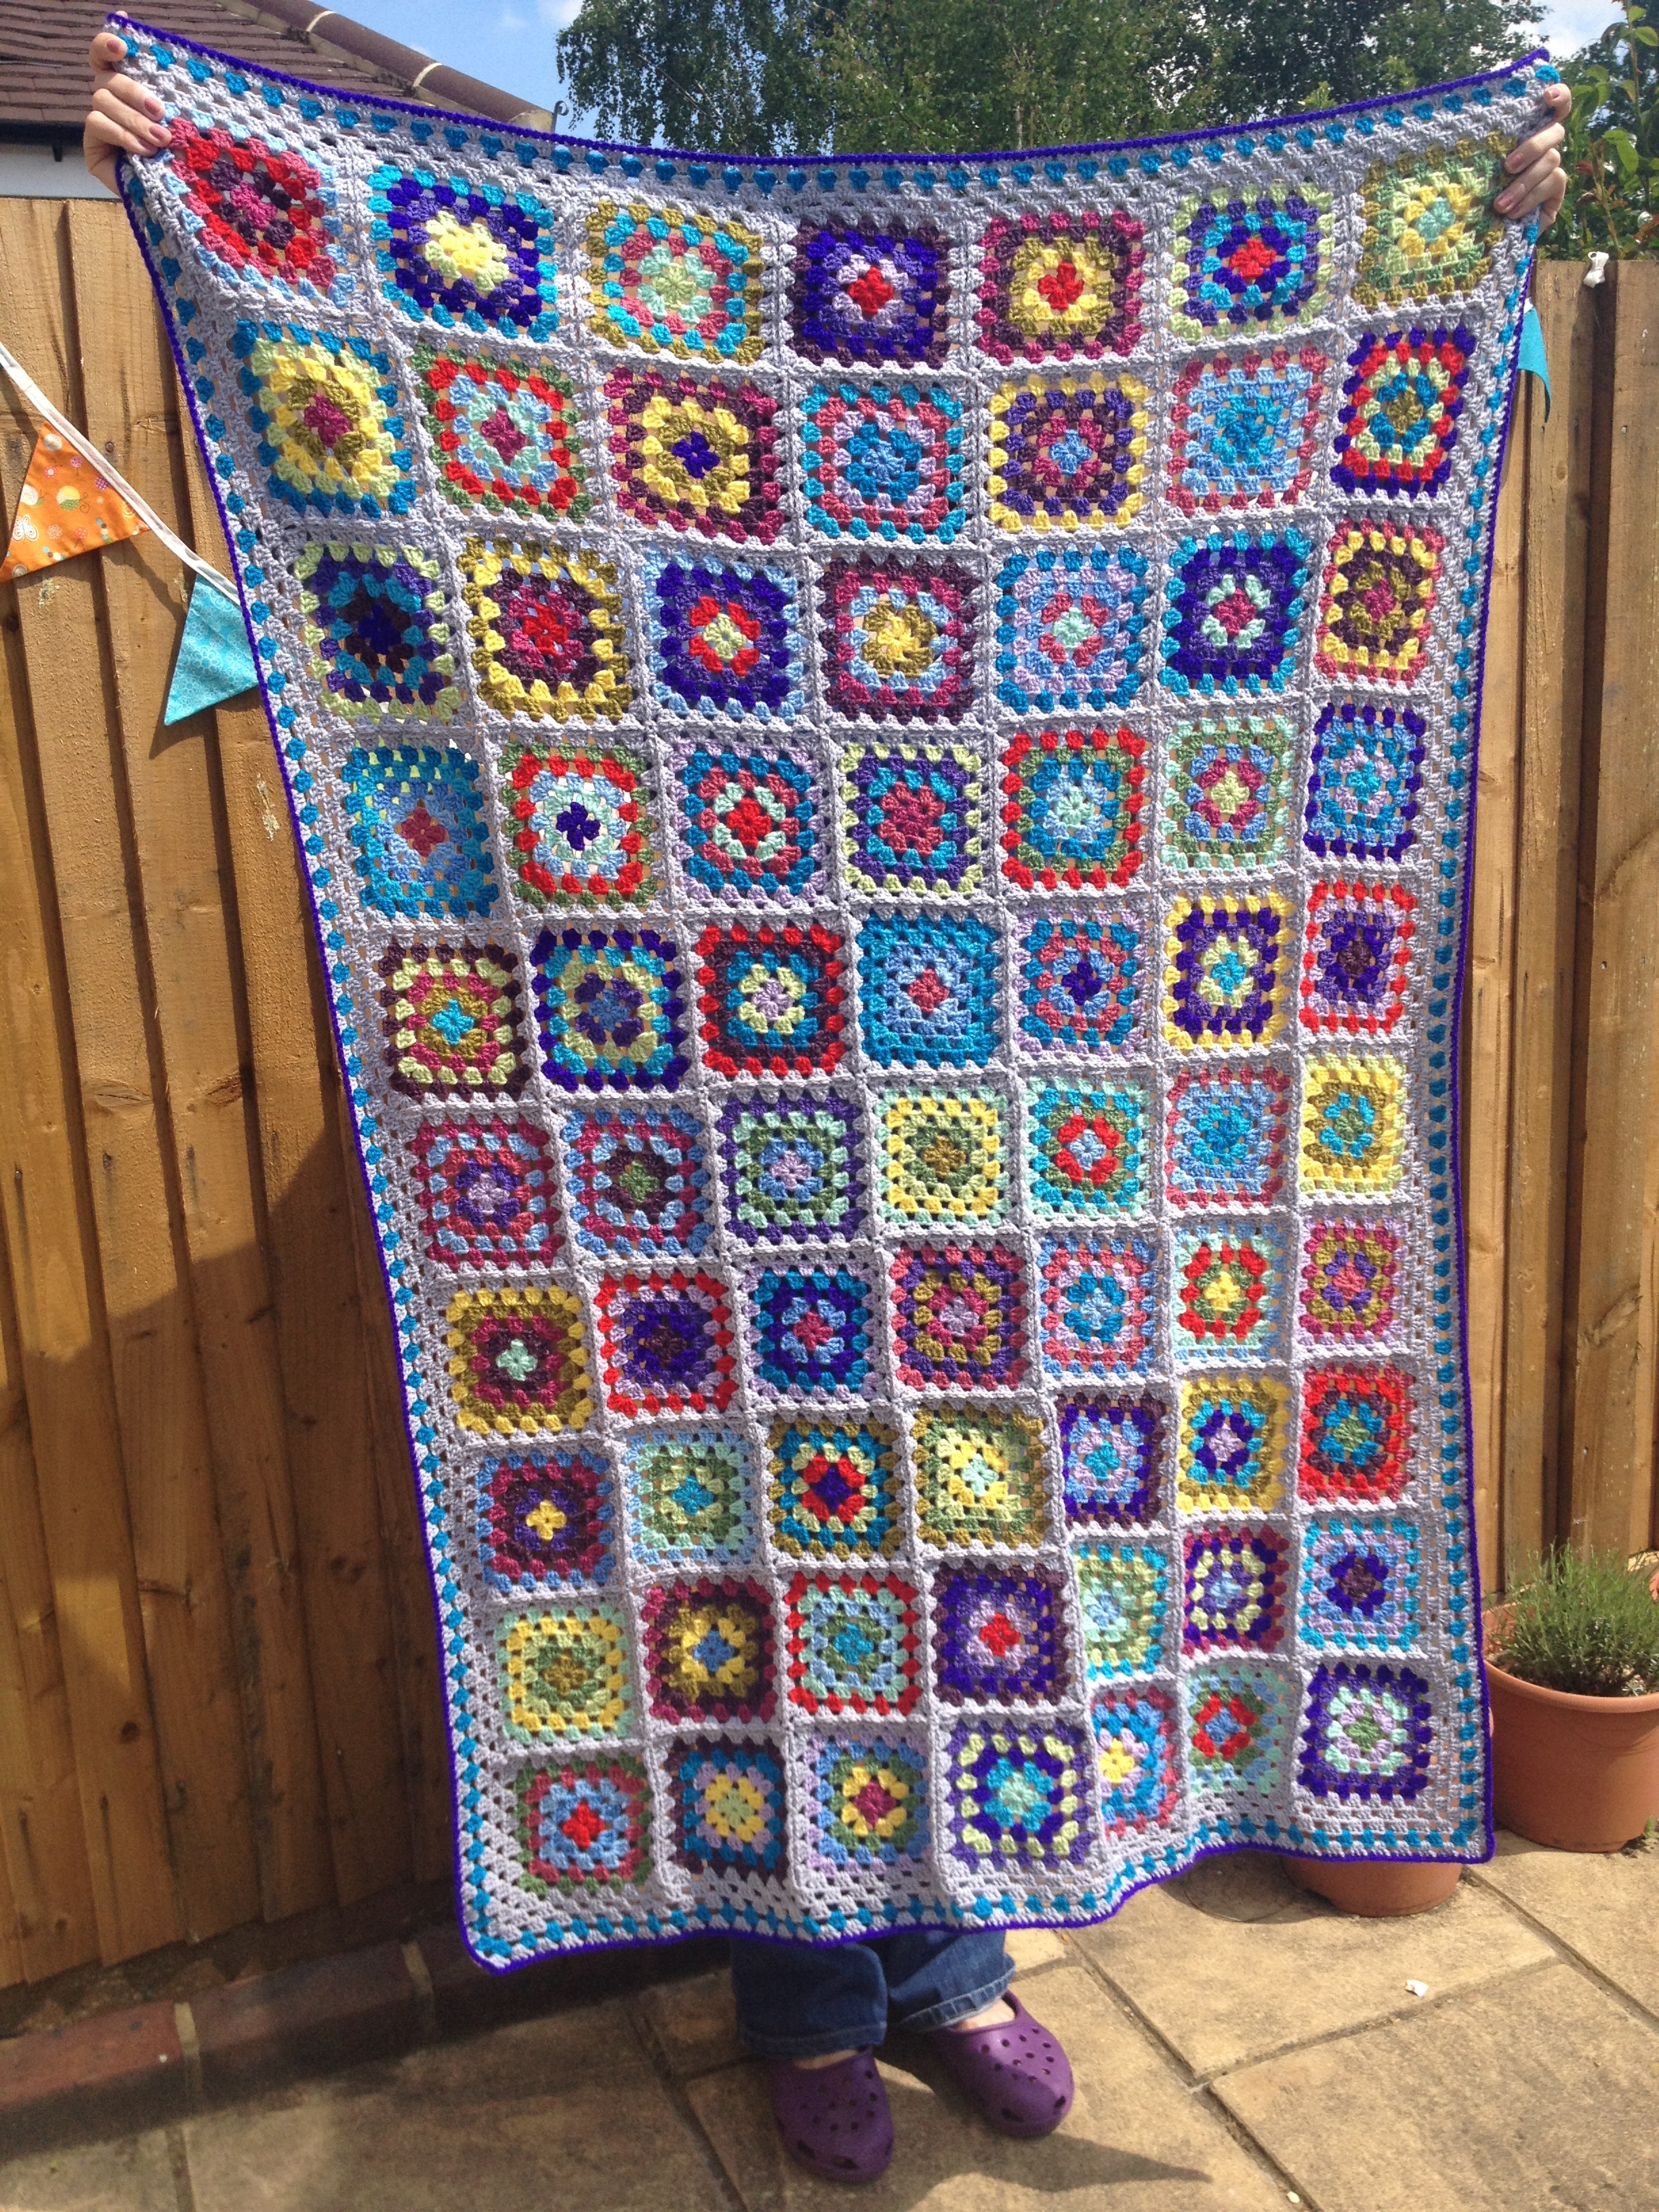
For a first time project, the Cozy Up tablet cover by Vicky Brown published in Simply Crochet issue six was ideal for me. There are only three colours and you just need to make a rectangle shape for the front, a simple back and then work the edges together.  I struggled a bit with carrying the yarn and when to change colour, but luckily the American website www.tapestrycrochet.com has an excellent tutorial. The trick with changing colour in tapestry crochet is to think ahead, because you need to change to the new yarn colour while you still have two loops of the incomplete double crochet stitch on your hook. It doesn’t take very long to get used to working this way but at the beginning the brain juices were almost boiling – tapestry crochet made a nice challenging change from crocheting granny squares.

The nitty-gritty of my laptop sleeve:

Pattern: Cozy Up table cover by Vicky Brown published in Simply Crochet magazine issue 6 (May 2013)

Yarn: Vinnis Nikkim cotton DK in Avocado, Lilac and Stone

Crochet hook: 3.5 mm

Modifications: I adjusted the size to fit my Macbook Pro and also added an envelope style flap to the back panel that folds over to the front. In stead of a solid colour back, I added stripes in Avocado and Lilac. I also didn’t use double crochet to join the two sides, but rather used overhand stitches to sew it together.

Front
Front
Back
Back


tapestry crochet laptop cover

The envelope style flap was easy to make. I just decreased a stitch on both sides of 10 rows. Now biscuit crumbs dust can’t get into the ports at the side.

tapestry crochet laptop cover

Isn’t this apple button absolutely the best? I mean really? An apple button for an Apple Macbook! And it’s green! I can’t even remember where or when I got it, but I thank the gods of crochet for sending it to me.

tapestry crochet apple button

IMG_6475

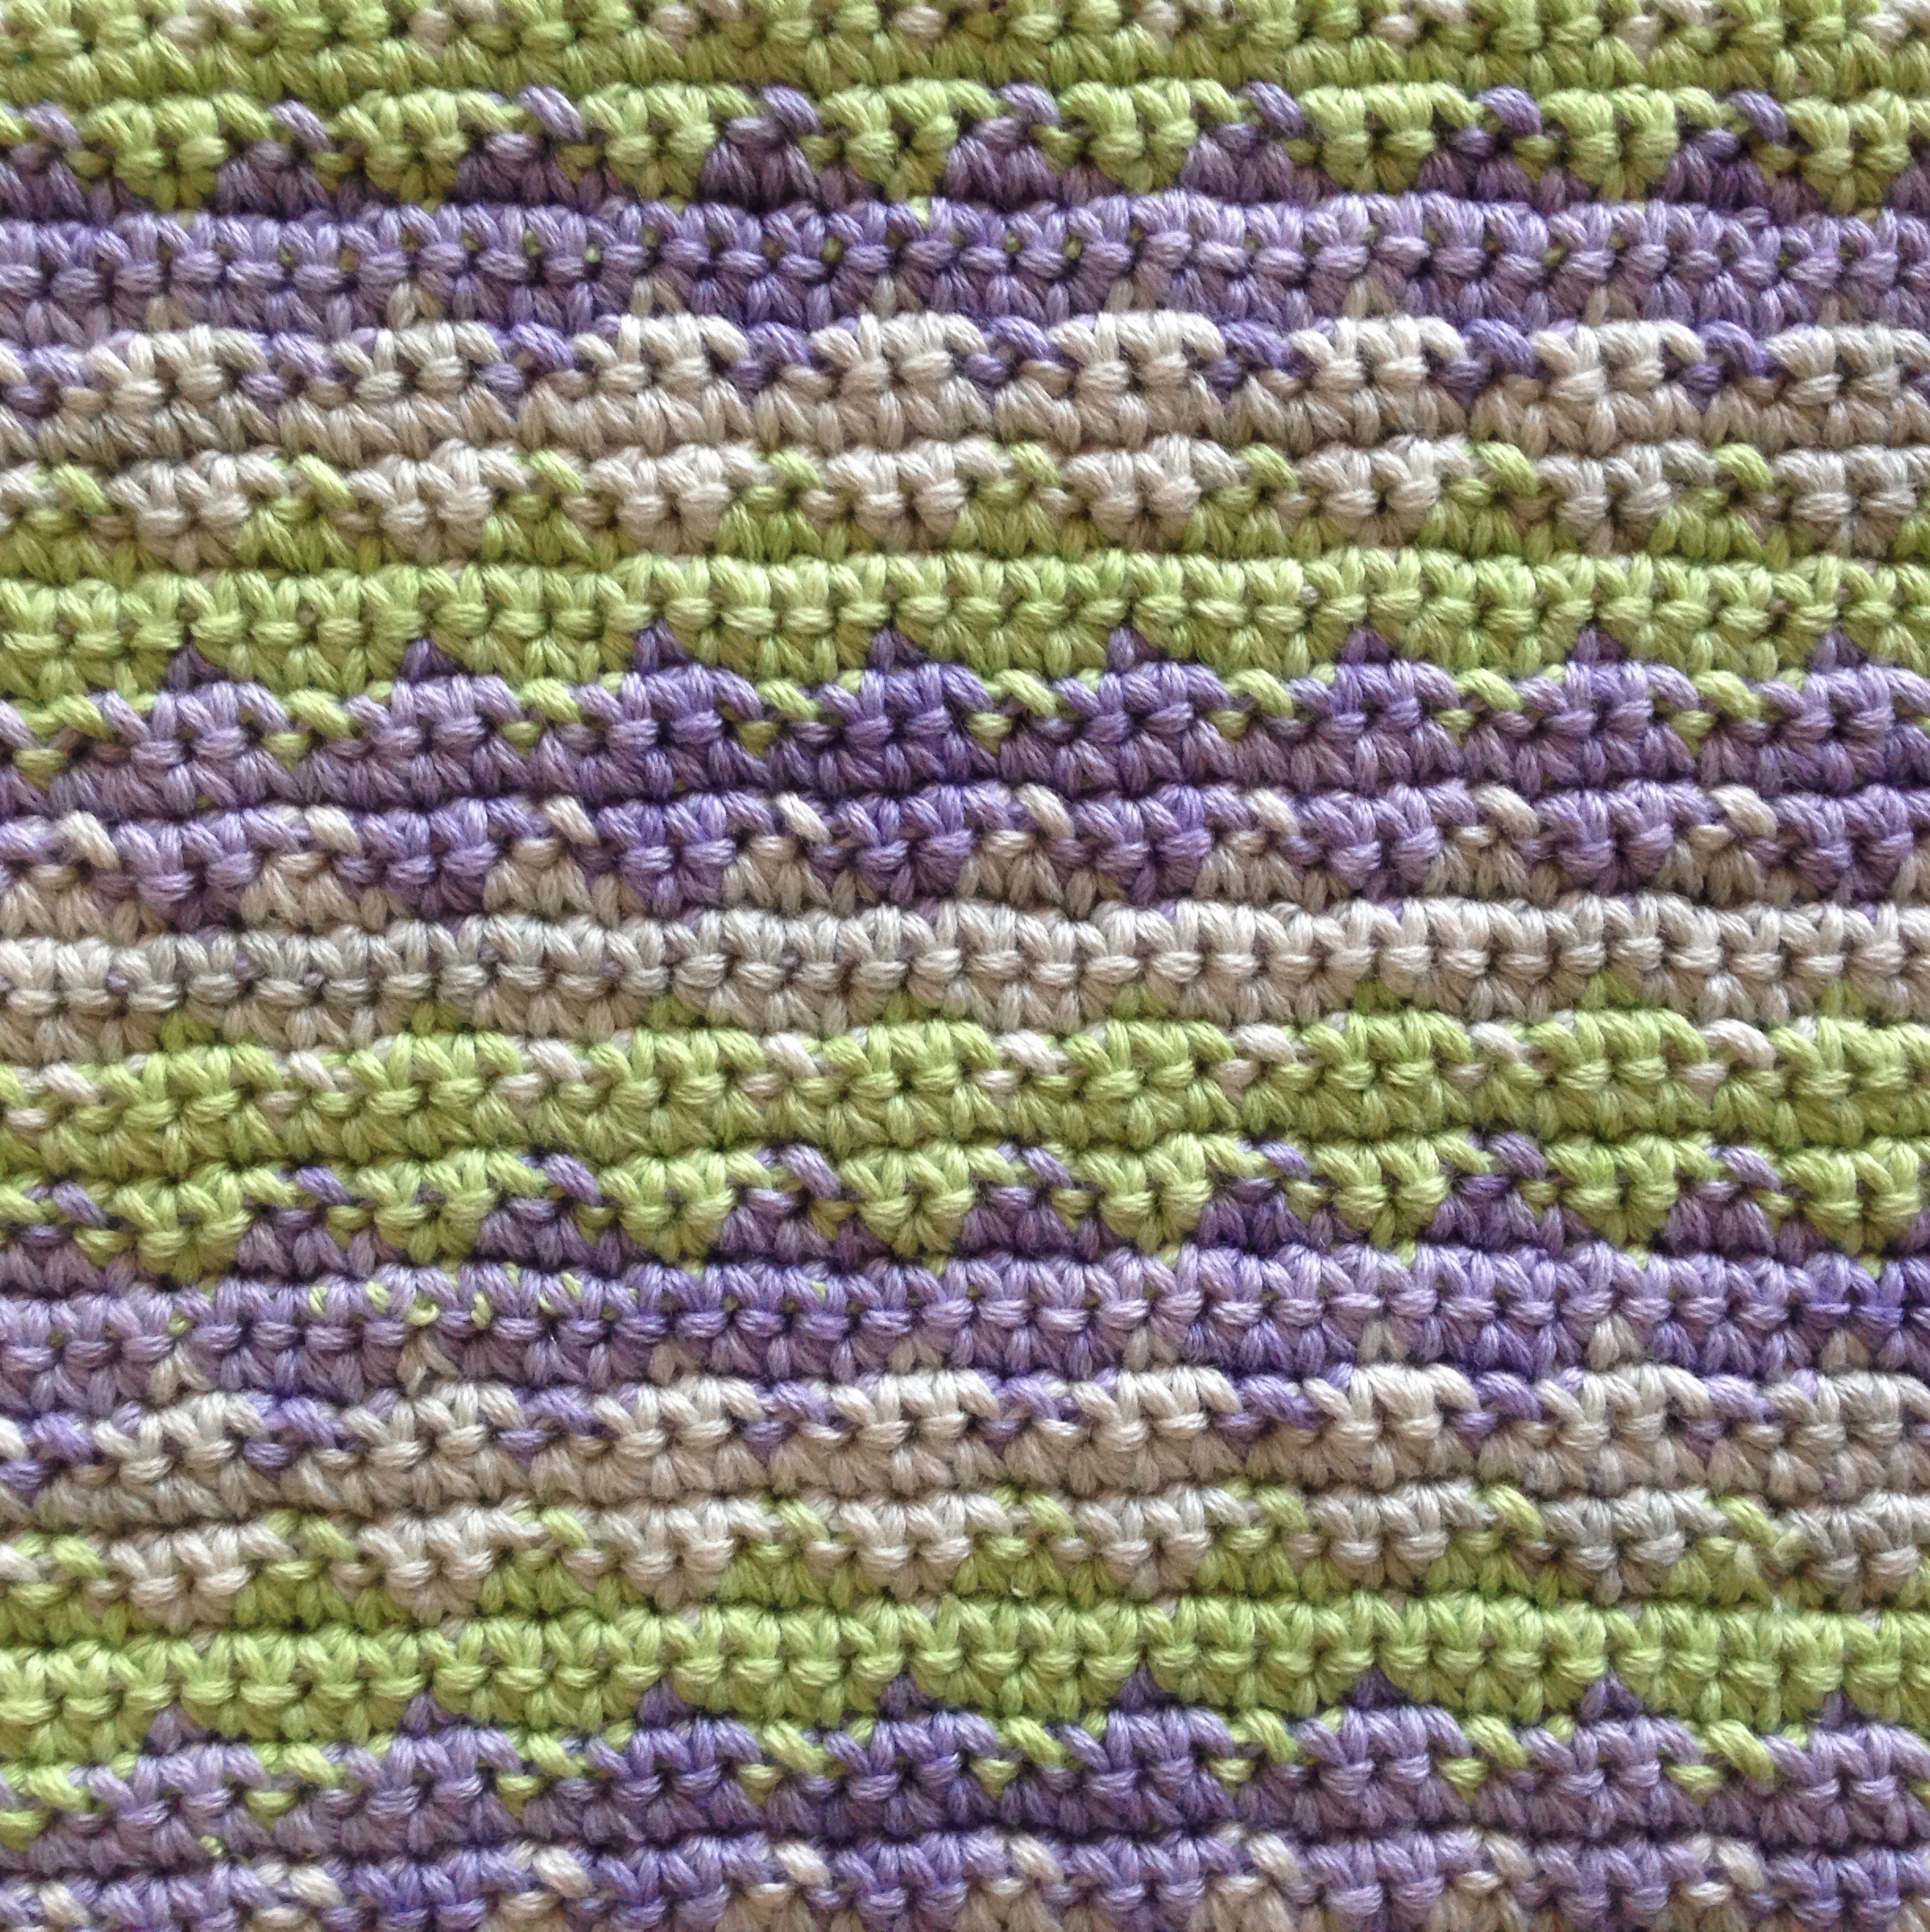
I use my laptop sleeve every day to keep the Macbook snug & protected and to keep the laptop from scratching my Office Behind The Door table. No, I lie. The table doesn’t need protection from scratches – I just like looking at the apple button and I want to use my laptop sleeve as much as possible. It’s so pretty and I concentrated so hard to make those diamonds!

If you haven’t guessed, I worked on this blog post over the Easter weekend. Wonder what gave it away? 🙂

Sunset Shades chevron scarf ta-daaaah

17 Friday Jan 2014

Posted by Natasja in My crochet, Ta-daah!

≈ 9 Comments

Tags

chevron, crochet scarf

Ta-daaah!! My Sunset Shades chevron scarf is done!!

sunset shades chevron scarf

I love the chevron design, the way the colours go together, the way one colour flows into the next. The scarf changes from pastel yellow to light pink, to peach, to light purple-pink, and also from lilac, to violet, to plum, to wine. These two groups of colours are separated by off-white and very light grey. I really like how it turned out and I’m quite proud of my Missoni-ish chevron scarf.

I made the scarf very wide so that even though its not extremely long, it covers my neck right up to my chin. No need to wind it around and around – once is enough to keep me snug and warm.

IMG_5252

It was a joy to crochet because although it’s only a plain and simple scarf, the colour changes kept it interesting and fun.

chevron scarf

I think the best thing about it, are the beautiful colours. I have really never seen anything like it, and even for a person who “doesn’t do pink” I really love it. I’ve blogged about this before, but I’ll just mention it again: my Mom gave me the yarn for this scarf. She chose the colours, and I just put them together in this sequence and thought up the chevron pattern. All credit should go to Mom.

IMG_5239

I think this is a great scarf. Because it’s cotton, it’s soft against my skin without being scratchy and the more I use it, the softer it becomes. I was a bit worried that a cotton scarf wouldn’t keep me warm, but it does! Because it’s so wide and crocheted in dense stitches, it keeps the cold out just like a woollen scarf would – but without the scratchiness.

The nitty-gritty for my Sunset Shades chevron scarf:

Pattern: My own pattern. I am in the process of writing it up. It will be on sale in my Etsy shop soon.

Crochet hook: 3.5 mm

Yarn: Vinni’s colours Nikkim (a 100% cotton hand-dyed cotton yarn) in Natural, Stone, Ballet Pink, Baby Yellow, Pink, Purple Pink, Lilac, Violet, Red Violet and Wine. All these shades, apart from Purple Pink and Wine are for sale in my Etsy shop.

Don’t forget the 10% discount code on Winkieflash blog for the first 10 people to buy Vinni’s Colours from my shop.  Seven people have already used the code , so only three more can get 10% off. 

Read Wink’s review, and find the code, here.

IMG_5250

Bring on the cold weather, I’m ready! In fact, I’m looking for excuses to wear the scarf indoors!

What do you think? Do you like it as much as I do?

Crochet mandalas ta-daaaah

28 Monday Oct 2013

Posted by Natasja in Crochet For Kidneys, My crochet, Ta-daah!

≈ 13 Comments

Tags

crochet

Mandalas, modern doilies, large coasters, call them what you like. They are all the rage right now and I’ve hopped onto that bandwagon. I’ve actually been on the wagon since September when I made the “vintage-style vase coaster” from Nicki Trench’s book which I reviewed here. I really enjoyed working in the round, making each round a different stitch and different colour. I love mixing things up, so these kind of patterns are right up my street. When I made that purple and white vase coaster I knew it was going to be used as a centrepiece on the tables at the Crochet for Kidney Research UK day on the 9th of November. Now I just needed to make five more so that I had one for each of the six tables.

Out of the blue I remembered seeing mandalas in Simply Crochet magazines. They were designed by Marinke a.k.a. Winkieflash, which I follow on Twitter and Instagram. Her mandalas would be perfect for my tables! I had to flick through all my copies of Simply Crochet magazine to find the two patterns. It was a task I thoroughly enjoyed – there are so many things I still want to crochet! *Note to self: page through your crochet books and magazines more often* Lots of post-it notes and folded page corners later, I eventually found Marinke’s mandala patterns in issues 5 and 7. I made copies of the patterns and took it, my purple and white yarn and 4 mm crochet hook with me on holiday.

Aaah, what bliss to be crocheting on holiday. Between going to the beach, afternoon naps, discovering narrow streets and feasting at seaside cafes, it took me two days to crochet the mandalas. You’ve already seen the video of me sitting on the balcony, weaving in the ends. If you missed it, click here to go to the YouTube video.

I couldn’t resist hanging my mandalas on the washing line in front of our holiday flat.  I don’t think anyone from the street noticed them, but I certainly couldn’t stop looking.

20131019-211345.jpgNow for the nitty-gritty of the mandalas.

Yarn: A mix of mostly Vinni’s Colours Nikkim and some Stylecraft Cotton Classique and  Rowan Handknit cotton

Hook: 4 mm

Pattern: Summer Hearts from issue 5 and Picots and Petals from issue 7 of Simply Crochet magazine. Marinke blogged about her patterns here. She designed six mandalas for Simply Crochet magazine, so there are more to come. Yeah!

Modifications made: I had to modify them all. Not because I didn’t like the pattern, but because I had to make the mandalas bigger so that they would be roughly the same size as the vintage-style vase coaster and in proportion with a 6 to 8 seat table.

Summer Hearts 1 – I followed the pattern exactely to the end, and then repeated rows 5 and 6 and did a final row of (UK) DC with a long DC between the fans:

20131019-212058.jpg

Summer Hearts 2 – I did rows 5 and 6 twice, left out row 11 (which is worked at the back of row 10) and then did the shells from row 6 again, finishing off with a final (UK) DC row:

20131019-212138.jpg

Picots and Petals 1 – In stead of making (UK) trebles in the second-to-last row, I made (UK) double trebles:

20131019-212106.jpg

Pictots and Petals 2 – In stead of making (UK) trebles in the second-to-last row, I made (UK) double trebles:

20131019-212117.jpg

Pictors and Petals 3 – In stead of making (UK) trebles in the second-to-last row, I made (UK) double trebles@

20131019-212128.jpg

And here they all are for the group shot. Pretty aren’t they?

20131019-212929.jpg

When you see these babies again, they will be in the centre of the tables in the Vera Fletcher Hall underneath a glass vase with purple flower.

Crochet balloons for a nursery

08 Sunday Sep 2013

Posted by Natasja in My crochet, Ta-daah!

≈ 17 Comments

Tags

balloon, crochet

20130907-173649.jpg

As if organising the Crochet for Kidney Research UK day isn’t enough, I’ve also been working of a very interesting custom order I received on Etsy. A lady emailed me the photo below mid August and asked whether I would be able to recreate the crocheted balloons hanging from the ceiling*. Say what?! Crocheted balloons for a nursery. No pattern. Only a photo to go by. Challenge accepted!

Pottery Barn crochet balloons in nursery

Once we had both done a bit of thinking, squinting closely at the picture, Googled a lot and did some number crunching, we came up with a plan.

I would use spherical polystyrene balls in three sizes (200 mm, 250 mm and 290 mm) as the top of the balloons. About three-quarters of the way down I will stop following the lines of the sphere and in stead crochet to a point which will form the bottom part of the balloon. In stead of ribbons, I’ll crochet three crochet chains for each balloon. We decided to make each balloon as textured and dense as possible so that the white polystyrene won’t show through. I was given creative licence with the design for each balloon.

I had a plan. Now all I needed was the pattern. There isn’t a pattern for “crochet balloons to hang from a ceiling in a nursery”. Imagine that. What I did find was Crochet Spot’s tutorial for how to crochet a sphere. This turned out to be all I needed. It was perfect. I obviously had to make adjustments and modify my balloons as I went.

20130907-173311.jpg
Shell stitches for the ivory, crunchy stitch and a diamond of bobbles for the white, and crunchy stitch for the beige balloon.
20130907-173408.jpg
20130907-173353.jpg
20130907-173341.jpg
A loop of invisible thread to hang the balloon from the ceiling.

If you hover over the photos in the above gallery, you will see more text that explains the designs. I used a mix of (US) SC, HDC, bobbles, shells and a fun stitch called Crunchy Stitch. I found Crunchy stitch in the Crochet Stitches Visual Encyclopaedia (there’s a link to the book on the right of the blog). Crunchy stitch is just alternating HDC and slip stitches. It gives a lovely texture.

You can see a short video of me crocheting the white balloon around the polystyrene ball here.

The white balloon was definitely the most difficult to make. I started off by using a DK yarn and spent a whole weekend trying to shape the top part, only to realise that I needed chunky yarn (to make it grow quicker, and to give me the texture I needed). As soon as I switched to the chunky yarn (which by the way has a lovely sheen that adds to the texture and looks great when the light falls on it) it was much easier. Getting the shaping right for the two smaller balloons also became easier. By the time I had reached the beige balloon I had this crochet balloon thing down!

The nitty-gritty of the crocheted balloons:

  • Yarn: 4 balls of White, 3.5 balls of Cream and 2.25 balls of Beige Wendy Supreme Luxury Cotton Chunky purchased at Loveknitting.com (If you shop at Loveknitting.com, just type in my name (Natasja King) in the space on the link asking if you’ve been “Referred by a friend?” in the checkout. If you do, you will receive a 15% discount on your first order!)
  • Hook: 6 mm
  • Finished sizes top to bottom: White: 41 cm, Cream: 39 cm, Beige: 36 cm
  • Polystyrene spheres: 290 mm, 250 mm and 200 mm purchased at Poly Craft Supplies

Up up and away!

20130907-173238.jpg

*The photo is from the Pottery Barn website. They couldn’t tell my client where to buy the crocheted balloons used in their catalogue photo, because it belongs to the person whose home the photo was taken in.

Granny Square In Bloom cushion

04 Sunday Aug 2013

Posted by Natasja in My crochet, My ramblings, Pattern, Ta-daah!

≈ 8 Comments

Tags

crochet, crochet cushion, crochet flower, free crochet pattern, granny square

You know that square motif I’ve been telling you about that had me so excited? Well, here it is. It’s called Granny Square In Bloom.

Granny Square in Bloom cushion.jpg

crochet flower granny square in bloom.jpg

I used the squares to make a cushion for my very good friend Liezel, as a birthday present (you can see her photography blog here).

She reads this blog and follows me on Instragram so I couldn’t post regular photo updates. I gave her the cushion yesterday which means I can finally reveal it to my lovely blog readers. The cushion was a huge hit! I’m so glad that I could make her happy with something handmade.

Liezel went home and took these photos of the cushion in it’s new home.

Liezel_Fourie Instagram crochet cushion collage.jpg

As you can see, she has a bird theme for the cushions on her bed. I wanted to stick to her theme, so I used three Red Robbin buttons. Aren’t they cute?!

red robin button.jpg

Nitty-gritty of the cushion:

  • Yarn: Stylecraft Cotton Classique in White, Rowan Handknit cotton in Ice Water, Raspberry, Linen and China Rose.
  • Crochet hook: 3.5 mm
  • Pattern for the front: Eight traditional granny squares of 4 rounds each in white, finished off with a row of SC. (Each of the four colours were used for two squares.)  Plus the eight 3-dimensional flower squares which are my own design. I call it Granny Square in Bloom squares. The pattern is available for free on the Photo Tutorials tab, in this blog post and also on Ravelry. I didn’t add a row of SC on the flower squares.
  • Pattern for the back: Traditional granny square of 19 rounds. Each colour round is seperated with two white rounds. I edged the granny square with SC in Linen.
  • Construction: The 16 squares which together forms the front, and the three side seams were sewed together with a slip stitch seam as described here on the Simply Crochet website. For the opening I slip stitch-joined up to the first shell on each side so that it would form neat corners.
  • Inner: Microfibre 16″ inner bought from Design-a-Cushions. Design-a-Cushions recommend purchasing an inner one inch bigger than your cover. I therefor made sure my covers were 15″ squared. Doing it this way gives you a perfect puffy cushion. I can highly recommend Design-a-Cushions. They are my favourite cushion inner supplier in the UK.
  • Red Robin Button: Natural Shell Zakka buttons that I bought on eBay from this seller.

crochet cushion seam.jpg

I thoroughly enjoyed designing the square, knowing that my friend will be the very first person to own something made in that design. Liezel, I hope you have the sweetest of dreams when you’re resting your pretty head on the cushion.

Lots of love

Jou maatjie, Natasja

Japanese V-neck ta-daaaah

29 Monday Jul 2013

Posted by Natasja in My crochet, Ta-daah!

≈ 24 Comments

Tags

crochet, Japanese crochet, wearable crochet

The V-neck top from a Japanese crochet pattern is finished! I’m wearing it today and I like it more and more with every hour that goes by. For it’s debut, I’m wearing it over a black vest, but I know it will look great over a longsleeved t-shirt as well.

Japanese crochet v-neck top

You probably notice the draping around the V of the neckline. Those folds are changing the whole time. It’s 14:30 now so I’ve been wearing the top for a couple of hours and it already looks softer. I used 100% cotton, so just like a denim jean, the longer I wear it and move around in it, the softer it becomes. This top is only going to get better!

I don’t always walk around like this, but I had to do it to show you the design more fully:

Japanese crochet v-neck top from back

I really, really, really, like my Japanese V-neck.  The only thing I don’t like, and feel I have to share with you in the spirit of full disclosure, is that the sleeves drop off my shoulders the moment I move my arms, and not in a sexy shoulder revealing way. Oh no. I completely lose a sleeve. Totally impractical, irritating and not pretty. My solution? Safety pins on each shoulder to pin the top to my vest.  As easy as that. (No way am I going to let hours of hard crocheting go to waste because of a minor wardrobe malfunction!)

Japanese crochet v-neck top

Nitty gritty of the V-neck:

  • Pattern: In Ravelry, the pattern is called #5 V-neck pullover. It’s designed by Eiko Matsumoto and published in Knit/Crochet With Ease – Seasonal Knits, also known as Easy Popular Knit and Crochet Wear. I bought the book on Etsy from Pomadour24. You can find the listing here.
  • Yarn: Patons 100% Cotton 4 Ply in Garnet, shade 1738. I used 4 and a quarter balls.
  • Crochet hook: 2.25mm
  • Modification: I made one modification: in stead of slipstitching the bottom 9 picots together to make the sides, I added another pattern repeat (but without the picots) to the bottom 12 picots on each side, thereby forming a very large armhole and widening the bottom of the top.  In the photo below you can see this modification. The side inserts don’t have picots on the bottom edge, and it also means that I don’t have a cute 3-picot grouping in the corners of my top because I used one of the three picots to kick off the rows of the side insert. No-one is going to notice the lack of picots in my sides, and it was more important to me to make the top fit around my hips, than sticking to the pattern.  A lot of ladies on Ravelry also had trouble with getting the top to fit around the hips. I could have added a third pattern repeat all around like they did, but that would have 1) made the top longer and 2) made the sleeves longer which would have added weight and pulled them down my shoulders even quicker than it does now. My solution was to do these side inserts – it fixed my problem, but without creating more problems.

Japanese crochet v-neck top side inserts

Wet blocking is highly recommended for this pattern. As with anything lacy it opens up the crochet stitches and gives the top shape. I can’t believe I’m saying this, or that I did it, but I pinned each picot seperately. There were hundreds! Looking at the top now, I’m very glad I did. Those picots on the arms and the bottom add the detail you need to round it all off.

Japanese crochet v-neck top

The Easy Popular Knit and Crochet Wear book is full of the most beautiful Japanese crochet patterns. This is my second top from the book. Out of the two, I like this one the most. I already have my eye on a waterfall cardigan. I’ll even use the same Patons 4 ply cotton yarn.

I think as a rule Japanese patterns are quite boxy and straight up-and-down. This means they are easy to make because they consist of repeating motifs or they’re basically just one big rectangle (like this one), so us ladies with a more womanly shape, need to make modifications. That, or just embrace the floaty, square shapes. Floaty tops can work well when paired with a tight-fitting top underneath and balanced out with a straight / slim leg trouser. (Oooh, check me out – giving fashion advice! Hahahaha.)

One last thought: I love this V-neck top, I loved being challenged by the crochet diagram, I loved using Patons cotton 4-ply and most of all, I love that wearing this V-neck top makes me feel unique and a tiny bit special.

Terrific Tuesday

04 Tuesday Jun 2013

Posted by Natasja in My crochet, Ta-daah!, Terrific Tuesdays

≈ 5 Comments

Tags

crochet, crochet thread, Japanese crochet

On a Monday I can still remember the fun I had over the weekend, Wednesday is the middle of the work week, on Thursday I start getting hopeful and on a Friday I can taste the weekend. But what about a Tuesday? It’s so…. just there. Weekend memories are too far away and the upcoming weekend might as well be a year away.

What we need is a bit of colourful inspiration to get us going on a Tuesday, don’t you think? A pretty picture, beautiful scenery or colourful imagery. Yup, that’ll liven up Tuesdays and turn it into a terrific day!

From now on I will go through my photos and Pinterest likes every Tuesday and find us a pretty picture to add colour and joy to the day.

xxxxxx

crochet coaster

crochet coast

Today we have two pictures. Lucky us!

What you see here is a crochet coaster that I made as an extra little something for the South African lady that commissioned the lace crochet basket. The basket looked so sad and lonely, and she is such a lovely lady, I just had to make her something extra.

Nitty gritty of the coaster:

  • Pattern: Round Coaster by Sachiyo Fukao from Kuuto! Japanese Crafts Lacy Crochet (the lace basket is from the same book)
  • Hook: 1.5 mm
  • Yarn: Coats Aida 10 in light grey to match the basket and DMC Coton Perlé  8 in shade 932 for the blue edging
  • Time spent: 30 minutes

I’m really starting to enjoy working with crochet thread and a teeny tiny crochet hook. I think it’s because I know this is how my great grandmother, who passed away when I was a little girl, crocheted. Whenever I use crochet thread I always think of her and imagine what life was like the last time she used Coats Aida thread. I distinctly remember the towers of Coats Aida thread in her room. My grandmother always had to buy it for her from OK Bazaars (the, then, John Lewis of South Africa.) I can’t remember Aggie ever using bright colours, but I was certainly drawn to the bright balls on the shelves of OK Bazaars. (Not much has changed then.) What she did have was an amazing tin of brightly coloured buttons which I adored. Now I keep my buttons in a glass jar and just like when I was a little girl, I can play with and admire then for hours.

I may use an iPhone to take photos of my crochet, use the internet to tell hundreds of crocheting strangers about what I do, buy my crochet thread online and use a Japanese pattern, but the basics of that which binds Aggie and I are the same. I have a bond with Aggie through crochet, and I love it.

Granny square blanket Ta-daaaah!

30 Thursday May 2013

Posted by Natasja in My crochet, Ta-daah!

≈ 19 Comments

Tags

crochet, crochet blanket, granny square, granny square afghan

granny square blanket with birds

All done! Nicole’s granny square blanket is ready to adorn the new couch in her new home. I had a great time making this granny square blanket and I’ll do it again in a heartbeat!

granny square blanket

The border had to round off the blanket and be understated enough not to distract from the granny squares. I didn’t do anything fancy; just 4 rounds of shells and a SC row, but I included two colours. Picking only two colours out of 15 was tough! I changed my mind a hundred times. Even when I had settled on two colours, I still had to decide which one to use for the shell row and which for the SC row. So many choices! In the end John helped me settle on bright turquoise and bright purple. We worked out that the blanket looked best with the darkest colour for the absolute final row so that narrowed things down quickly.

granny square blanket border

Here you can see the blanket in its full glory. Do the rounds of each granny and the square arrangement look random? I planned it that way you know 😉

granny square blanket

The nitty gritty of the blanket:

  • Yarn: Sirdar Hayfield Bonus DK colour pack from Deramores. I used all the colours in the pack, except Pink. The grey is Sirdar Hayfield Bonus DK in shade 814 – Light Grey Mix. The Deramores pack is a brilliant idea and the key to the success of this blanket I think.
  • Hook: 4 mm
  • Pattern: 70 traditional granny squares consisting of 6 rounds each, arranged 7 wide x 10 long. The 6th row of each granny is done in Light Grey.
  • Joining method: My Rose Valley’s Join-as-you-go method.
  • Border: Two rows of granny stripe shells in Light Grey, a row in Bright Turquoise, a row in Light Grey and then finally a row of SC in Bright Purple. To get the border to lie flat, I used Bunny Mummy’s technique that she explains here.  I also followed Lucy’s tip on steam blocking acrylic yarn so that the final SC row wouldn’t curl up. It worked liked a charm!
  • Finished size: 140cm x 96 cm
  • Time spent: I started on the first Bank Holiday Monday in May, and finished on the second Bank Holiday Monday in May, so 22 days.

Liezel and I will be meeting Nicole on the 15th of June to hand over the blanket. Liezel came along because it was through Liezel’s Instagram feed that Nicole found me and asked me to crochet the granny square blanket for her. I’ve never met Nicole, and Liezel has only met her once. Can you believe it?! The power of Instagram, iPhones and mutual friends is a thing of beauty!

Nicole, I hope the love and joy in each crochet stitch will bring you years of snuggly happiness and blessings in your new home.

Atlantic Waves ripple blanket Ta-daaaah!

08 Wednesday May 2013

Posted by Natasja in My crochet, Ta-daah!

≈ 22 Comments

Tags

Around the corner crochet, blanket, crochet, crochet blanket, crochet border, crochet chart, crochet pattern, ripple

Ooo, wee this ta-daaah post has been a very long time coming. It’s been a draft post since February 2013! Shock horror. Hopefully you will understand why I have been hanging on to this one for so long, when you hear my excuse reasoning.

You see, the Atlantic Waves ripple blanket is inspired by the sea and made for someone who loves the sea. Hence, it is only fitting that I should photograph it on a beach of some sort. Seeing as the English weather have been grey and cold for, what feels like, a million years, I couldn’t go to the beach to photograph the blanket.

Luckily I have been on a South African holiday for a week…. my family is from Cape Town which means we are surrounded by water and encased in blue skies and sunshine…. and the recipient of the blanket is my Dad…. so I managed to finally take the photos just a few days ago!

There’s just a slight problem. My Dad and I went on a roadtrip to Cape Agulhas (where the Indian and Atlantic oceans meet) on Wednesday morning. We drove the whole day and was only just able to catch the last rays of sun at the southern most point of Africa.

That meant that the next day had to be the day of The Seaside Photoshoot. That was also the one day out of my 10-day holiday that it rained. It basically looked like Britain. Gggggrrrrr. Hey-ho, my Dad and I now have a good story to tell about The Wet And Windy Photoshoot. Here you can see me, wind-swept and wet taking photos of his blanket. Oh the things you do in the name of crochet!

IMG_1282

More about the blanket.

Almost everyone that crochets knows Lucy of Attic 24’s easy ripple blanket. Lovely at it is, I didn’t want to make a Lucy ripple, but I did want to make a ripple. The term “ripple” or “wave pattern” always evoke images of water, the sea, waves breaking and water receding against a shoreline to me. It just felt right that I should use this pattern for my Dad’s blanket seeing as he loves the ocean and he loves blue. 

I wanted my ripple / wave pattern to be a little different and special, with texture and lots of interest. I paged through the Crochet Visual Encyclopedia and immediately fell in love with this pattern.

Atlantic wave crochet pattern

Guess what this ripple pattern is called. Atlantic Wave! The perfect pattern for my sea theme ripple blanket! The raised Fpdc adds the texture I was looking for and enhances the 3D effect of my dark to light to dark colour sequence. (It amazes me that they used a green yarn to demonstrate a sea themed pattern… strange don’t you think?)

To strengthen the sea inspiration, I used shades of blue ranging from navy to powder blue, and cream. I didn’t want the cream and navy to be next to each other as the colour contrast would draw too much attention, so I decided to go from dark to light and back to dark etc. That way I get a beautiful colour rhythm, gradual colour changes and a 3D optical illusion.

In my mind the cream is the sea foam and the blues represent the ocean as it changes from light blue just behind the sea foam, to navy at the horizon.

So here are the photos of my Atlantica Waves ripple blanket, taken with the Atlantic Ocean in the background!

Atlantic waves ripple crochet blanket

crochet ripple blanket

ripple crochet blanket

I think this ta-daaah post was worth the wait. Nevermind the wet, stringy hair and cold feet.

The nitty gritty of the Atlantic Waves ripple blanket:

  • Pattern: Atlantic Waves by Robyn Chacula
  • Yarn: Stylecraft Special DK in Midnight, Royal, Aster, Cloud Blue, Cream
  • Crochet hook: 5 mm
  • Border: No. 39 from Around The Corner Crochet Borders by Edie Eckman. It was the perfect border for this blanket – it even has a Treble, just like the ripple pattern!

Atlantic waves ripple crochet blanket

The blanket is now safe and sound (and out of the rain) on my Dad’s bed. Just in time for the South African Winter.

Dear Husband and my Dad really like the blanket. John like it so much that he actually tried to get me to not give it to my Dad: “He doesn’t know he’s getting the blanket. It could just stay here with me.” He really enjoyed “test driving” the blanket again and again and again 😉 It’s obvious that John would like his own blanket….. bring on Autumn 2013 – I’ll be hooking my husband a blanket. I already have a pattern in mind. As you do.

Crochet baskets

15 Monday Apr 2013

Posted by Natasja in My crochet, Ta-daah!

≈ 17 Comments

Tags

crochet, crochet thread, Japanese crochet

In October 2012 I blogged about the great selection of Anchor crochet cotton I won. In that post, which you can read here, I said that I would use the crochet thread for a cell/mobile phone cover, a basket and a doily. I haven’t got round to the doily yet, I did make the cell/mobile phone cover but before I could photograph it for you I lost it (read: fell asleep on the train with the cover on my lap and jumped up when the train got to my station), and today I’m showing you the basket.

The basket is not big, and it’s shallow, but I think that’s a good thing. Working with crochet cotton I don’t think the sides would have been able to stand up if there were any more than 3 rows.

crochet lace basket

I especially love the little handles on the sides. You need very small buttons though!

crochet lace basket

It was such an easy pattern and pretty result, that I ended up making two.

crochet basket carnation crochet hookcrochet basket carnation

crochet basket carnation crochet hook

These shallow crochet baskets will be perfect for keeping odds & ends together. I can see it on a table in your hallway for the car keys, on a dresser for perfume bottles, or the bathroom for the handwash and hand lotion. You can see it too can’t you? Yes, I know you can! If you want to make one (or two) for yourself, here is the nitty-gritty:

  • Pattern: Lace Baskets from the Kyuuto! Japanese Crafts! Lacy Crochet book.
  • Hook: 1.5 mm
  • Yarn: Aida 10 in silver grey and Freccia 6 in shade 01442
  • Modifications: For the silver grey basket I had to add an extra round before starting with the sides, as the crochet thread is thinner than the Freccia 6 and I wanted my baskets to be the same size.

I’m giving these baskets away to friends on foreign shores so my desk still needs a basket for post-it notes and pens. I think I’ll make my one in shades of green. Striped!

← Older posts
Newer posts →

Enter your email address to follow this blog and receive notifications of new posts by email.

Join 2,706 other subscribers
Follow crochetime on WordPress.com

Follow on Bloglovin’

Social

  • View NatasjaKing’s profile on Instagram
  • View Natasja King’s profile on Pinterest

The eBook I wrote

Recent Posts

  • Edward’s Crochet Imaginarium and two pink monsters
  • Review of How To Crochet book by Mollie Makes
  • Buttercup knit and crochet cardigan
  • Kimono Cardigan
  • The Sky is the limit

Categories

As seen on TV Book reviews CAL Camping Crochet For Kidneys Etsy Etsy seller interviews Folksy GIF In the press Knitting Markets My book My crochet My knitting My ramblings Other people's crochet Part 1 Part 2 Part 3 Part 4 Pattern Photo Tutorial Positive Thinking Ta-daah! Terrific Tuesdays Video Watch me crochet Wednesdays Yarnbombing

Instagram

No Instagram images were found.

My designer profile

Blog at WordPress.com.

  • Follow Following
    • crochetime
    • Join 718 other followers
    • Already have a WordPress.com account? Log in now.
    • crochetime
    • Customize
    • Follow Following
    • Sign up
    • Log in
    • Report this content
    • View site in Reader
    • Manage subscriptions
    • Collapse this bar
 

Loading Comments...
 

    Privacy & Cookies: This site uses cookies. By continuing to use this website, you agree to their use.
    To find out more, including how to control cookies, see here: Our Cookie Policy