
Today I’m sharing a super easy crochet placemat pattern with you. You’re probably thinking that placemats are very boring right? Boring and practical. Who wants boring and practical? Not me! I want interesting and different, so I added a bit of cross stitch. Not just any cross stitch, no I added an exact replica (minus one tiny prongy detail) of the King Household’s knives and forks!
Check it out.

I love it! With these placemats your table is always set even if you eat with your hands. How very civilised.
 So how did I do it? It’s dead easy.
To make the placemats you will need double knit cotton in three shades and a 4 mm crochet hook. I used Stylecraft Classique Cotton DK in Azure and Soft Lime and Rowan Handknit Cotton in Mist. Sadly Mist has now been discontinued but you can use white or any light grey yarn.
My placemats are 30 cm x 45 cm. The green one is worked in trebles and the blue placemat in half trebles. To achieve this size, I worked 33 rows of trebles and 43 rows of half trebles. The foundation chain for the green treble square was 54 chain stitches (51 plus 3 for the turning chain) and 53 chain stitches (51 plus 2 for the turning chain) for the turquoise half double crochet square. In both cases I did the big square first and then joined the other colour to the top and the bottom and worked 10 rows of double crochet. I don’t want to call it a pattern, because it really isn’t and you will make your placemat to fit your table / breakfast bar / lap tray. Use my rows and chains as a guide.
I may not have written up a proper pattern, but I would like to pass on some handy tips for you.
HANDY TIP 1: place a stitch marker in your first and last hdt or tr. That way you will know where to insert your hook for the next row and wont accidentally create extra stitches on the sides. In patterns where the turning chain counts as a stitch (for these placemats I didn’t count the turning chains) you will place the marker in the top chain of turning chain. So if you are working in hdt, place the stitch marker in the 2nd chain, and for a trb place it in the 3rd chain. Stitch markers are, I dare say, essential where turning chains are to be counted as stitches. I think apart from my crochet hook en scissors, stitch markers are probably my most valued crochet tool.

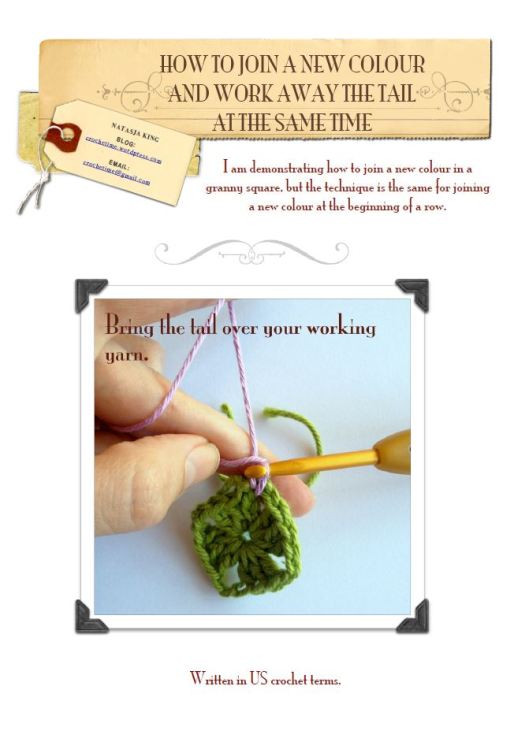
HANDY TIP 2: to save you from weaving away the tail end when you join the new colour for the double crochet side panels, flick the tail end of the new colour over your working yarn as you make the stitches. The tail end will magically grow shorter and eventually disappear, yet be safely encased within each stitch. It’s a very clever way of halving the tail ends you have to weave away! At the same time you can crochet over the tail of the old colour. This method saves you from having to weave away two tails. Score!
Here’s a video showing you how I do it.
Once the crocheting is done, you’ll want to get on to the cross stitch bit, but before you can cross stitch on crochet you have to block the piece – that’s the HANDY TIP 3. If you do it afterwards you run the risk of the cross stitch design going all skewy. The double crochet panels will naturally want to curve and it will be worked tighter than the rest of the placemat, so blocking really is essential here.
So how should I block you ask? It depends on what fibre your yarn is made of. If your fibre is artificial, like acrylic: 1) pin the piece in the shape you want it to be onto a couple of towels on top of your ironing board, wrong side facing up, 2) cover with a damp cloth and then 3) hover with your steam iron over the cloth. Do not let the iron touch the cloth. All you want is a bit of steam to set the shape. Also don’t hover very long – a few seconds will do. If it’s a natural fibre like cotton or linen: 1) dampen the crochet, 2) spread it out on a foam board or layers of towels right side facing up, 3) stretch and lightly tug the crochet until it’s perfectly round or square or whatever shape it should be. Then 4) pin it and 5) let it dry over night. I used cotton for my placemats so this is the method I used. 
If you’re wondering about the red lines on my foam blocking mat, they were drawn on by me with a Sharpie on a wintry Sunday afternoon a couple of months ago. It took the whole afternoon and was a very boring job, but I’m really glad I took the time to do it. The point of blocking is to get the edges of your crochet straight, so to me it makes sense to have straight lines on the blocking board. (Although looking at the photo I didn’t really follow those lines very well did I…?)
Once blocked you are ready to embroider.
You will need a piece of double crochet to embroider on. Cross stitch onto crochet can only really happen on double crochet stitches. The dense texture and evenly spaced short stitches replicates Aida (the fabric used for cross stitch) perfectly. As an added bonus, when you make double crochet stitches in double knit yarn, your stitches will almost certainly be 5 mm squared, which makes it perfect for designing with quadrille paper. Which brings us to the next item you will need: quadrille paper (it’s like graph paper, but the squares are all 5mm squared). You’ll also need a pencil and of course your eating utensil of choice.
Using a pencil, trace the outline of your knife and fork onto the quadrille paper.

Now you fill in each square with a x. Your knife and fork shape will not follow the straight lines, but that’s where creative licence comes in: in conventional cross stitch you also use half stitches but for cross stitch onto crochet, that’s tricky to do, so whenever the line goes through less than half of a square, ignore that square. Here you can see the outline of my knife encase three squares (two full ones and a half), but I only created two cross stitches.
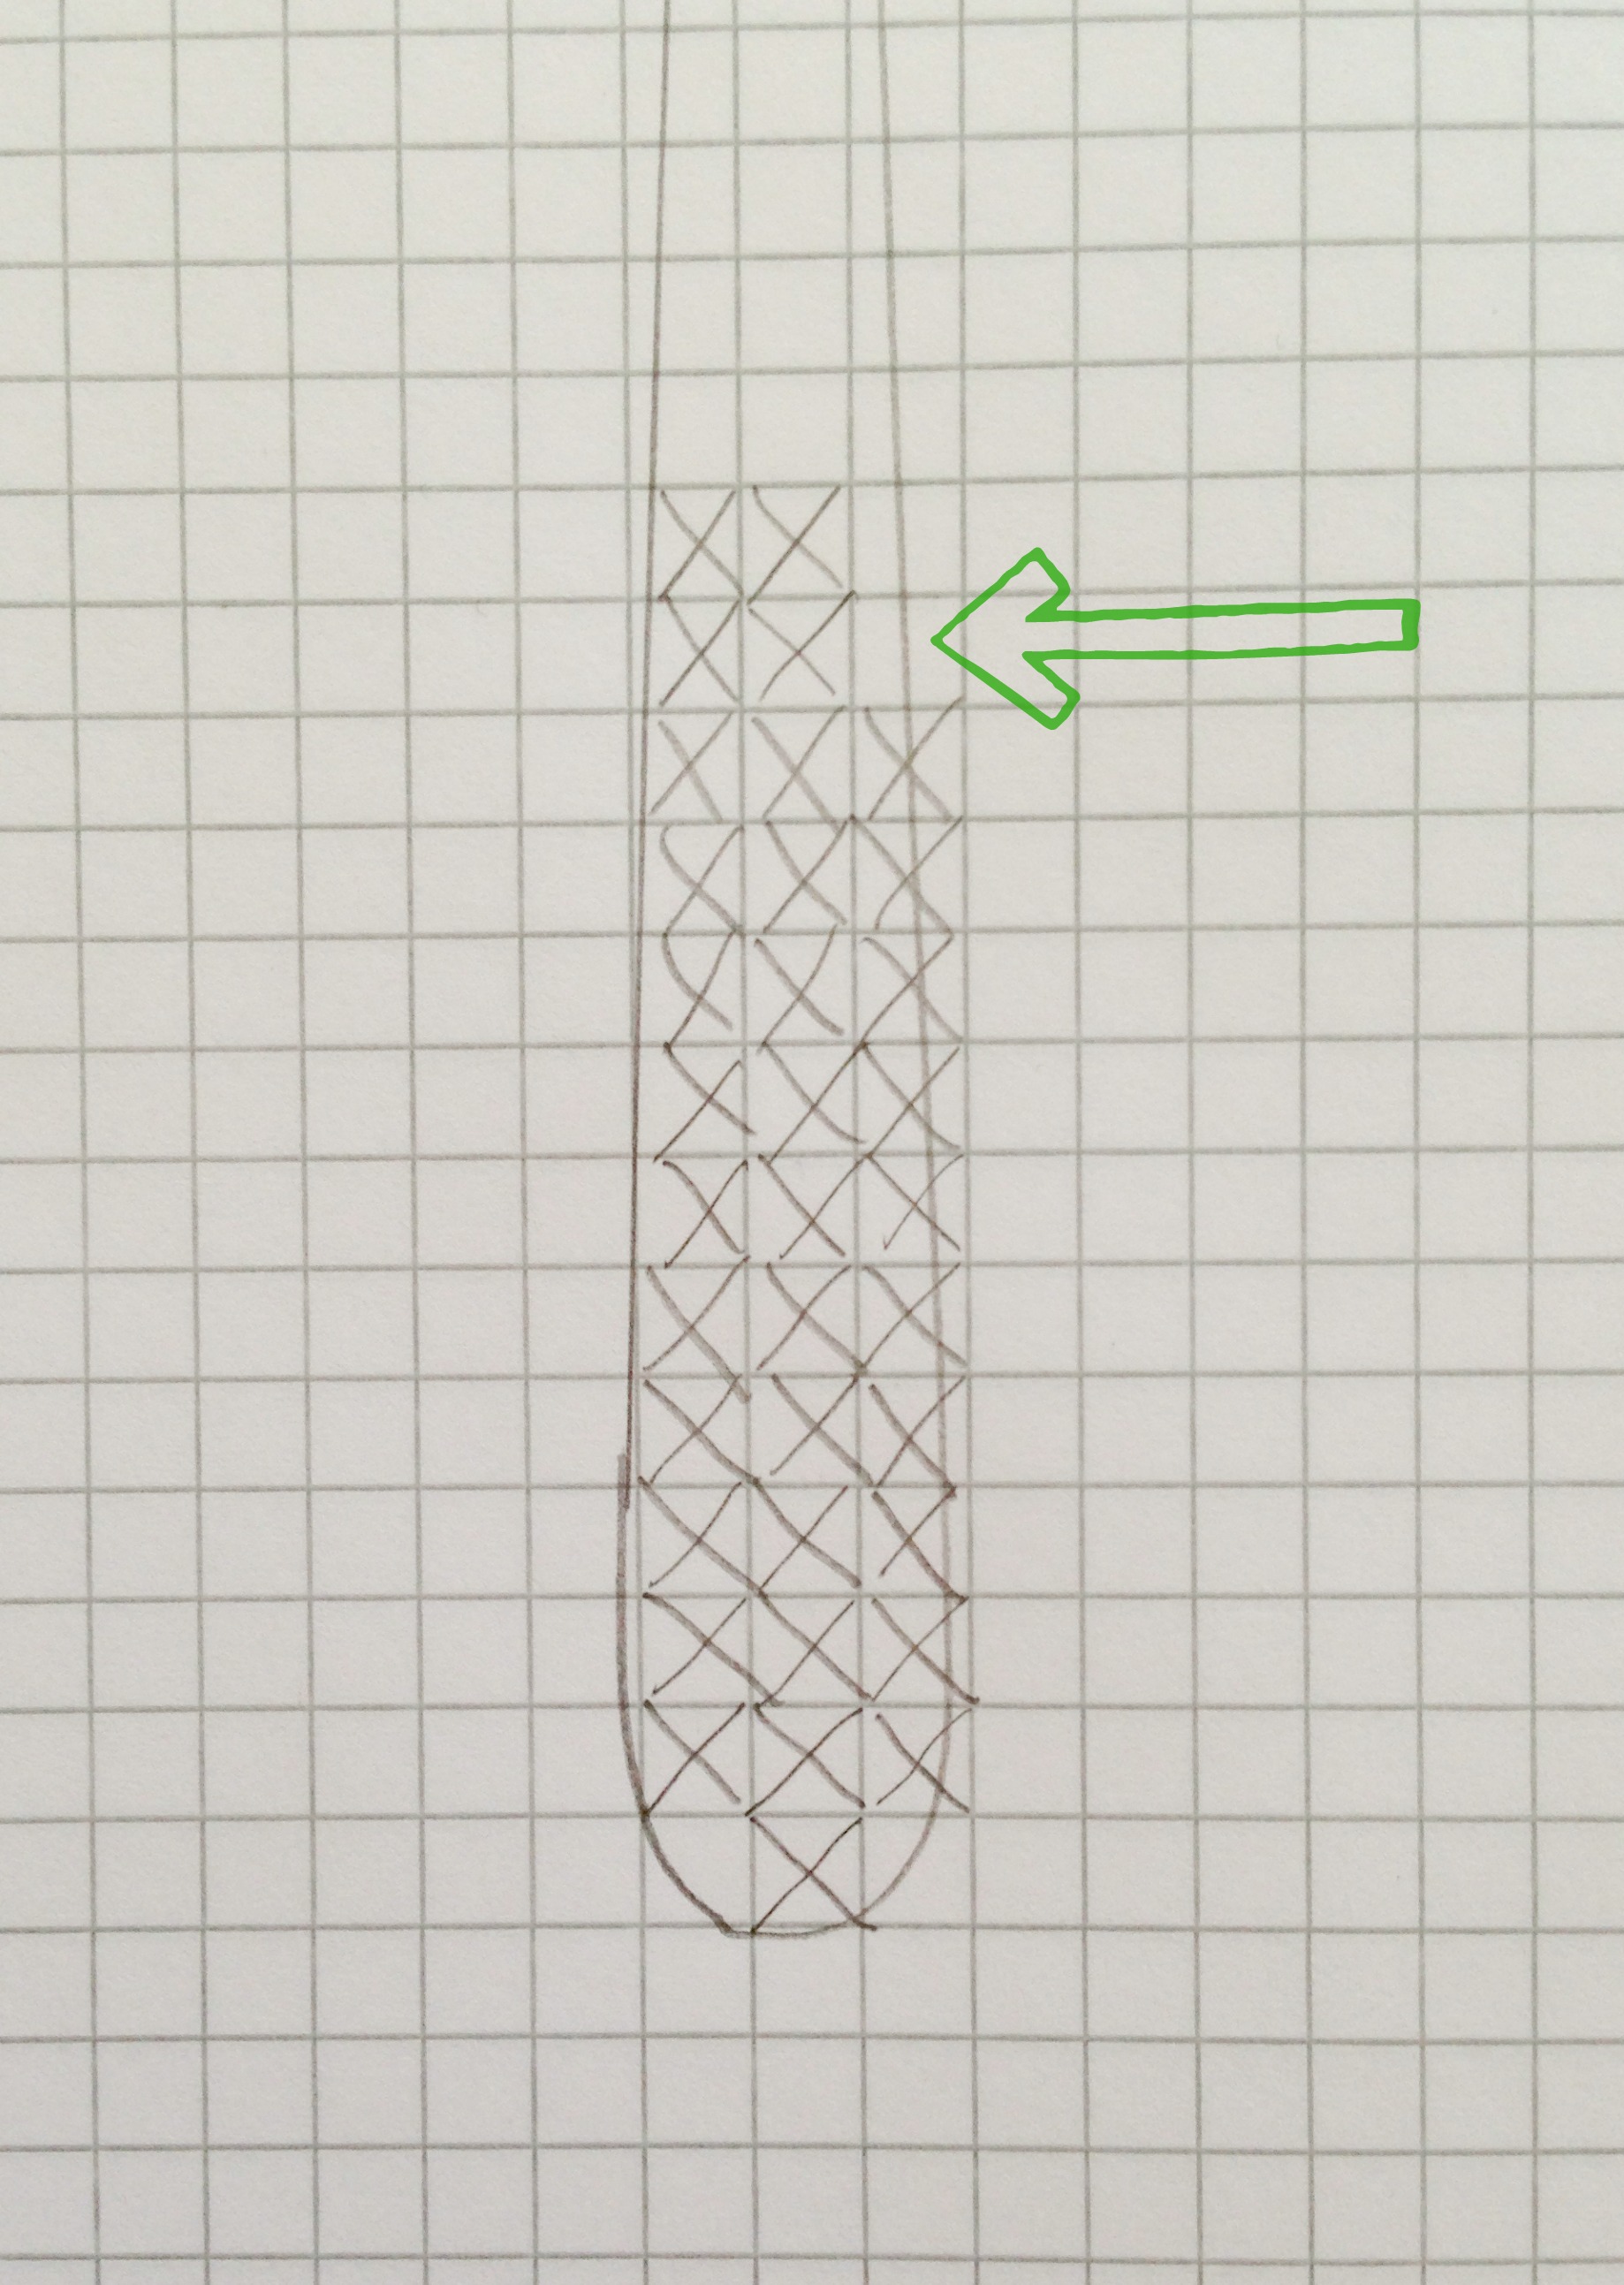
The overall effect is still a knife and that’s all that matters. Creative licence also turned my 4 prong fork into a 3 prong. I just had to forgo a prong in order for there to be unworked space between my prongs. It’s a small sacrifice to make.
Once you have filled in the squares with x’s, go over them with a pen so they are darker and you can see if you are happy with the shape created.
Cut out the shapes and place them on your placemat, moving them around and spacing them evenly. Use pins to indicate the top, bottom and any other points along the knife or fork that you want to be sure to get right. I placed pins where the prongs stopped and where the shape changed from xxx to xx. These are just guides to keep you on track.

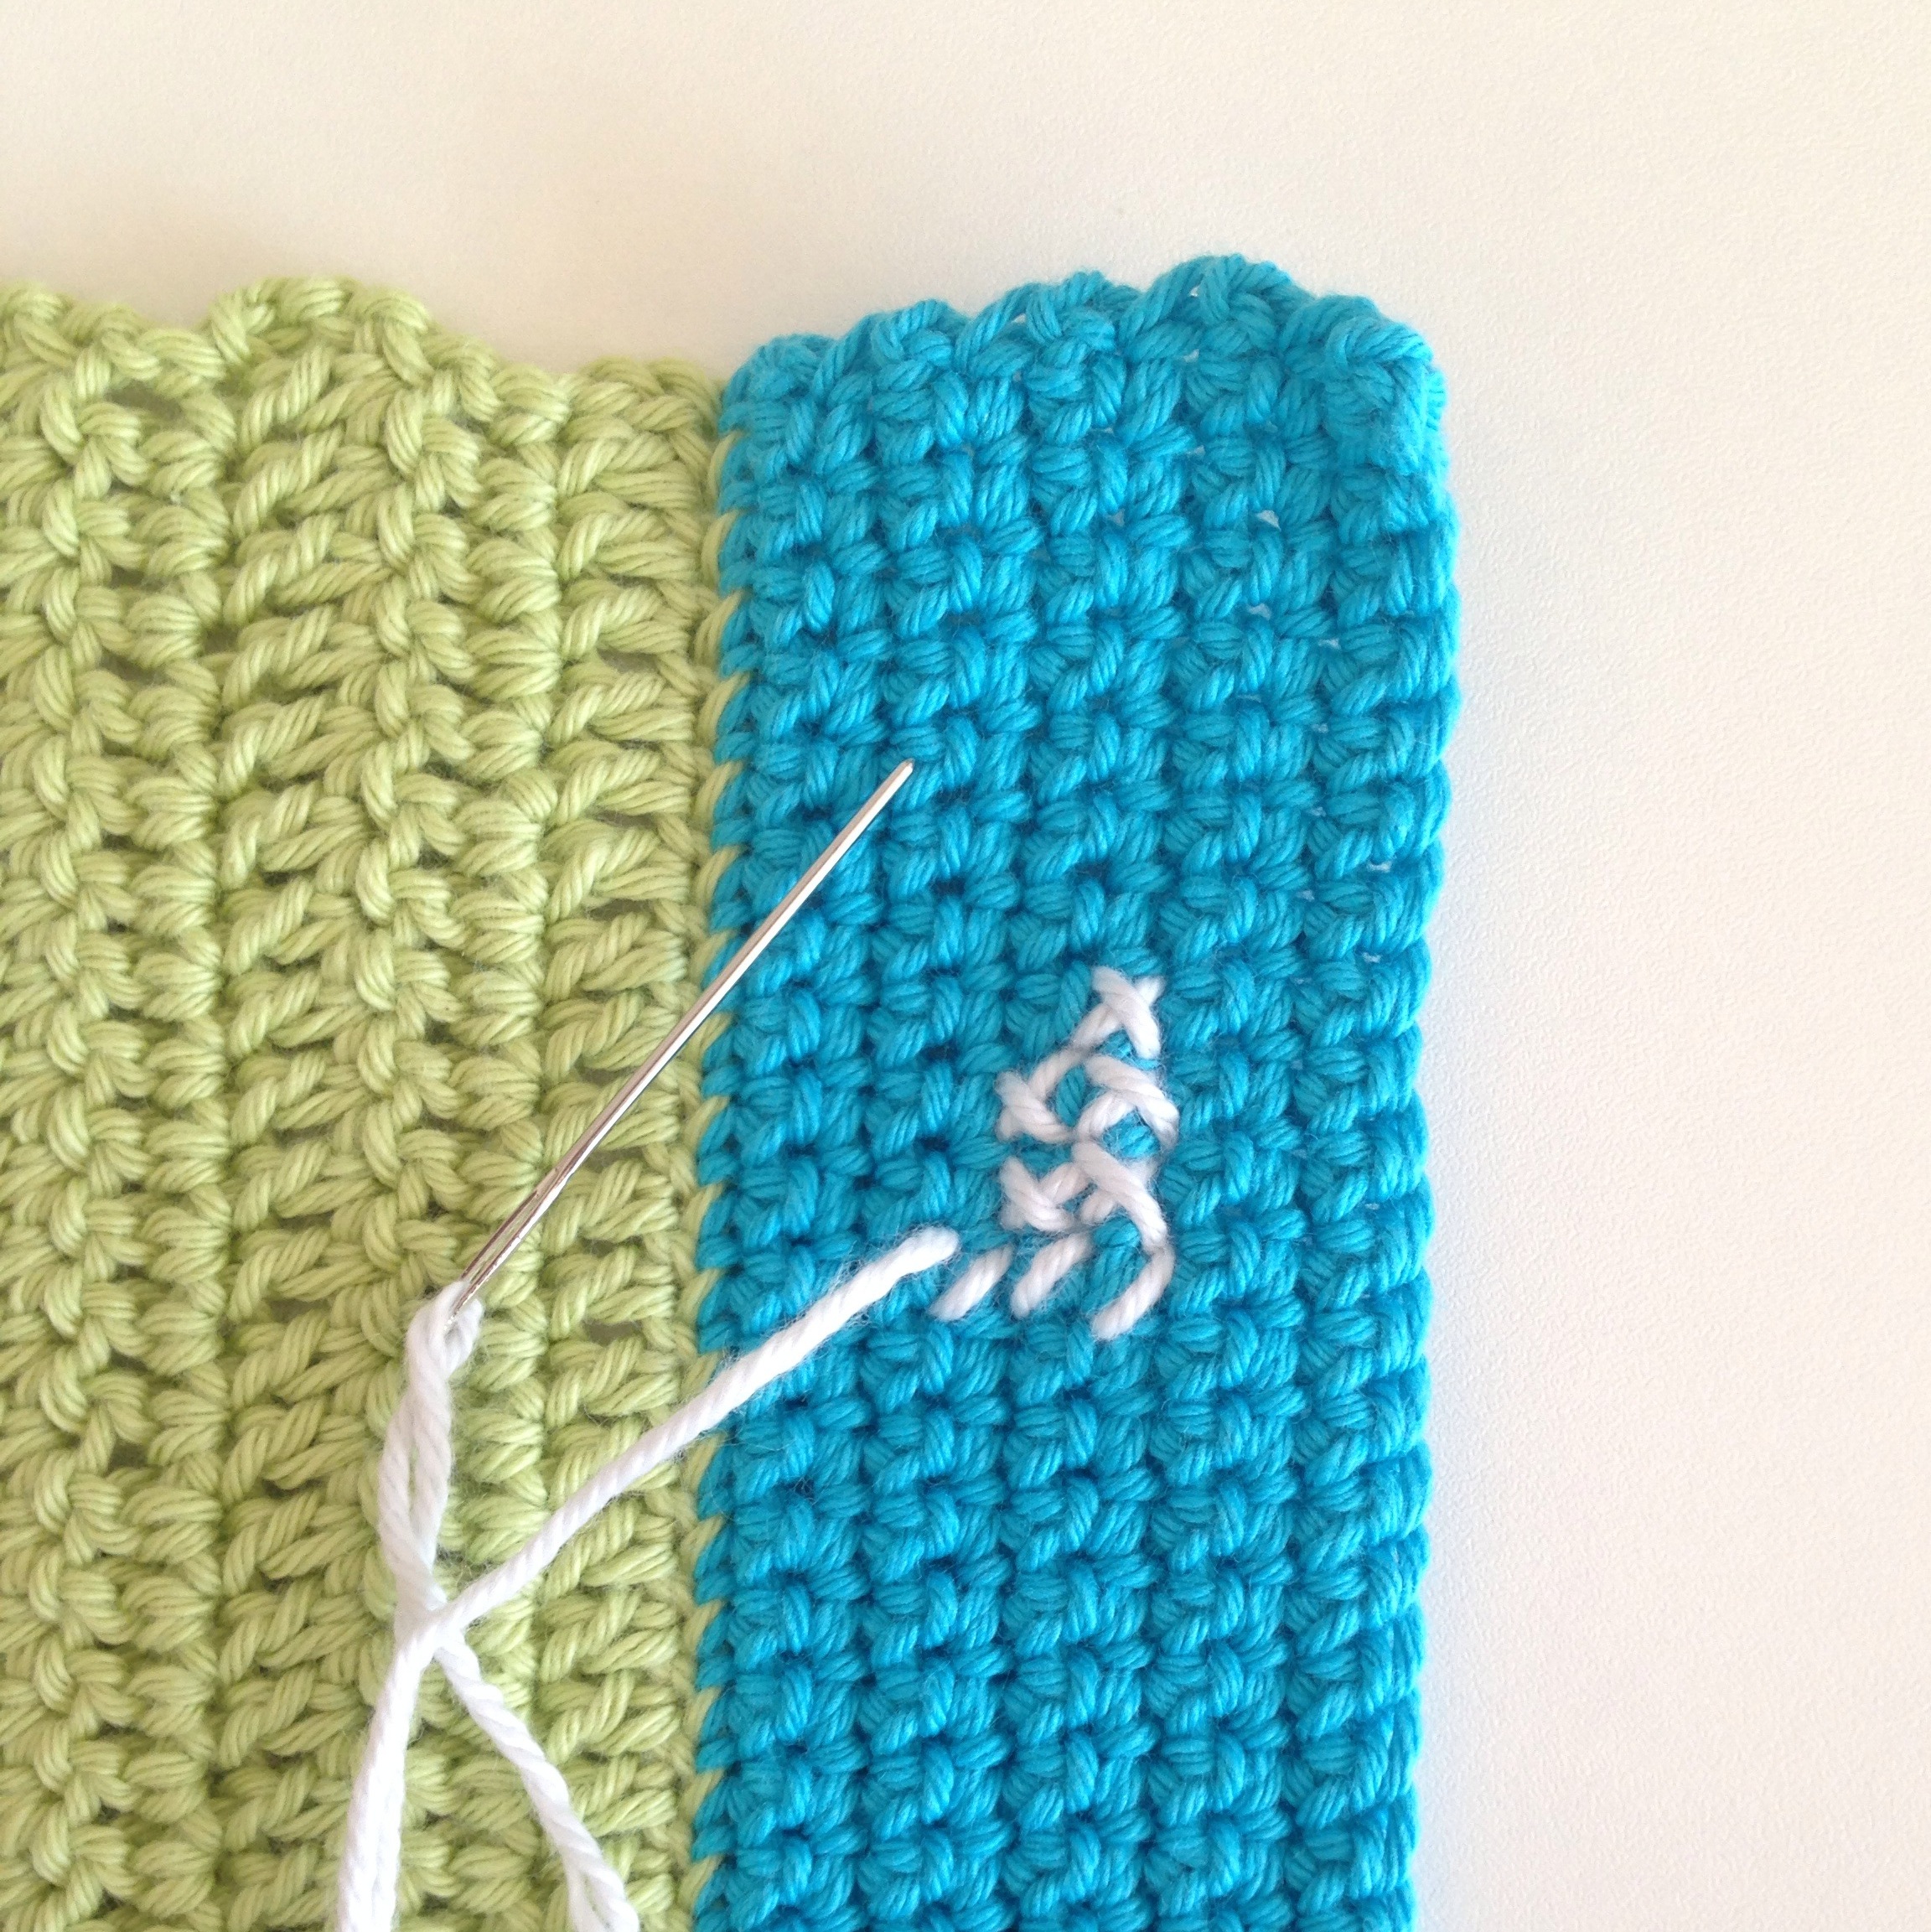
Now you’re ready to start cross stitching. You’ll soon get the hang of it and will almost naturally feel where the stitches have to go. The key to neat cross stitches is to keep the bottom stitches all slanting in the same direction, and the top ones in the opposite, but same, direction.

When you’ve finished your embroidery, crochet a border of double crochet stitches in the main colour all around your placemat to visually pull it all together. Make three double crochets in the corners. Weave away the (very few) tails you have left – remember Handy Tip 2? – and maybe block it again just be sure that the placemats are perfectly straight on the sides and pointy in the corners. That’s all there is to it. Easy, right?


Doesn’t it look great?! Now that you know that one square on quadrille paper equals one double crochet square in double knit yarn, you can draw – and therefore cross stitch – anything on your crochet! How about cross stitching the words “breakfast” “lunch” or “dinner”? Or personalising the placemat with the name of each of your family members?


 I will do all my photo tutorials as PDF documents. That way I don’t create huge blogposts, and the document can be printed. It will also include a (hand drawn!) crochet diagram. I think crochet diagrams are great. If you learn to crochet with a set of photos and then look at the diagram for what you’ve just crocheted, it should be easy to grasp how to crochet from diagrams. That’s how I learned, so I’m hoping it will work for others too.