• Home
  • About me
  • Contact me
  • Crochet How To Links
  • Photo Tutorials
  • Patterns I Designed
  • Crochet For Kidneys
    • Part 1
    • Part 2
    • Part 3
    • Part 4
    • Part 5

crochetime

~ So many patterns, so much yarn, so little time: story of my hooky life.

crochetime

Tag Archives: crochet

Granny Square In Bloom cushion

04 Sunday Aug 2013

Posted by Natasja in My crochet, My ramblings, Pattern, Ta-daah!

≈ 8 Comments

Tags

crochet, crochet cushion, crochet flower, free crochet pattern, granny square

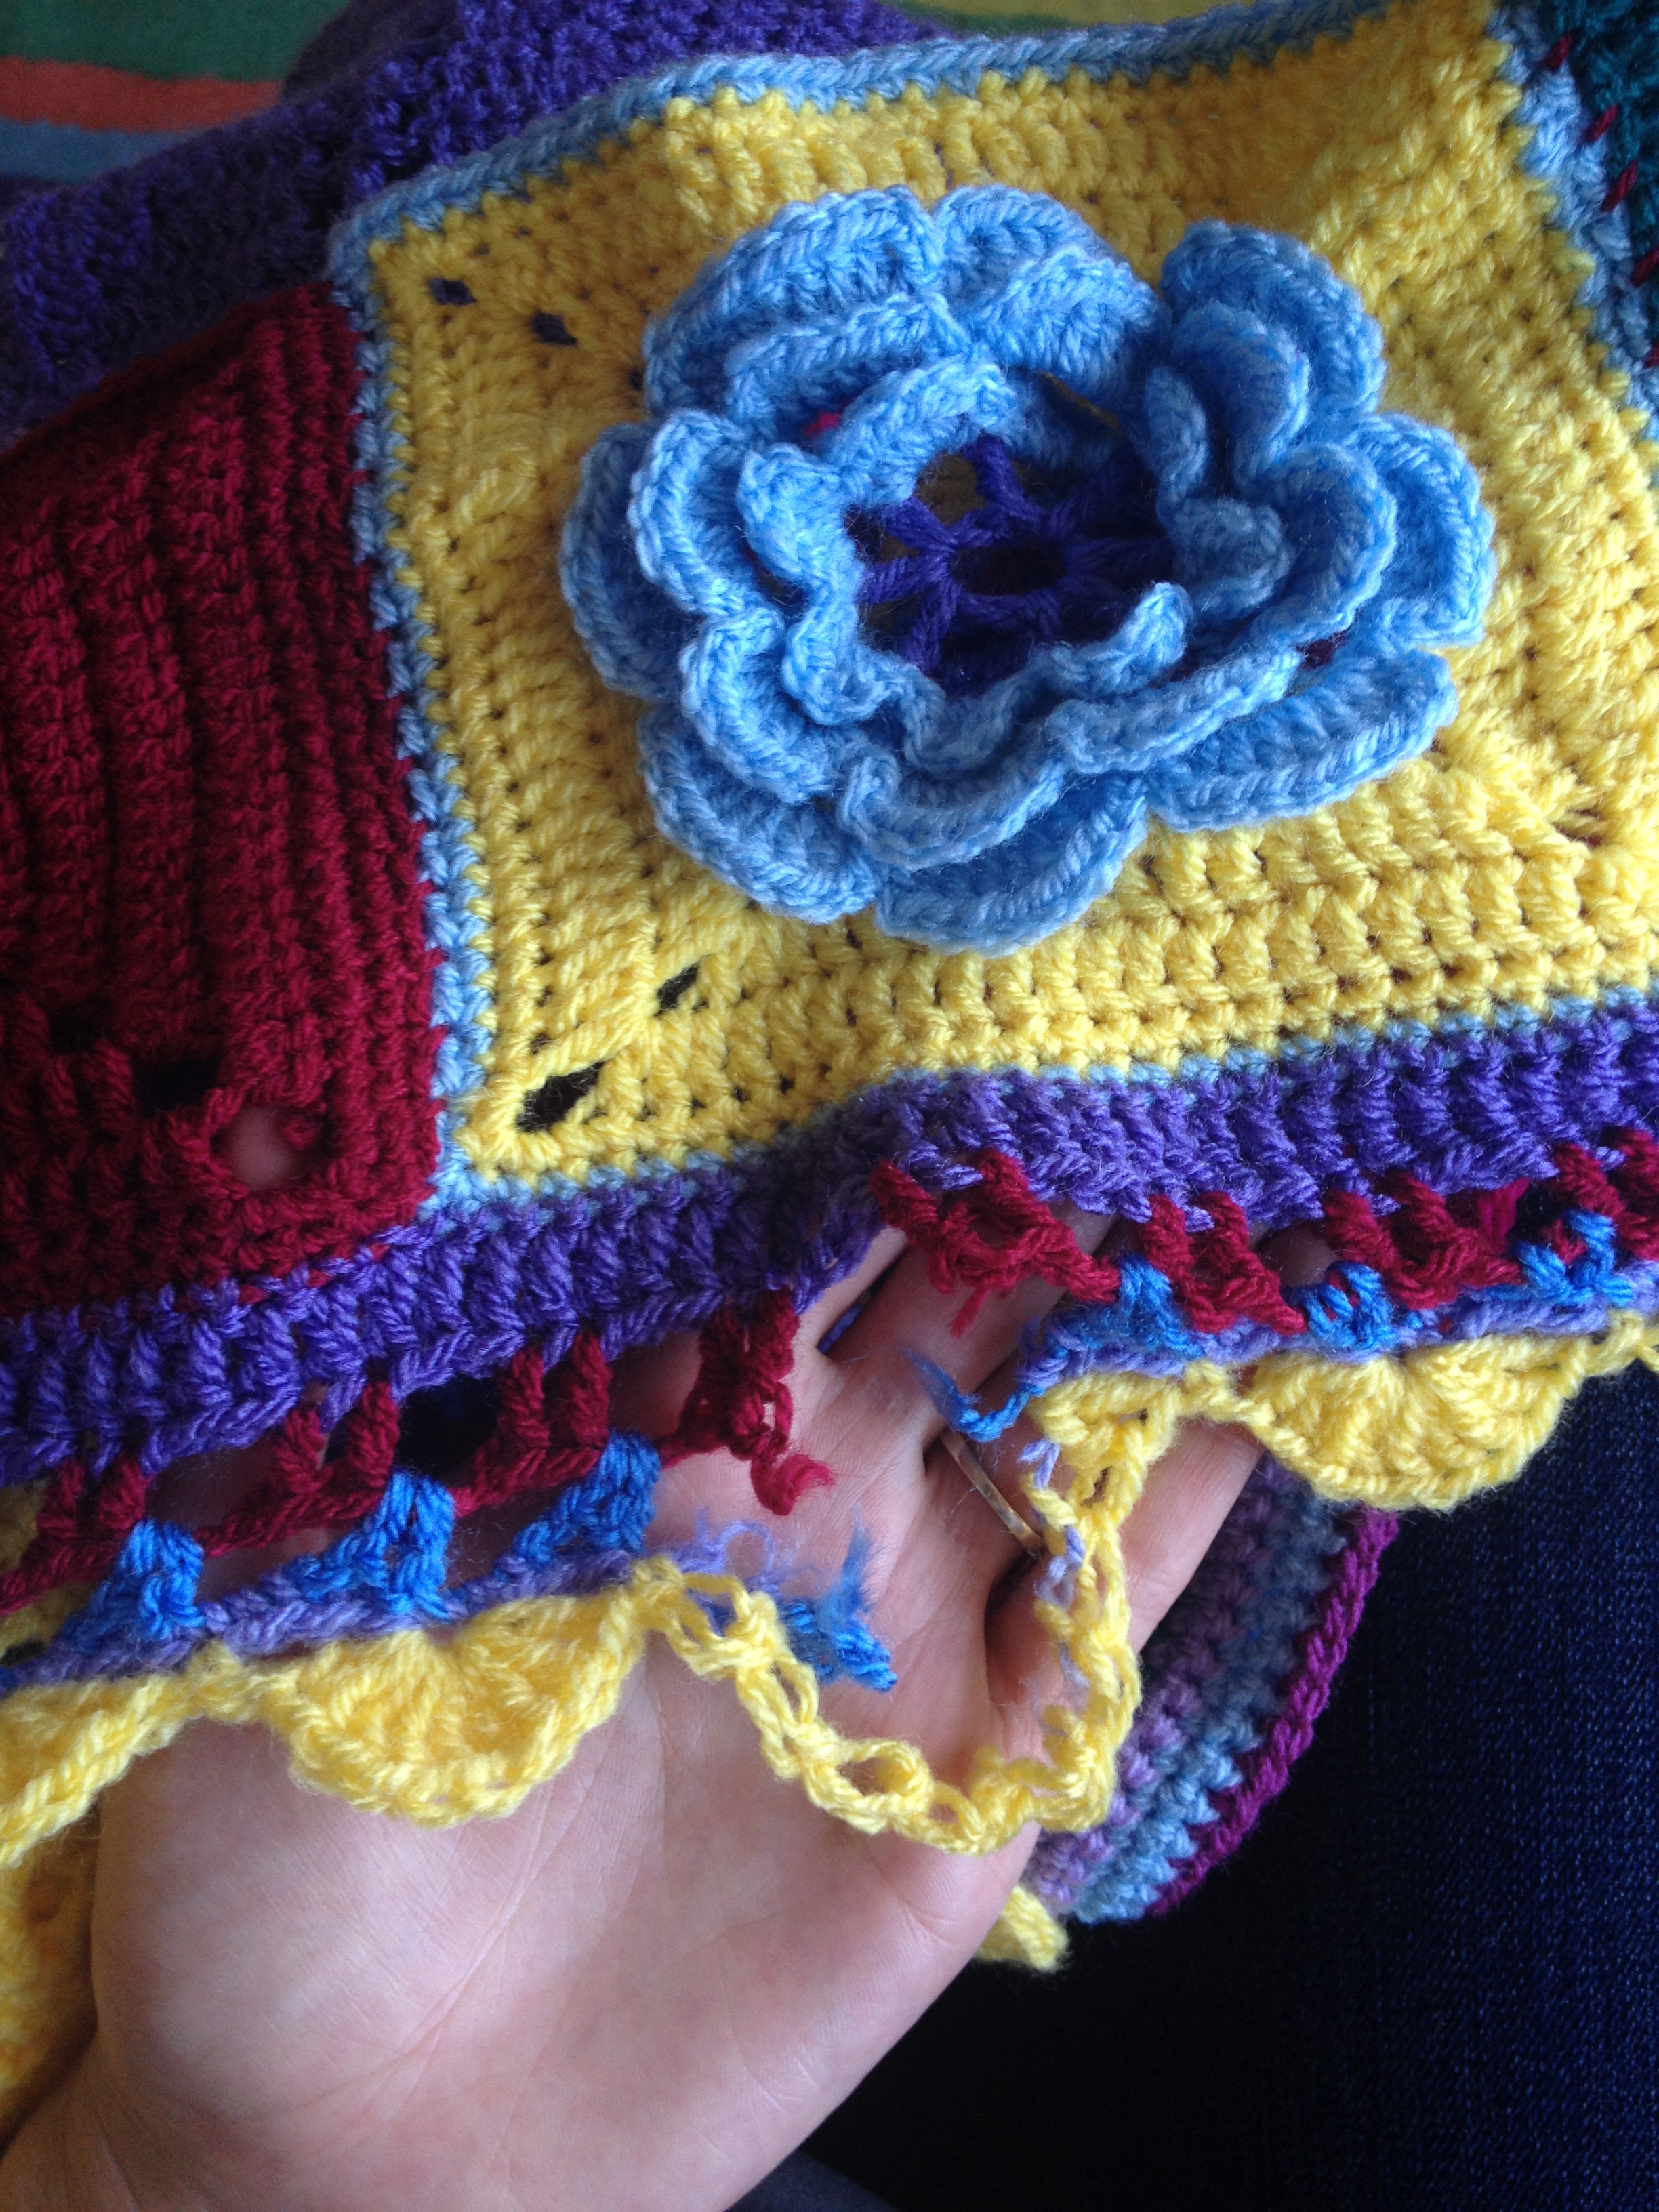
You know that square motif I’ve been telling you about that had me so excited? Well, here it is. It’s called Granny Square In Bloom.

Granny Square in Bloom cushion.jpg

crochet flower granny square in bloom.jpg

I used the squares to make a cushion for my very good friend Liezel, as a birthday present (you can see her photography blog here).

She reads this blog and follows me on Instragram so I couldn’t post regular photo updates. I gave her the cushion yesterday which means I can finally reveal it to my lovely blog readers. The cushion was a huge hit! I’m so glad that I could make her happy with something handmade.

Liezel went home and took these photos of the cushion in it’s new home.

Liezel_Fourie Instagram crochet cushion collage.jpg

As you can see, she has a bird theme for the cushions on her bed. I wanted to stick to her theme, so I used three Red Robbin buttons. Aren’t they cute?!

red robin button.jpg

Nitty-gritty of the cushion:

  • Yarn: Stylecraft Cotton Classique in White, Rowan Handknit cotton in Ice Water, Raspberry, Linen and China Rose.
  • Crochet hook: 3.5 mm
  • Pattern for the front: Eight traditional granny squares of 4 rounds each in white, finished off with a row of SC. (Each of the four colours were used for two squares.)  Plus the eight 3-dimensional flower squares which are my own design. I call it Granny Square in Bloom squares. The pattern is available for free on the Photo Tutorials tab, in this blog post and also on Ravelry. I didn’t add a row of SC on the flower squares.
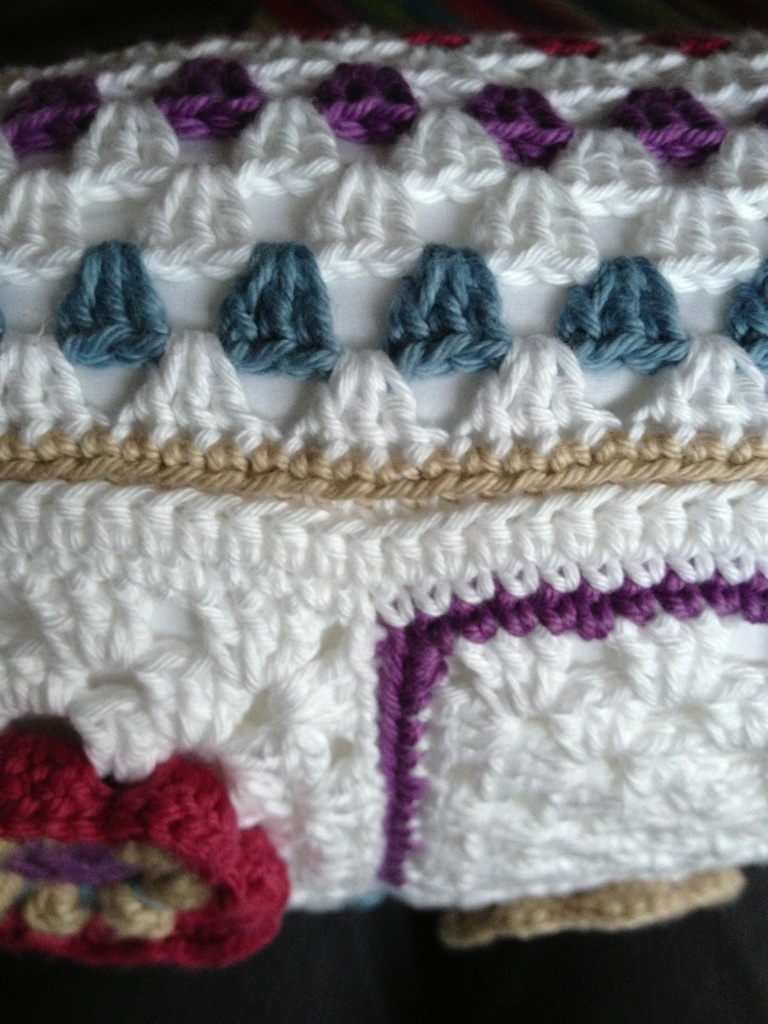
  • Pattern for the back: Traditional granny square of 19 rounds. Each colour round is seperated with two white rounds. I edged the granny square with SC in Linen.
  • Construction: The 16 squares which together forms the front, and the three side seams were sewed together with a slip stitch seam as described here on the Simply Crochet website. For the opening I slip stitch-joined up to the first shell on each side so that it would form neat corners.
  • Inner: Microfibre 16″ inner bought from Design-a-Cushions. Design-a-Cushions recommend purchasing an inner one inch bigger than your cover. I therefor made sure my covers were 15″ squared. Doing it this way gives you a perfect puffy cushion. I can highly recommend Design-a-Cushions. They are my favourite cushion inner supplier in the UK.
  • Red Robin Button: Natural Shell Zakka buttons that I bought on eBay from this seller.

crochet cushion seam.jpg

I thoroughly enjoyed designing the square, knowing that my friend will be the very first person to own something made in that design. Liezel, I hope you have the sweetest of dreams when you’re resting your pretty head on the cushion.

Lots of love

Jou maatjie, Natasja

Japanese V-neck ta-daaaah

29 Monday Jul 2013

Posted by Natasja in My crochet, Ta-daah!

≈ 24 Comments

Tags

crochet, Japanese crochet, wearable crochet

The V-neck top from a Japanese crochet pattern is finished! I’m wearing it today and I like it more and more with every hour that goes by. For it’s debut, I’m wearing it over a black vest, but I know it will look great over a longsleeved t-shirt as well.

Japanese crochet v-neck top

You probably notice the draping around the V of the neckline. Those folds are changing the whole time. It’s 14:30 now so I’ve been wearing the top for a couple of hours and it already looks softer. I used 100% cotton, so just like a denim jean, the longer I wear it and move around in it, the softer it becomes. This top is only going to get better!

I don’t always walk around like this, but I had to do it to show you the design more fully:

Japanese crochet v-neck top from back

I really, really, really, like my Japanese V-neck.  The only thing I don’t like, and feel I have to share with you in the spirit of full disclosure, is that the sleeves drop off my shoulders the moment I move my arms, and not in a sexy shoulder revealing way. Oh no. I completely lose a sleeve. Totally impractical, irritating and not pretty. My solution? Safety pins on each shoulder to pin the top to my vest.  As easy as that. (No way am I going to let hours of hard crocheting go to waste because of a minor wardrobe malfunction!)

Japanese crochet v-neck top

Nitty gritty of the V-neck:

  • Pattern: In Ravelry, the pattern is called #5 V-neck pullover. It’s designed by Eiko Matsumoto and published in Knit/Crochet With Ease – Seasonal Knits, also known as Easy Popular Knit and Crochet Wear. I bought the book on Etsy from Pomadour24. You can find the listing here.
  • Yarn: Patons 100% Cotton 4 Ply in Garnet, shade 1738. I used 4 and a quarter balls.
  • Crochet hook: 2.25mm
  • Modification: I made one modification: in stead of slipstitching the bottom 9 picots together to make the sides, I added another pattern repeat (but without the picots) to the bottom 12 picots on each side, thereby forming a very large armhole and widening the bottom of the top.  In the photo below you can see this modification. The side inserts don’t have picots on the bottom edge, and it also means that I don’t have a cute 3-picot grouping in the corners of my top because I used one of the three picots to kick off the rows of the side insert. No-one is going to notice the lack of picots in my sides, and it was more important to me to make the top fit around my hips, than sticking to the pattern.  A lot of ladies on Ravelry also had trouble with getting the top to fit around the hips. I could have added a third pattern repeat all around like they did, but that would have 1) made the top longer and 2) made the sleeves longer which would have added weight and pulled them down my shoulders even quicker than it does now. My solution was to do these side inserts – it fixed my problem, but without creating more problems.

Japanese crochet v-neck top side inserts

Wet blocking is highly recommended for this pattern. As with anything lacy it opens up the crochet stitches and gives the top shape. I can’t believe I’m saying this, or that I did it, but I pinned each picot seperately. There were hundreds! Looking at the top now, I’m very glad I did. Those picots on the arms and the bottom add the detail you need to round it all off.

Japanese crochet v-neck top

The Easy Popular Knit and Crochet Wear book is full of the most beautiful Japanese crochet patterns. This is my second top from the book. Out of the two, I like this one the most. I already have my eye on a waterfall cardigan. I’ll even use the same Patons 4 ply cotton yarn.

I think as a rule Japanese patterns are quite boxy and straight up-and-down. This means they are easy to make because they consist of repeating motifs or they’re basically just one big rectangle (like this one), so us ladies with a more womanly shape, need to make modifications. That, or just embrace the floaty, square shapes. Floaty tops can work well when paired with a tight-fitting top underneath and balanced out with a straight / slim leg trouser. (Oooh, check me out – giving fashion advice! Hahahaha.)

One last thought: I love this V-neck top, I loved being challenged by the crochet diagram, I loved using Patons cotton 4-ply and most of all, I love that wearing this V-neck top makes me feel unique and a tiny bit special.

Kleenex does crochet hexagons

11 Thursday Jul 2013

Posted by Natasja in My ramblings

≈ 7 Comments

Tags

crochet, hexagon

Kleenex crochet hexagons pocket pack.jpg

I know!!!!! Your reaction to this photo, was my reaction in Boots a few minutes ago.

I was in Boots to buy something for John, when I saw a 6-pack of the smaller “Collection” Kleenex pocket packs. Two of the six were wrapped in this crochet hexagon print. I nearly knocked over a woman in my attempt to quickly throw it in my basket (not that any of the Suits in Boots Fleet Street would put up a fight for a crochet covered pack of tissues, but I grabbed and ran anyway).

I’ts only £1.29 for the pack of six.  I’ll be using the other four – they have photos of a leaf and russian matryoshka dolls on them (I’m telling you this because I know you will be going to Boots to look for it) – but the two with the crochet hexagons will remain untouched. Obviously.

How to weave away yarn tail ends

19 Wednesday Jun 2013

Posted by Natasja in GIF, Photo Tutorial

≈ 1 Comment

Tags

crochet, granny square

The dreaded weaving away of tail ends. It’s a not a fun job, but has to be done right. Right?

I reckon if you have a yucky job to do, you may as well do it well so that you won’t have to do it again. Do it once, and do it right I say.

Below is a GIF (a series of photos in a loop) to show you how to weave away the tail ends in a way that they will stay stuck. The GIF may take a few seconds to jump to the next photo, so just give it time. It will loop back again to the first photo so you can watch the process again and again. For clarification, what you’re looking at is the back of a granny square.

Weaving in ends

The trick to keeping the tail neatly and tightly woven away is not so much the weaving action, but the change of direction. Try to change the direction of the weave as many times as you can. In a typical shell, like in the photos above, I manage to fit in three directional changes. I’ve never had a tail end come loose, so aim for at least three.

GIF Give your yarn tails a bit of love and they will stay hidden through the years of snuggling, stroking and cuddles.

How make a multicoloured, traditional granny square

17 Monday Jun 2013

Posted by Natasja in My crochet, Photo Tutorial

≈ 10 Comments

Tags

crochet, crochet instructions, granny square, photo tutorial

Last week I showed you how to make a single colour granny square. Today I’ll show you how to crochet a multicoloured, traditional granny square.

This is probably what you think of when you think “granny square”.  If you’ve seen granny square blankets on shows like The Big Bang Theory or the Roseanne show, this photo tutorial will show you how to make one in the same style. I’ve blogged about those famous granny square blankets here and here. If you want to make those blankets, just use black as your final round and be as bright as you like with the other rounds.

Multi colour granny square tutorial

As for the green bunny in the photo…. I just couldn’t resist. His fur matched the centre of my granny square so perfectly, he was just begging to be on the cover!

You can hop on over (see what I did there?) to the Photo Tutorials page here, or click on the photo above to download the pdf photo tutorial.

How to join a new colour and weave away the yarn tail at the same time

14 Friday Jun 2013

Posted by Natasja in My crochet, Photo Tutorial

≈ 3 Comments

Tags

crochet, crochet instructions, photo tutorial

The title of this blog post is quite a mouthful isn’t it? But if you’re a crocheter, I bet you anything you would have asked this question a few times.

To crochet is lovely, but to weave in tail ends not so much. If you’re making a granny square blanket for instance, you’ll have two tail ends per colour, per granny square to weave away. Most granny squares are at least 5 rounds, so that’s 10 ends per granny square! Weaving in those ends quickly adds up to One Massive Job. I know of quite a few crocheters who haven’t finished a project just because the weaving in of ends seem too daunting.

In this photo tutorial I show you how to work away a tail end, as you crochet. If you do this, you’ll only have one tail end (the one that you create when you finish off and cut the yarn) to weave away. That’s one half of The Weaving Away Job done!

As I say on the cover of the photo tutorial, I am demonstrating the technique with a granny square, but the technique can be used for joining a new colour in a row as well.

Join a new colour and work away tail end

The tutorial is available to view on the Photo Tutorials page here, and clicking on the photo above will take you there too.

Photo Tutorials

11 Tuesday Jun 2013

Posted by Natasja in My crochet, Photo Tutorial

≈ 16 Comments

Tags

crochet, crochet instructions, granny square, photo tutorial

I learned to crochet with the help of YouTube, yarn websites like Garnstudio & Lion Brand and crochet bloggers. These are free websites, or run by people like you and me who just want to share their knowledge and make other crocheter’s lives easier. I’ve learned so much, and taken away so much inspiration from others that I think it’s high time I start doing the same.

This blog is already my place where I share what I’ve done, but I don’t feel I’ve really taught anyone anything. Not in the way that I’ve been taught by bloggers who take the time to take step by step photos, or make detailed videos.

In light of this, and St. Francis of Assisi’s wise words: “For it is in giving that we receive” there is a new section on my blog called Photo Tutorials.

I’ve only made one tutorial so far: How To Make A Single Colour Granny Square. It’s not a ground breaking new design, but I had to start somewhere. 🙂 In time I will add more photo tutorials and eventually video tutorials as well.

Single colour granny square tutorial front pageI will do all my photo tutorials as PDF documents. That way I don’t create huge blogposts, and the document can be printed. It will also include a (hand drawn!) crochet diagram. I think crochet diagrams are great. If you learn to crochet with a set of photos and then look at the diagram for what you’ve just crocheted, it should be easy to grasp how to crochet from diagrams. That’s how I learned, so I’m hoping it will work for others too.

Please give me your feedback. If you think it’s okay and clear enough, I will use it as a template for all future photo tutorials.

You can find the link to my Photo Tutorials page here.

Rubiks Cube Park yarnbomb

10 Monday Jun 2013

Posted by Natasja in My ramblings, Yarnbombing

≈ 1 Comment

Tags

crochet, Rubiks Cube, Yarnbomb

If you want to get in on some yarnbombing action, why not crochet squares for Crochet Grenade‘s Rubiks Cube Park yarnbomb?

All the details are on the Facebook Event page here, or you can read it below. I copy & pasted it straight from the page:

“INTERNATIONAL YARNBOMB PROJECT: “RUBIKS CUBE PARK” DEADLINE FOR SQUARES: JULY 1ST. I will need 2,700 crocheted squares and ANYONE ANYWHERE can help by spreading the word, mailing in squares, coming to meet ups, or even installing. This yarn bomb installation will be on the weekend of Comic-Con San Diego. For those of you not familiar with Comic-Con, it is a four-day event held yearly in San Diego, CA celebrating comic books, science fiction/fantasy and film/television, pop culture, horror, animation, anim…e, manga, toys, collectible card games, video games, webcomics, and fantasy novels. It’s the ultimate geek event and this convention is the largest of its kind in the US with over 130,000 attendees. (http://www.comic-con.org/) In the park across the street from the convention center and the event, there are 60 cement cubes in Children’s Park. I will be joining all of your squares together to create Rubiks cubes.  The plan is to install it “guerrilla style” across the street from the convention center, in the middle of downtown San Diego. Each Rubiks Cube will be a different pattern to create a visually abstract appearance. To create these Rubiks cubes I will need 45 sqaures per cube. Although you do not need to use Red Heart yarn, I ask that you try to match as closely as possible to the colors listed. ANY BRAND of worsted acrylic yarn can be used as long as the colors match to keep it all cohesive. I would love for people to volunteer to make a cube!! I will attach a business card with “DONATED BY ___” on the cube(s) that you make. There are 45 squares to a cube and the pattern is very simple!

Link to color palette here.

YARN: RED HEART RED: Hot Red ID# 0390 (Super Saver) YELLOW: Bright Yellow ID# 0324 (Super Saver) ORANGE: Pumpkin ID# 0254 (Super Saver) GREEN: Paddy Green ID# 0368 (Super Saver) BLUE: Blue ID# 0886 (Super Saver) WHITE: White ID# 0311 (Super Saver)

For those not familiar with crochet or reading crochet patterns, I created a video explaining how to make the square needed for this project. http://www.youtube.com/watch?gl=US&hl=en&client=mv-google&v=wXnK3V2zSzA&nomobile=1

CROCHET SQUARE PATTERN Hook: I

Form a magic ring OR ch 6 and join with SL ST

Round 1: Ch 3, *3 DC in ring, TR in ring, * repeat from * three more times, join with SL ST to the top of Ch 3

Round 2: Ch 3, * DC in each DC to TR, ( 2 DC, TR, 2 DC) in TR. Repeat from * three more times, join with SL ST to top of Ch 3

Repeat Rnd 2 until square reaches 7.5 inches (6 rounds) Finish off.  Weaving ends optional.

SQUARES CAN BE MAILED TO: Crochet Grenade PO BOX 17188 San Diego CA 92177-7188. I will post pictures of submissions to the event page so that everyone gets credit for what they send.

List of all submissions sent by participants: https://docs.google.com/spreadsheet/ccc?key=0ApDRRWFRF1SndHl5SXpod2E3VnQwaTd5czhlaFlTZXc#gid=0

The following link is to see the squares that are still needed. https://docs.google.com/spreadsheet/ccc?key=0ApDRRWFRF1SndDBfT0xmTnVsVkdTV0RMUVljQjVpOVE#gid=0”

I am making nine white squares for this great yarnbomb, thereby covering one side of one rubiks cube. I thought I’d do white as that’s the safest colour if you don’t have access to Red Heart Super Saver yarn. Did you see how many squares are needed? Two Thousand Seven Hundred!!!  This is a huge project, so if you have a minute to spare please do get involved.

International Yarn Bombing Day 2013

09 Sunday Jun 2013

Posted by Natasja in My crochet, Yarnbombing

≈ 9 Comments

Tags

crochet, IYB2013, Thames Ditton, Yarnbomb

8 June 2013 is International Yarn Bombing Day. Were you aware? I wasn’t, until I read Christelle’s blogpost on Wednesday. Wednesday! IYBD is on Saturday! What to do? Well for one thing, I couldn’t in good conscious let the day go by without yarnbombing something. It’s the one day in the year when I’m not the only weird one for attaching yarny things to railings and benches!

Something had to be done.

Same as my last minute Genoa yarnbombing of Intrecci Urbani, I got out the squares from Rachel’s Crochet Along. I had 11 completed crochet squares, left over Stylecraft DK and a yarnbombing deadline. It was an easy decision to make.

My plan was to use the squares to add to my bench yarnbombing in Summer Road because it seems to be a hit with the local Thames Ditton residence. No-one has tried to remove the crochet or damage it. In fact, people play and interact with it! I think of it as a yarnbomber-friendly-zone*. The railing behind the bench has been calling my name for quite a while now. Just as a living room looks best with something on the wall behind the couch, so my crocheter mind thinks the railing behind the bench could do with a little yarn loving…

Behold, my contribution to International Yarnbombing Day 2013:

Thames Ditton yarnbomb

As you can see, I joined up the squares (all crocheted from patterns in 200 Crochet Blocks by Jan Eaton), and added an edging to the bottom.

The edging pattern is as follows:

Row 1: SC in purple

Row 2: DC in purple

Row 3: *2DC, 2 chain* repeat in deep red

Row 4: *2 chain, 2DC* repeat in bright blue

Row 5: SC in lavender

Row 6: *SC, skip 3 stitches, 9 DC in same stitch* repeat in yellow

John and I put up the yarnbomb on Friday evening so that the Thames Ditton residents would wake up with a yarny suprise on the morning of International Yarn Bombing Day 2013.

Here is a video of me putting up the yarnbomb.

*Unfortunately this video and blog post is the only evidence of my yarnbomb. When I returned to the park on Saturday afternoon, someone had already, probably during the course of Friday night, tried to remove it. Out of the more than 20 cable ties I used, only five remained. Not only did they try to remove it, but they damaged the border in the process.

IMG_1839

My contribution to International Yarn Bombing Day 2013 was visible for less than 24 hours, but I did take part and I have a video to remind me. I was really heart broken when I had to take down my crochet work, but I guess it’s just the risk you take with these kind of things.

Terrific Tuesday

04 Tuesday Jun 2013

Posted by Natasja in My crochet, Ta-daah!, Terrific Tuesdays

≈ 5 Comments

Tags

crochet, crochet thread, Japanese crochet

On a Monday I can still remember the fun I had over the weekend, Wednesday is the middle of the work week, on Thursday I start getting hopeful and on a Friday I can taste the weekend. But what about a Tuesday? It’s so…. just there. Weekend memories are too far away and the upcoming weekend might as well be a year away.

What we need is a bit of colourful inspiration to get us going on a Tuesday, don’t you think? A pretty picture, beautiful scenery or colourful imagery. Yup, that’ll liven up Tuesdays and turn it into a terrific day!

From now on I will go through my photos and Pinterest likes every Tuesday and find us a pretty picture to add colour and joy to the day.

xxxxxx

crochet coaster

crochet coast

Today we have two pictures. Lucky us!

What you see here is a crochet coaster that I made as an extra little something for the South African lady that commissioned the lace crochet basket. The basket looked so sad and lonely, and she is such a lovely lady, I just had to make her something extra.

Nitty gritty of the coaster:

  • Pattern: Round Coaster by Sachiyo Fukao from Kuuto! Japanese Crafts Lacy Crochet (the lace basket is from the same book)
  • Hook: 1.5 mm
  • Yarn: Coats Aida 10 in light grey to match the basket and DMC Coton Perlé  8 in shade 932 for the blue edging
  • Time spent: 30 minutes

I’m really starting to enjoy working with crochet thread and a teeny tiny crochet hook. I think it’s because I know this is how my great grandmother, who passed away when I was a little girl, crocheted. Whenever I use crochet thread I always think of her and imagine what life was like the last time she used Coats Aida thread. I distinctly remember the towers of Coats Aida thread in her room. My grandmother always had to buy it for her from OK Bazaars (the, then, John Lewis of South Africa.) I can’t remember Aggie ever using bright colours, but I was certainly drawn to the bright balls on the shelves of OK Bazaars. (Not much has changed then.) What she did have was an amazing tin of brightly coloured buttons which I adored. Now I keep my buttons in a glass jar and just like when I was a little girl, I can play with and admire then for hours.

I may use an iPhone to take photos of my crochet, use the internet to tell hundreds of crocheting strangers about what I do, buy my crochet thread online and use a Japanese pattern, but the basics of that which binds Aggie and I are the same. I have a bond with Aggie through crochet, and I love it.

← Older posts
Newer posts →

Enter your email address to follow this blog and receive notifications of new posts by email.

Join 2,406 other subscribers
Follow crochetime on WordPress.com

Follow on Bloglovin’

Social

  • View NatasjaKing’s profile on Instagram
  • View Natasja King’s profile on Pinterest

The eBook I wrote

Recent Posts

  • Edward’s Crochet Imaginarium and two pink monsters
  • Review of How To Crochet book by Mollie Makes
  • Buttercup knit and crochet cardigan
  • Kimono Cardigan
  • The Sky is the limit

Categories

As seen on TV Book reviews CAL Camping Crochet For Kidneys Etsy Etsy seller interviews Folksy GIF In the press Knitting Markets My book My crochet My knitting My ramblings Other people's crochet Part 1 Part 2 Part 3 Part 4 Pattern Photo Tutorial Positive Thinking Ta-daah! Terrific Tuesdays Video Watch me crochet Wednesdays Yarnbombing

Instagram

No Instagram images were found.

My designer profile

Create a free website or blog at WordPress.com.

Privacy & Cookies: This site uses cookies. By continuing to use this website, you agree to their use.
To find out more, including how to control cookies, see here: Cookie Policy
  • Subscribe Subscribed
    • crochetime
    • Join 718 other subscribers
    • Already have a WordPress.com account? Log in now.
    • crochetime
    • Subscribe Subscribed
    • Sign up
    • Log in
    • Report this content
    • View site in Reader
    • Manage subscriptions
    • Collapse this bar
 

Loading Comments...